Color toning is an essential tool in photo editing that lets you add a unique mood or style to your images. If you’ve been using Lightroom, you might be surprised to find that the same color grading tools are also available in Photoshop. Mastering these tools will help you bring your images to life in new ways, adding depth, warmth, or coolness where needed.
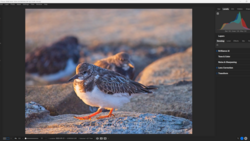
Coming to you from Aaron Nace with Phlearn, this insightful video walks you through the process of color toning in Photoshop using Adobe Camera Raw. Nace starts by explaining the benefits of using smart objects, which allow you to make non-destructive edits. This is a simple but critical step for anyone wanting the flexibility to adjust or undo changes later. Nace then shows how the Camera Raw filter replicates many of the tools familiar to Lightroom users. It’s all about using midtones, shadows, and highlights to manipulate the overall tone of an image.
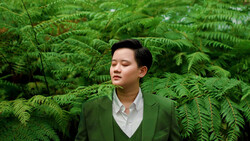
Nace's approach to color toning is hands-on and practical. You’ll see how he drags the sliders to experiment with different hues and saturations until the image feels just right. He shows how each section of the image—shadows, midtones, and highlights—can be independently adjusted to create a specific mood. This is especially helpful for keeping certain elements, like skin tones, natural while experimenting with more dramatic changes in other areas. This step-by-step method gives you control over every detail, from subtle shifts in color to more dramatic changes.
The video emphasizes experimentation. Nace encourages you to try different color combinations, highlighting that there’s no “right” answer when it comes to color grading. This flexibility allows you to craft a look that fits your vision. One notable feature Nace covers is how to balance and blend your color adjustments, so you can make your highlights pop or dial down the shadows. This level of control ensures your final image doesn’t look over-processed.
For those who frequently edit multiple images, Nace also explains how to save presets, a feature that can save you tons of time on future projects. By creating and applying presets, you can keep your edits consistent across different shoots, speeding up your workflow while still maintaining a professional touch. Check out the video above for the full rundown from Nace.

Join the Fstoppers community for free
-
Post comments and join in the discussions
-
Browse the site ad-free
-
Share your work and get featured in the community
-
Compete in the photo contests for fun and prizes
No comments yet