Looking for a way to take your editing to the next level? Range masks not only save a trip into Photoshop, they also simplify an extremely powerful tool that will improve your editing, no matter what genre you shoot.
Something many photographers find themselves doing as they advance their skills in editing is having to take their photos into Photoshop to luminosity-mask their scenes to get more refined control when blending or editing their photos. Not only is this time-consuming, it can also be a bit too complicated for many of those out there just getting their feet wet in editing. Thankfully, Lightroom added a feature a few years ago that can replicate this process with very successful results when used properly.
In this video and article, I'll use a few examples to go over what range masks are and ways to use both color and luminance values to bring photos to life that otherwise might never see the light of day. These techniques can be applied to all types of photography, but as a landscape photographer, I will be using landscapes as examples. With that said, let's get started!
What Are Range Masks?
If you have ever used a radial filter, graduated filter, or the adjustment brush (I'll refer to these tools as local adjustments throughout the article) then you might have noticed a range mask selection at the bottom of the tool. Each of these local adjustments accomplishes basically the same things using different methods by applying local adjustments such as exposure, clarity, and saturation. If you haven't used these tools before, definitely check out one of my recent articles on radial filters to get a better understanding of how they work.

Assuming you know what these local adjustments do, all range masks do is help provide even more control to an area you are adjusting by telling Lightroom you either want to control a specific luminance value or a specific color range. If you're still a bit confused, it will make a lot more sense with an example, so let's use one! Also, if you want a somewhat scientific look into how this works, takes a look at an article Andy Day did earlier this year on luminance masks.
Luminance Range Masks
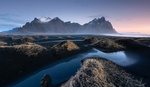
One of the biggest challenges in landscape photography is trying to blend the darkest and brightest parts of an image while keeping the image as natural as possible. This can be very difficult in many situations because scenes typically have skies that are far too bright in contrast to their shadowy foregrounds. One way to combat this is to take multiple exposures in the field and then blend them together later or turn them into an HDR image giving you a much higher dynamic range to control when editing. While that can certainly improve your final image, many times, we have all the information we need in one image, yet trying to edit properly can be the biggest challenge, and this is where luminance masking can make a huge difference.

We'll use this image as an example, and if you'd like to know how I took this image or my thoughts regarding it, feel free to check out this video taking it in the field. This is an image I created by blending two exposures together to give myself more latitude to edit with. However, even after blending the two images together, I'm still not happy with the sky in the image. Notice how the sky from right to left goes from bright to dark, because that's where the sun is, but the gradient is exacerbated because I was using a polarizer, causing a dark effect on the left side of the image. We are going to fix that using local adjustments and range masks!

Adding a graduated filter
First, we'll create a graduated filter and decrease our exposure and highlights. Notice how our sky has more detail, but we have darkened our foreground on the right side far too much, making the image look unnatural. This is where the magic happens.
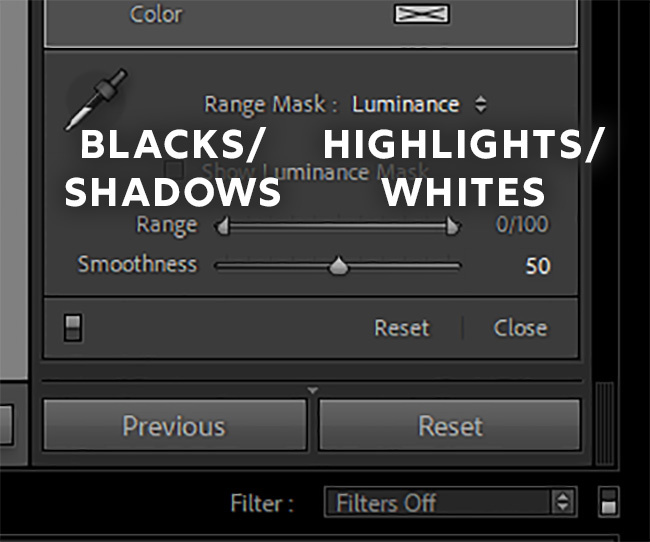
Left Selector: Blacks/Shadow, Right Selector: Highlights/Whites
At the bottom of your local adjustment, you'll see the range mask drop-down; select Luminance. A bar will show up that has a scale of 0/100. The left adjustment represents your blacks/shadows, and the right adjustment represents your highlights/whites. Basically, as you move either of these sliders towards the other, you'll decrease your selection range. For example, if you move the left slider, you will start to cut out the shadow areas of your local adjustment, which is exactly what we'll be doing for our photo, because we only want to affect the brightest parts of our adjustment.

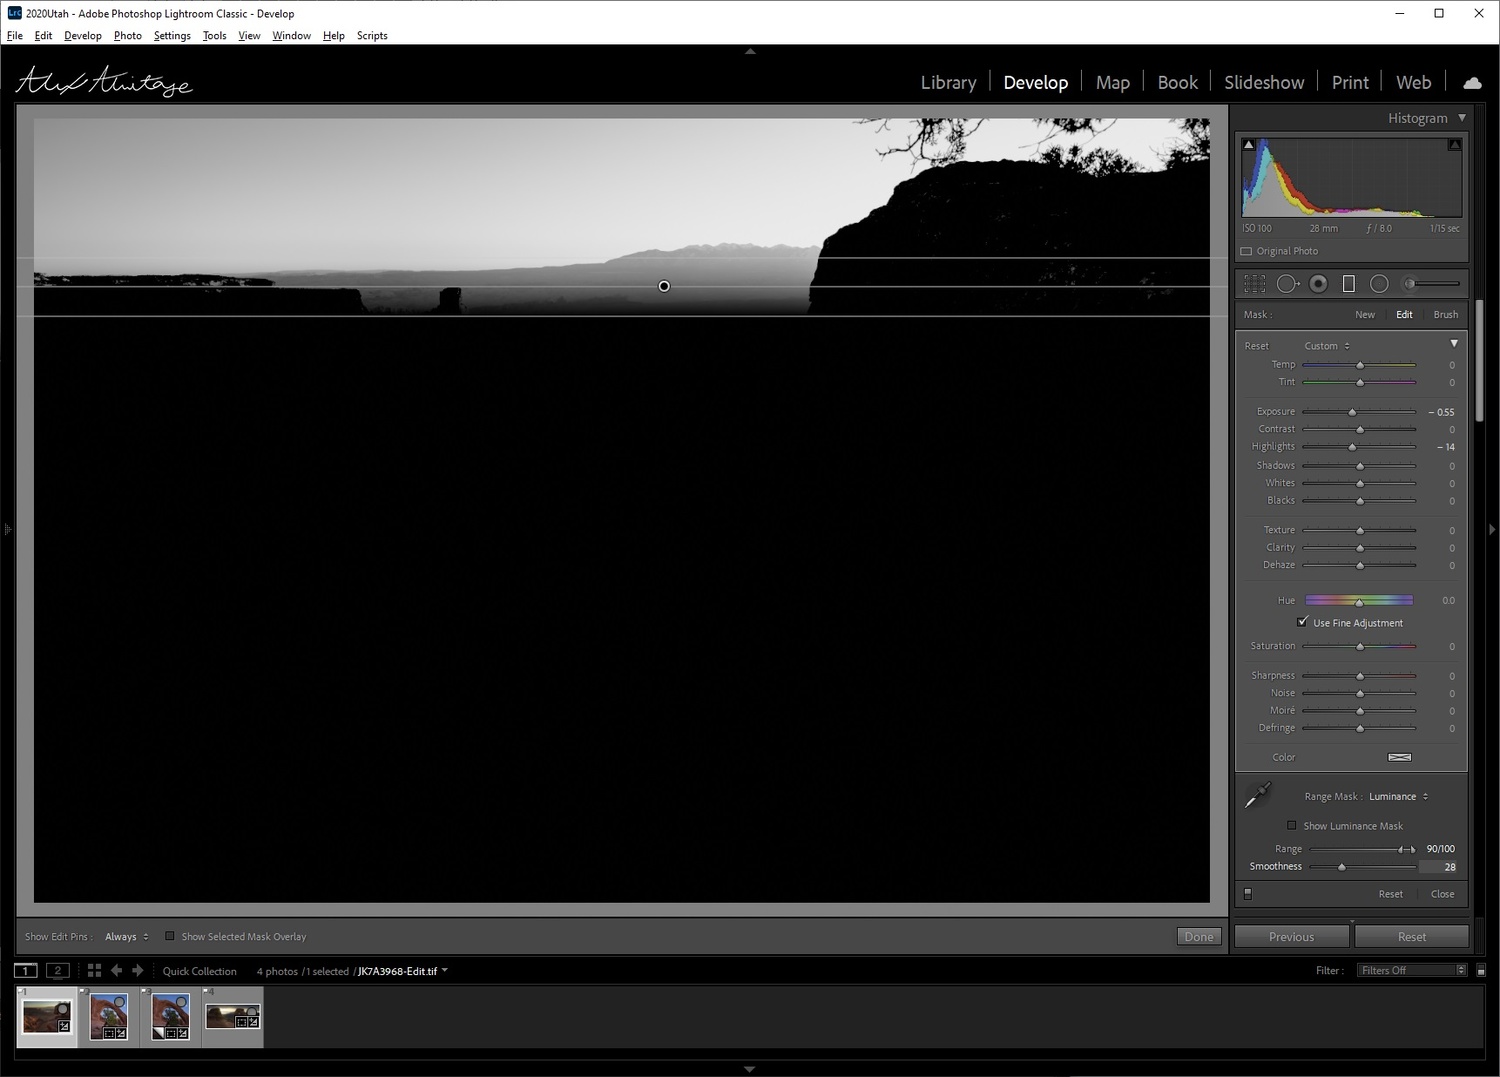
Adding a Luminance Range Mask
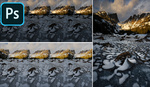
There are multiple ways to do this. You can select the dropper tool and select the luminance value you want to target. You can check the "Show Luminance Mask" box and start changing your values. Finally, and this is how I personally choose to do it, you can hold alt (option on mac) while sliding either bar to precisely choose your mask. Notice in the image above that anything in white is what is being affected and anything in black is not being affected. You'll notice too many of the rocks are still white, but we can fix that using the smoothness slider.
Adjusting Luminance Smoothness
Again by holding alt (option on mac) and moving the slider I can adjust to exactly what I want, completely darkening the rock while keeping the sky selected (white). Also, notice there is a slight gradient in our sky selection now as well, which is perfect because we want to darken the right side of the sky a bit more than the left side to even it out.

First results but we are not done yet
Here are our results! We are not done yet, though. Our sky is still suffering from the polarization I was using, making the left side appear too dark. We can fix this by adding another graduated filter and a radial filter using luminance masks.
Adding a second graduated filter
Here, I've added a second graduated filter and selected a range to target that dark corner while not changing the rest of the sky too much and making sure the transition right to left looks natural.

Adding a radial filter
The last step is to add a small radial filter to target the dark area in the corner. This doesn't require a luminance mask, but it helps make the blend look a bit more natural. You'll also notice I'm zoomed out for this. I like to zoom out and look at my image quite small to be able to see if it's obvious how I changed the sky, looking for halos or gradients that don't look smooth.


Here is our before and after! Typically, I still want the sky to resemble natural light, meaning the right side in this image should be a little bit brighter than the left side in a subtle way. Overall, I think the results here might be a bit too heavy, and I might want to tone down my adjustments just a little bit. Still, when I bring up the whites and add some more contrast into the image, it will make the sky brighter in a much more even manner.
Color Range Masks
When I make tutorials, I try to watch or read what others have made on the subject to not only better my knowledge, but also see how others might use something that I didn't think of. Nearly every video or article I went over said they rarely if ever use this feature, but I'm happy to say I recently had great success using it for our next image. This image also comes from the same day I took the photo in the previous example, and I go into full detail about how I captured the image in this video.

Starting Image
Here is our starting point that I've already done my main edits to, and it should be obvious what our photo mostly needs at this point is a bit of light on our subject, the tree.

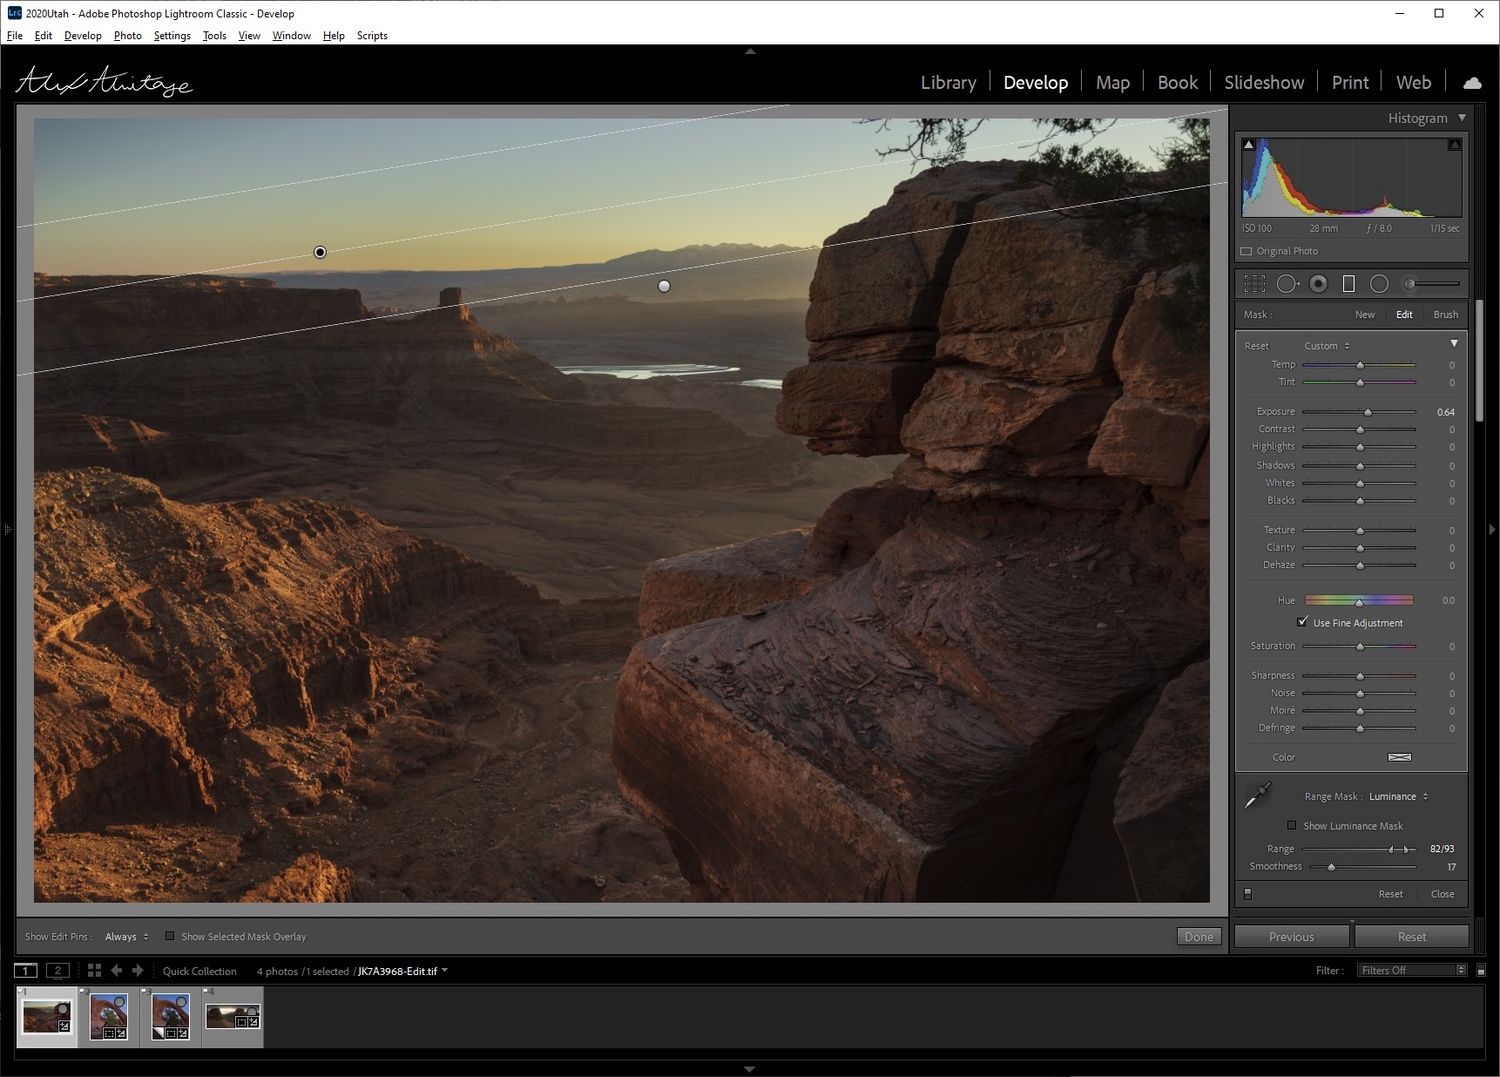
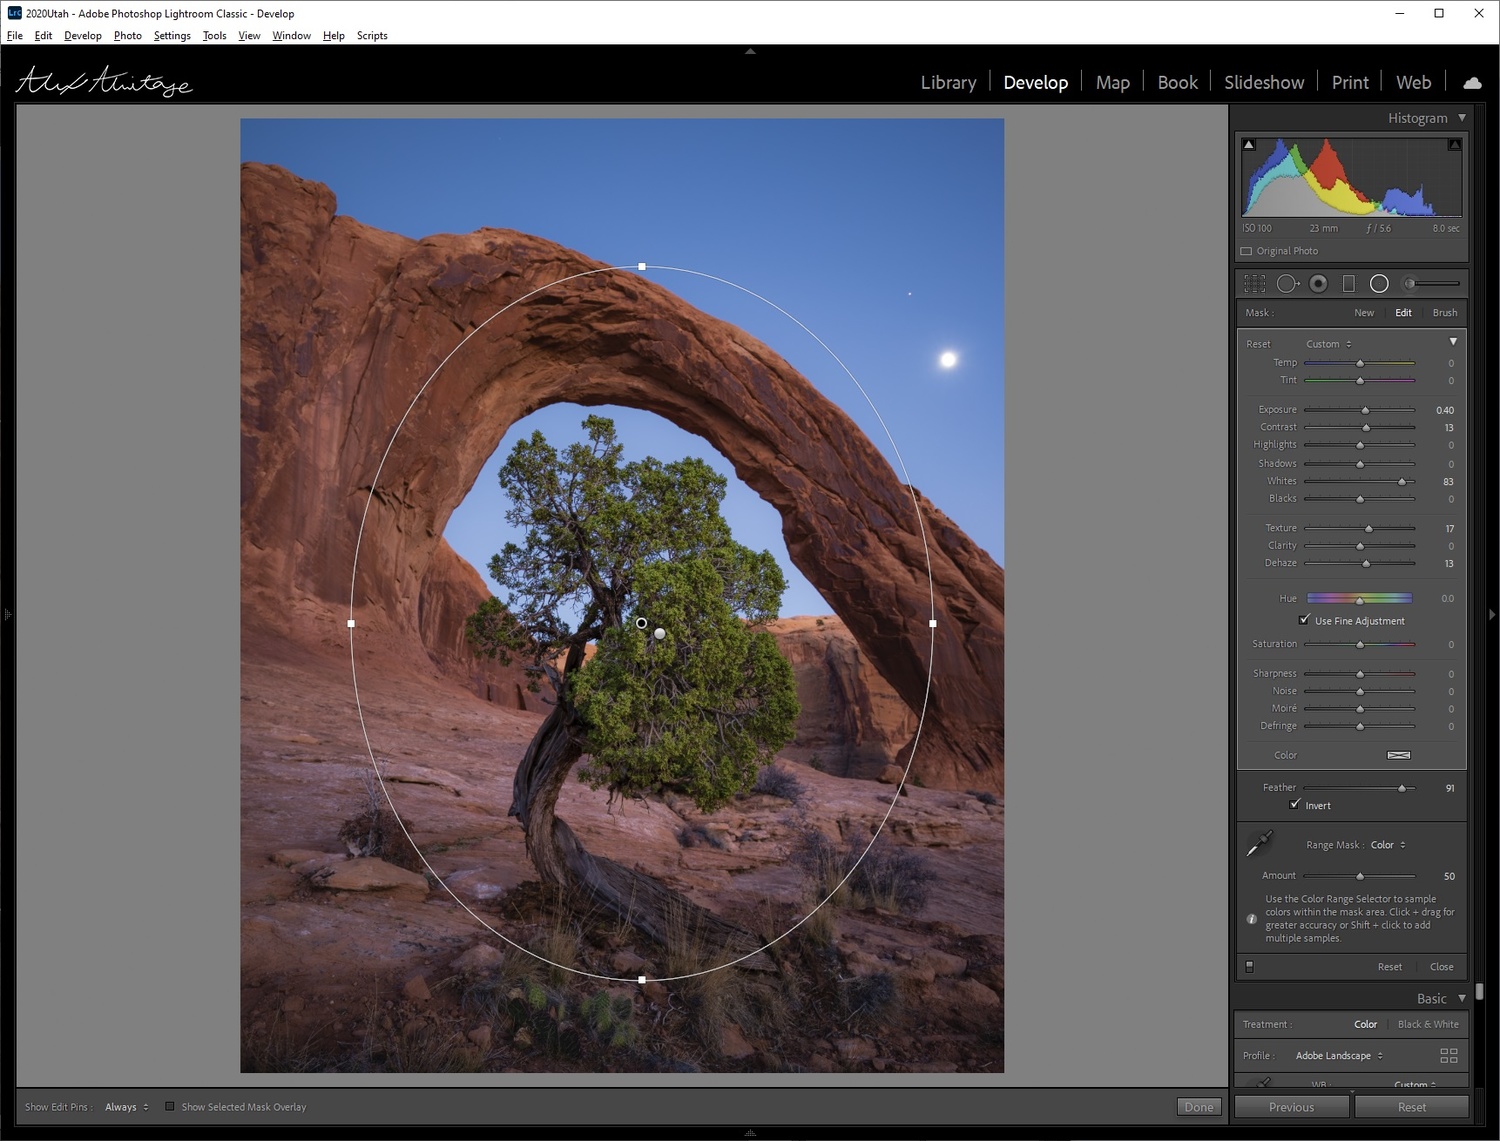
Adding a non-masked radial filter
The first thing I did was add a radial filter without using any masks. This filter is simply a way to brighten the entire image, like the opposite of a vignette, but as you can tell, it takes up nearly the entire picture. This just draws the eye of the viewer to the subject very subtlety. However, we are still missing the light I want on the tree itself, even though you could argue this image is presentable already.

Selecting color
I created a second radial filter with the intention to only adjust the tree. I made the filter and enabled "Color" in the range mask selection. Then, I took the eyedropper tool and selected the green area of the tree and added one extra point by holding shift and selecting another point on the tree.
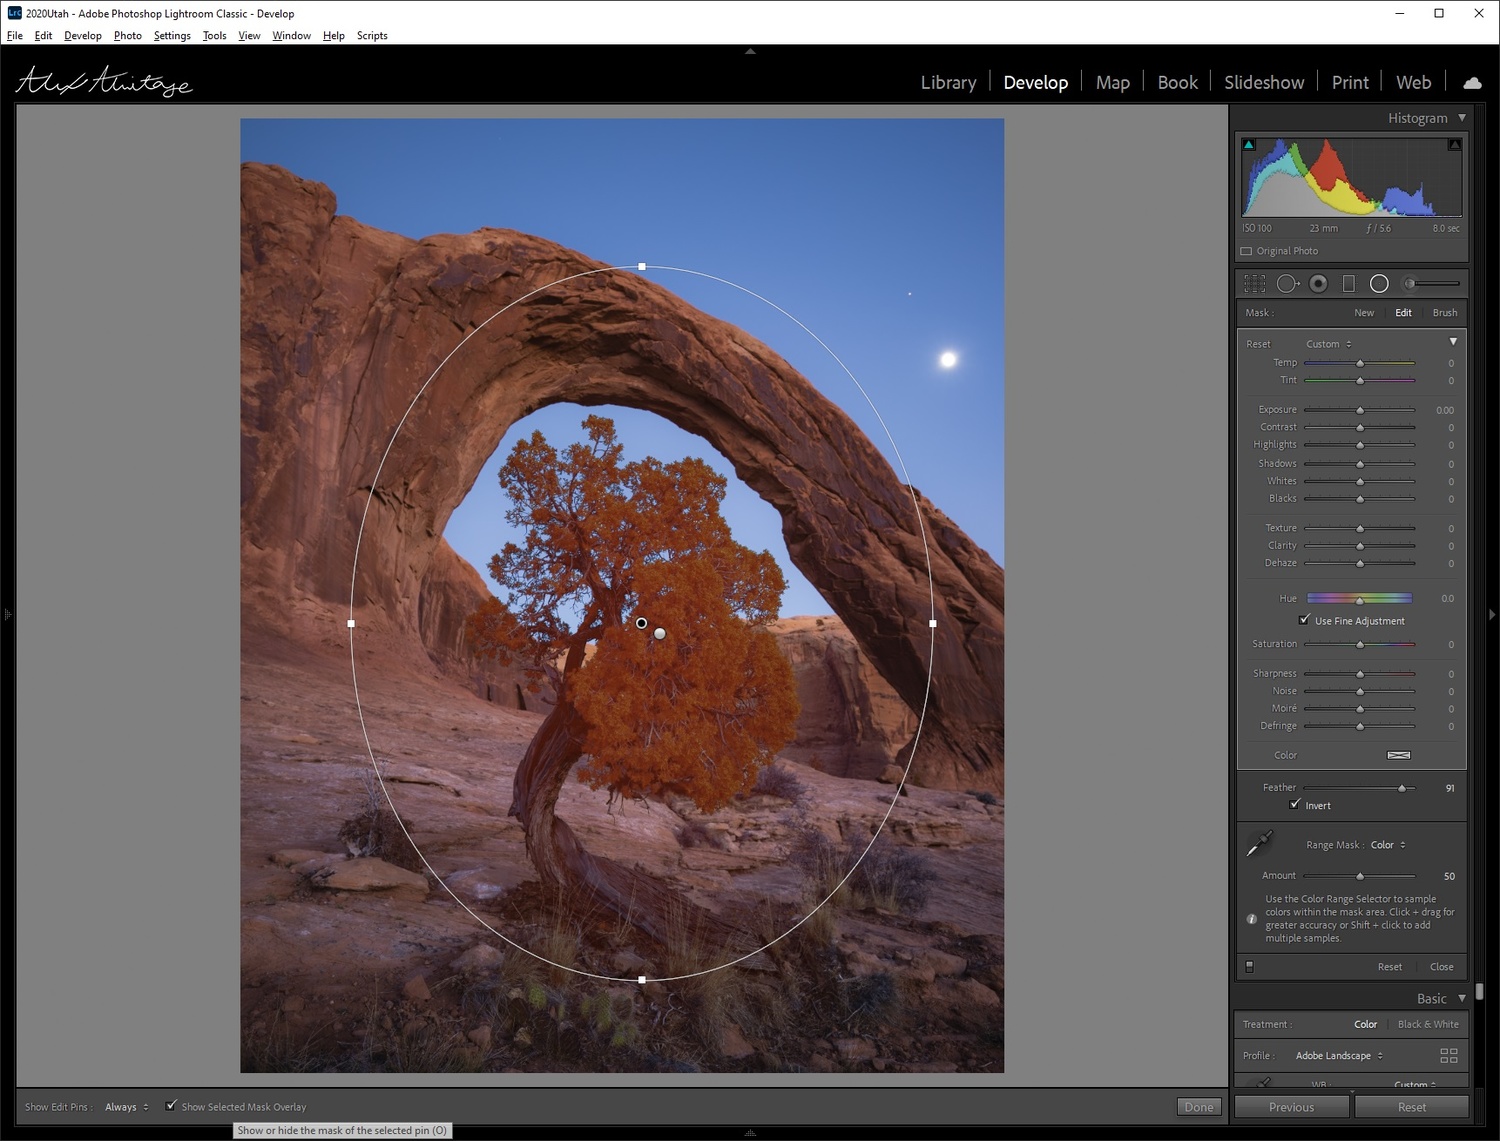
Showing selection by pressing "O"
The extra points are simply to give Lightroom more direction on exactly what colors you want to target. You can check your current selection by checking the bottom left box that says "Show Selected Mask Overlay" or by simply pressing "O."
Magic
Now that my selection is done, I make the appropriate adjustments and boom. Magic happens. You may need to adjust your "Amount" for your selection here once you apply the edits to make sure you're only affecting the areas you intend; on this particular photo, I didn't need to change it at all.

Without a range mask
For example, take a look at what this adjustment looks like with no range mask applied. These are quite remarkable results just using the range mask, and honestly, this edit was the reason I wanted to make this tutorial considering I think it brought the photo to life.
Conclusion

You might be asking yourself throughout this tutorial why I'm not using other tools like the HSL slider for the tree to brighten it that way. The truth is I did use those sliders in my edit, but they just weren't enough. Also, I can't adjust contrast, clarity, or only bring up white values using just the HSL tool. This is a much more precise and creative way to not only target a specific color but also a specific area. Notice in the example above that if I had made adjustments to the entire image, it would have targeted the cacti and brush on the bottom of the image, which I didn't want, but by using the radial filter I could adjust only the area I intended to.
While I did use landscape photos as examples, these techniques and ideas can be applied to every genre of photography. I'd love to see your results and genuinely enjoy feedback on either the video or article. Thanks as always!


Or.. Try Capture One, where you can apply a Luma range onto any mask, and then do neat things like... only apply noise reduction to shadows, or colour adjustments to midtones
Richard this is a great idea. I've been meaning to dabble with capture one and now is a better time than ever!
They have a free trial.
I gave up on lightroom years ago, I haven't looked back.
It suits a professional work flow in pretty much every way, including areas like backing up
I like the accompanying article, thank you for taking the time to write it out. I am so used to always exporting to photoshop for luminosity work, it'll be nice to play with some overlooked tools
Thanks Austin!
Absolutely superb explanation of the subject. About half the video is egospeak. Would love seeing more of your stuff if you can trim it down. Thank you for the effort
Appreciate the compliment! I'm unsure what you mean by egospeak and it taking up half the video though. Do you mean how I don't make cuts to speed up the editing process? Or do you mean the 3 minute part of me reminding people to watch other styles of content?
He means you spend a lot of time with useless crap trying to make yourself look/sound clever, rather than getting to the point, which was actually very interesting. As per my post at the top, the first four minutes of the video were just a waste of everyones time, including yours.
I genuinely try not to waste people's time in the videos I make but that might be a judgement made if you watch my other videos. I do include time stamps in all my videos if it's something you could care less about and want to skip ahead.
All of that said my hope is to be more than just a talking head instructing people on editing techniques and if me speaking my mind at the start of the video isn't for you, I totally get it and that's okay. Personally I consume quite a lot of videos where it's just someone talking about their thoughts and ideas regarding photography and I enjoy those.
So if it's just not for you, don't watch it or skip to the parts you care about the most, or read the article I wrote as an option as well.
Alex, I feel Jason's response is self-serving as well, but he is right in principle. This is an issue in just about every tutorial I see. I NEED these tutorials to continue to expand my skills. And, if you all could stick to the facts only. Again, GREAT CONTENT!!!
Like I said, it's not something I typically do in other tutorials. I genuinely had been thinking about those thoughts before making the video so I talked about them. I always include time stamps as well in case people just want to skip ahead that's okay too.
I understand where you're coming from though!
This is a great feature of Lightroom. Thanks for sharing such a valuable information.
https://evoxol.com/
This was very helpful, thanks. You probably won't like this but here goes. When I'm watching your video my eyes are drawn way to much to your nose ring. I guess you are making a personal statement with it and of course that is your right. But if you want to keep me interested in what you have to say (yes I'm an older person) you want me to be looking at your eyes and your mouth, not your nose ring. I wouldn't be surprised if potential sponsors aren't put off by it as well. Again, I like your content and wish you the best.
I appreciate the feedback and kind words! Ultimately if someone doesn't want to watch my content or a sponsor wouldn't want to support me because of something like that, I likely wouldn't want to work with them anyways :) This is definitely the kindest comment I've had regarding this opinion so I do appreciate that. All of that said I don't plan on changing myself for others and understand I might lose a subscriber here or there because of it and that's okay with me!
Another great tutorial Alex. Love what you did with that tree!
Thanks Joe!