
Adobe introduced the Range Mask to Lightroom Classic a few years ago, and it’s a useful means for targeting an adjustment when the local tools — Adjustment Brush, Gradient Filter, and Radial Filter — are simply too clumsy. If you want a deeper understanding of how it functions in relation to Luminance, read on.
For those unfamiliar with the Range Mask, it’s a means of refining a local adjustment. If you're already a little familiar with how they work, you may want to scroll straight down to "Identifying Its Effects."
When Might You Use a Range Mask Based On Luminance?
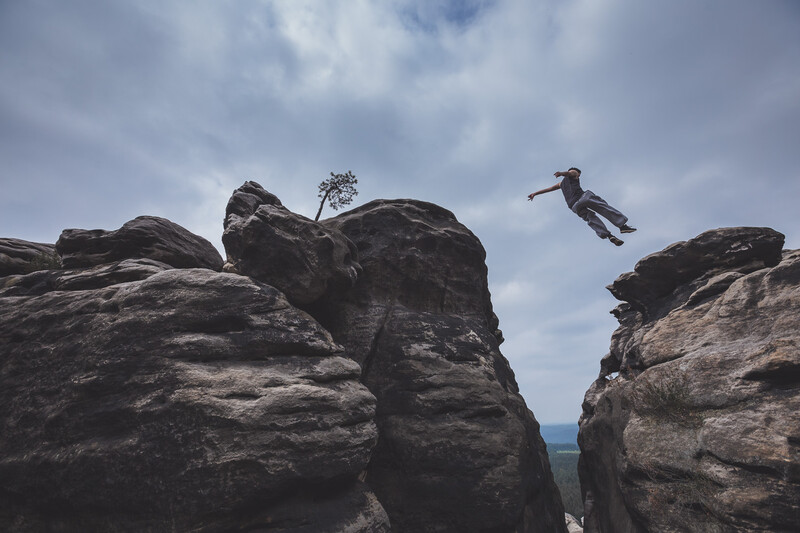
Landscape photographers are probably most familiar with a Luminance Range Mask, often using it to tweak a Graduated Filter that is being used to bring down the exposure of a bright sky. You want the smooth gradation brought by the filter, but sometimes, parts of the landscape extend into the sky, and the filter darkens features such as mountains that you’d prefer to leave unaffected.
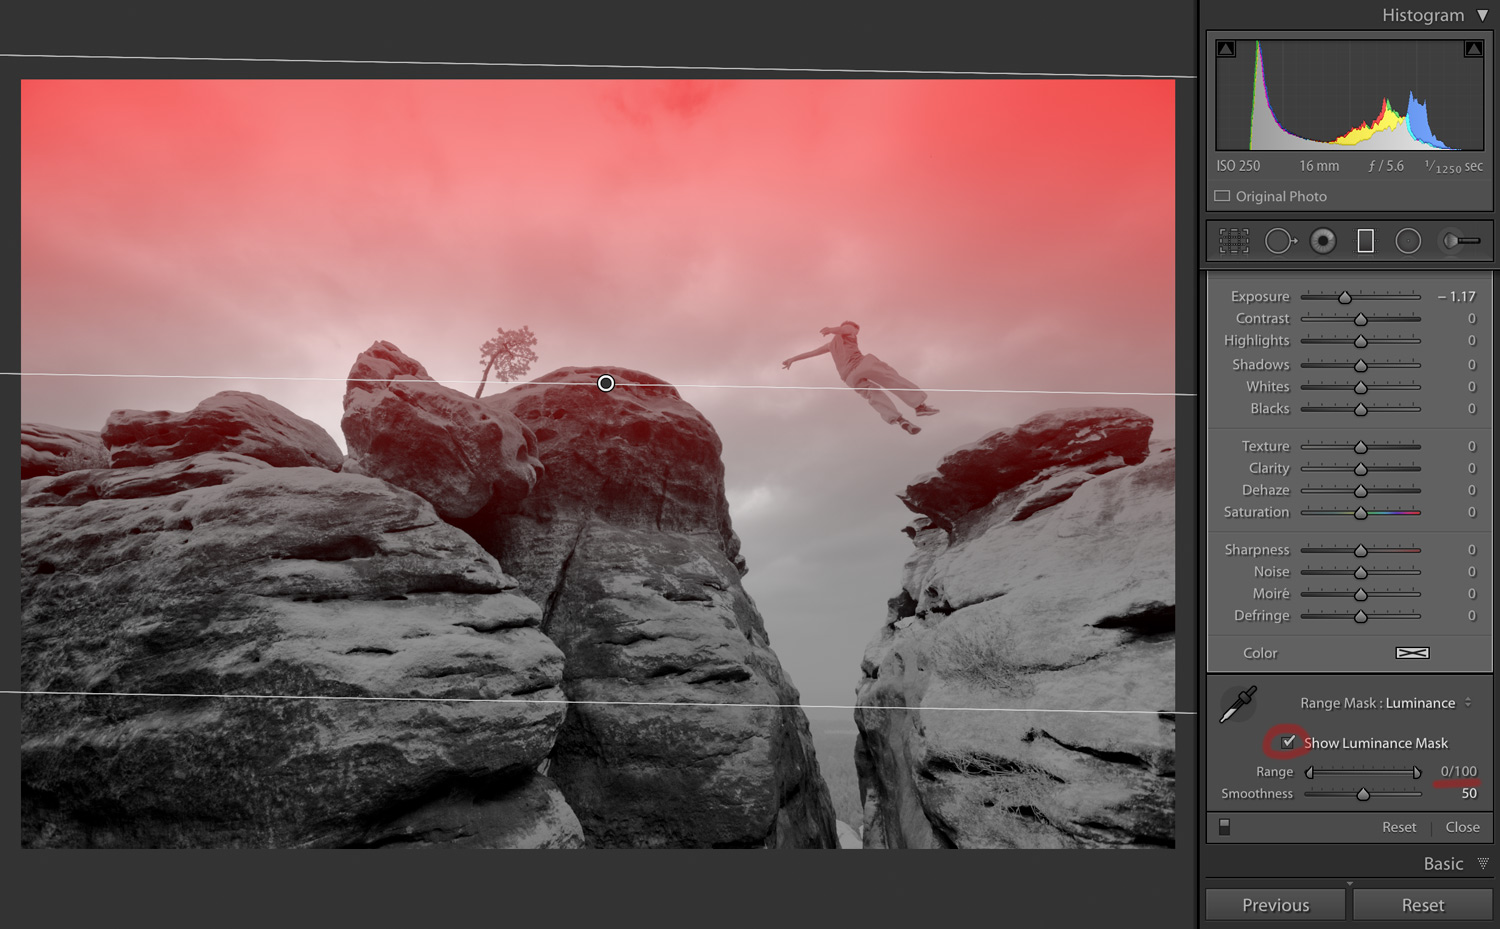
In this example, I've hit M to bring up the Gradient Filter tool, set the Exposure to -1.17, and dragged the filter from the top of the image towards the last of the sky between the rocks. I've then pressed O so that Lightroom shows me a mask of the filter in red:
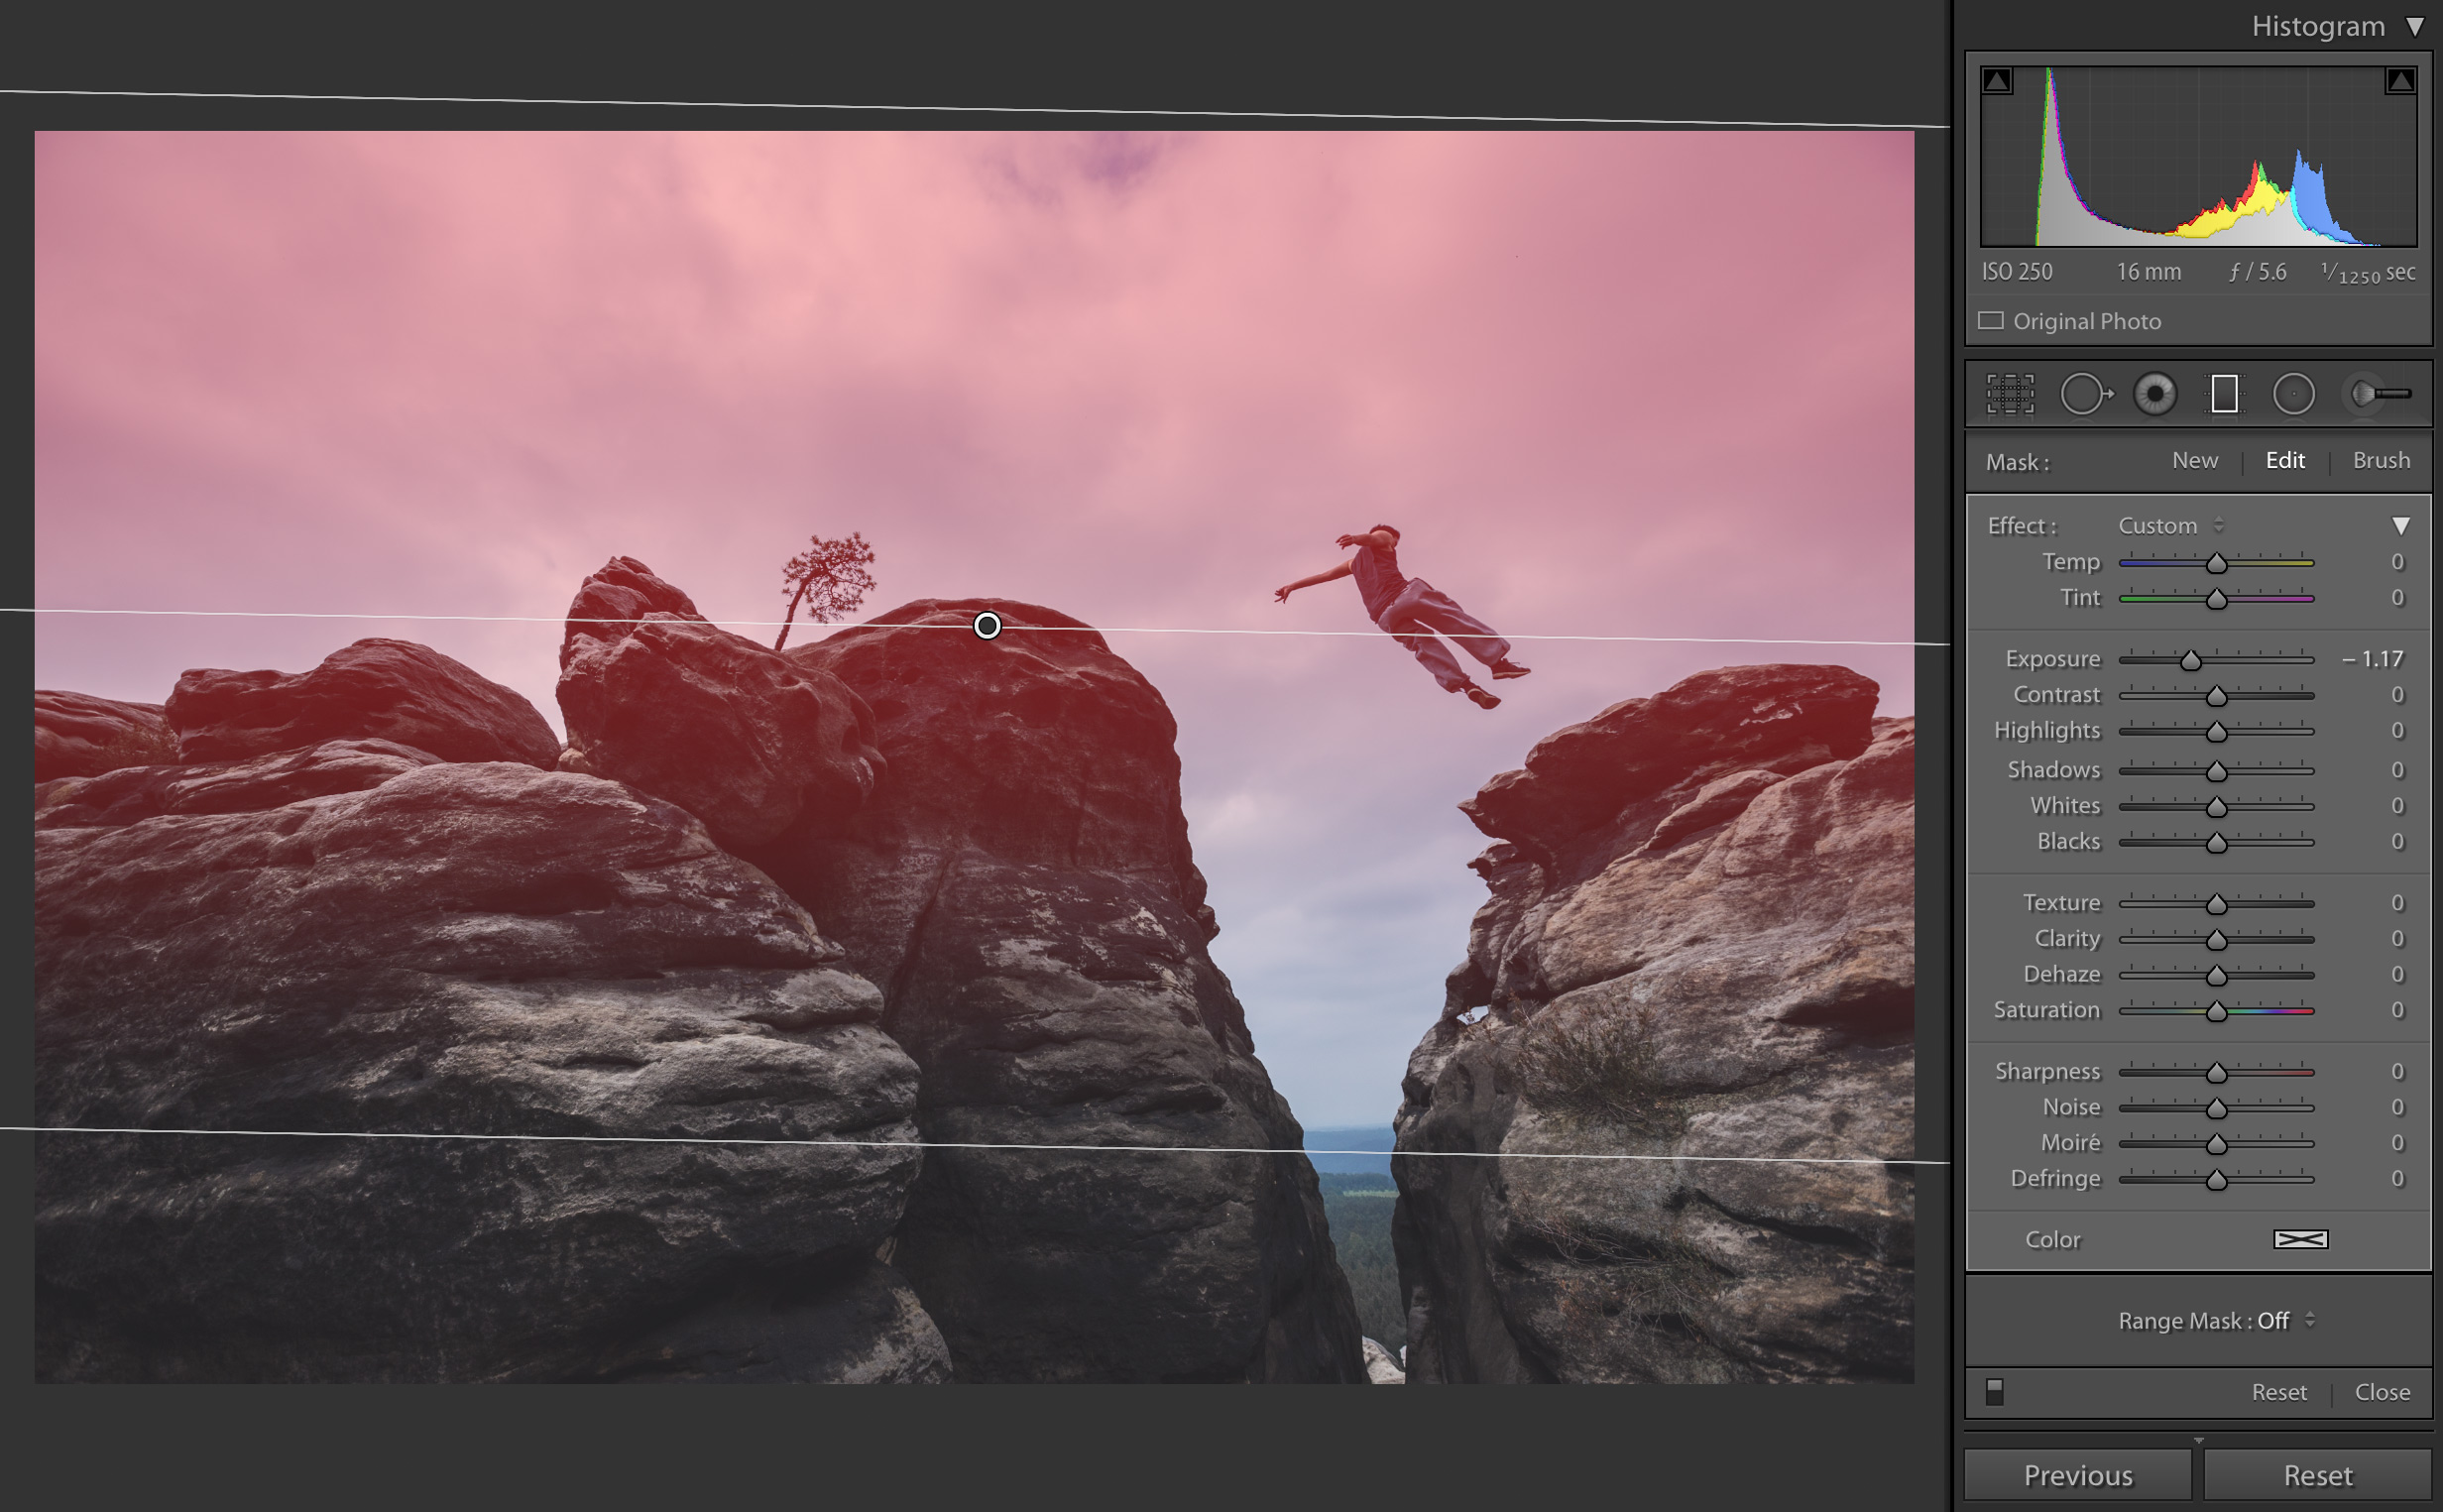
Obviously, the filter is affecting the rocks and the athlete, which is not what I want. To resolve this, one option would be to click on “Brush” and then hold Option (Alt on PC) so that your brushing takes away from the filter, erasing parts of the mask:
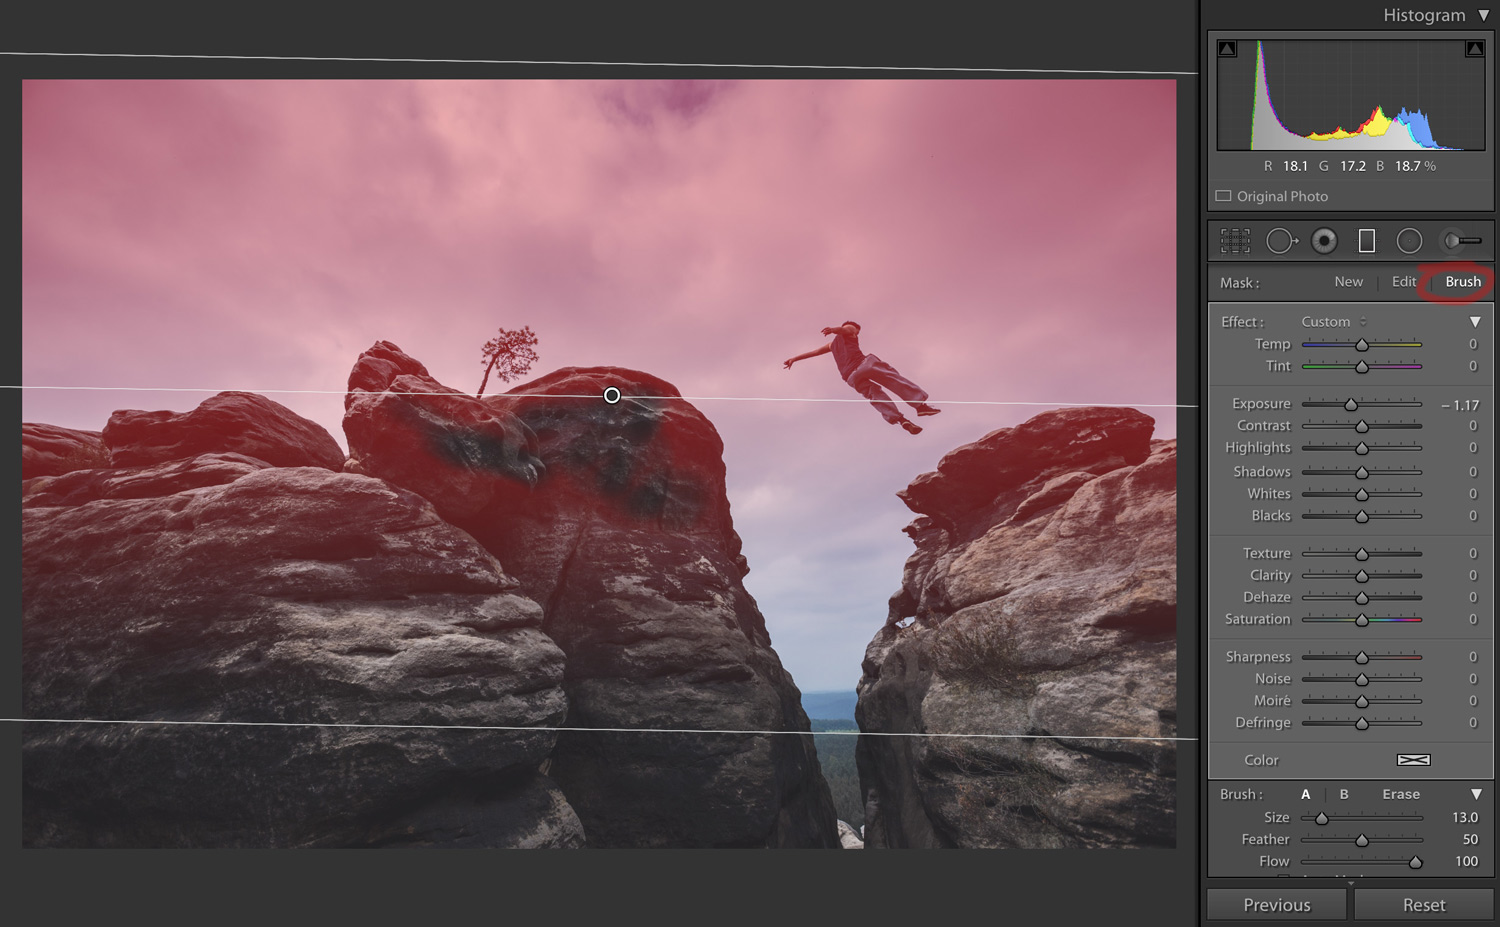
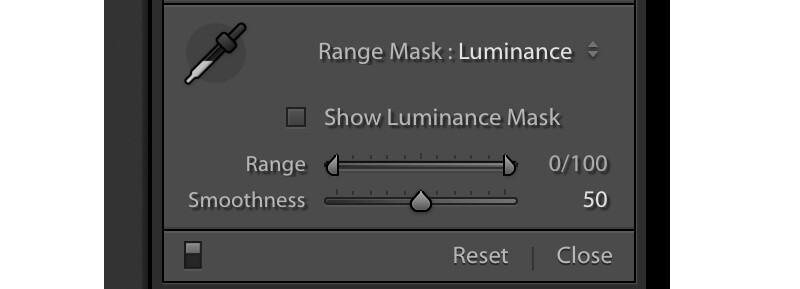
The other option would be to use a Range Mask that targets only the brightest areas of the image, thereby affecting only the sky and not the rocks. To achieve this, next to Range Mask, simply select “Luminance.” From the slider that appears below, you drag the tab on the left over towards the right.
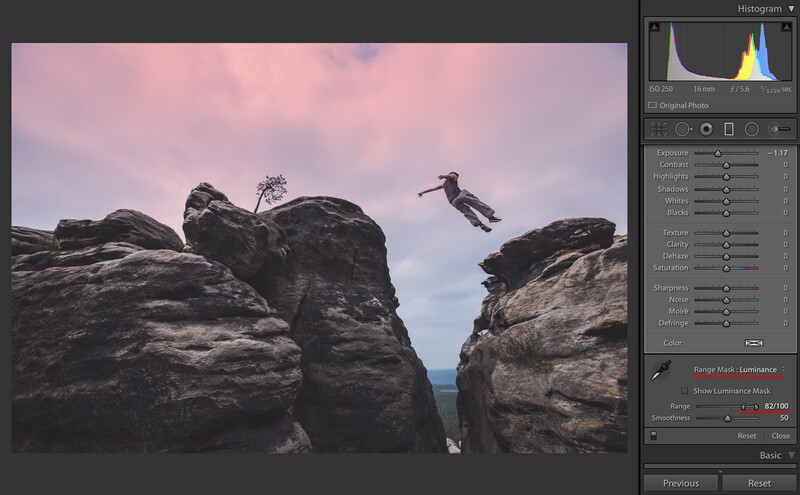
To get a better idea of how the scene is being affected, you can click on “Show Luminance Mask” to give you a black and white version of the image, which shows how those sliders are affecting the results. Here it is before the Range was adjusted:
And here's that same mask with the Range tweaked to 82/100:
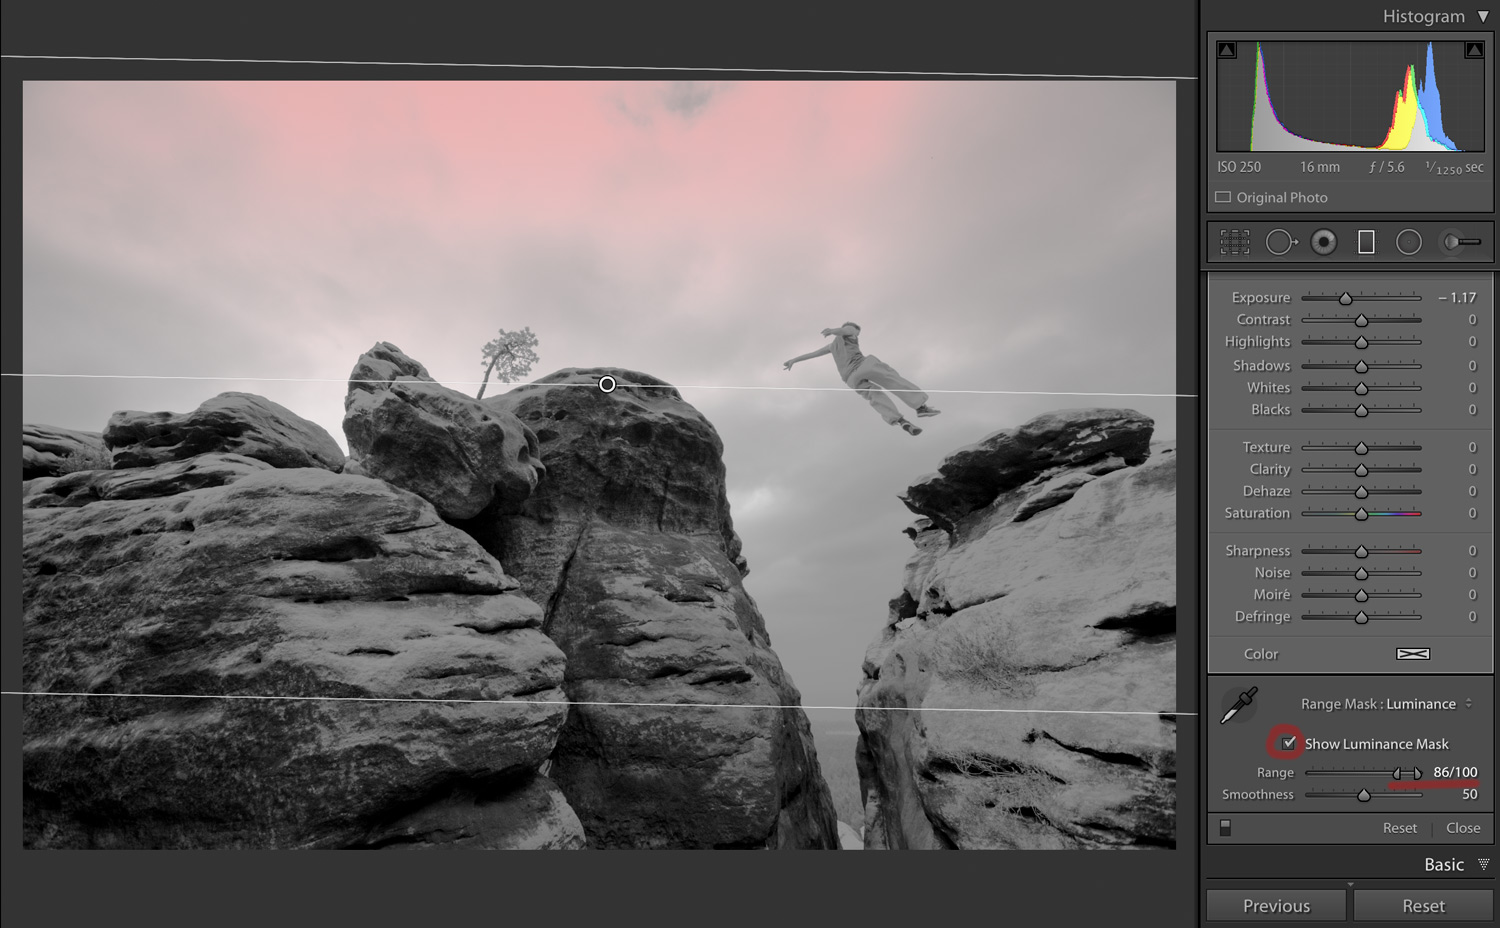
As you can see, the effects of the Gradient Filter have been changed quite dramatically, making its impact far more subtle.
If you’re not sure what’s going on here, keep reading.
Identifying Its Effects
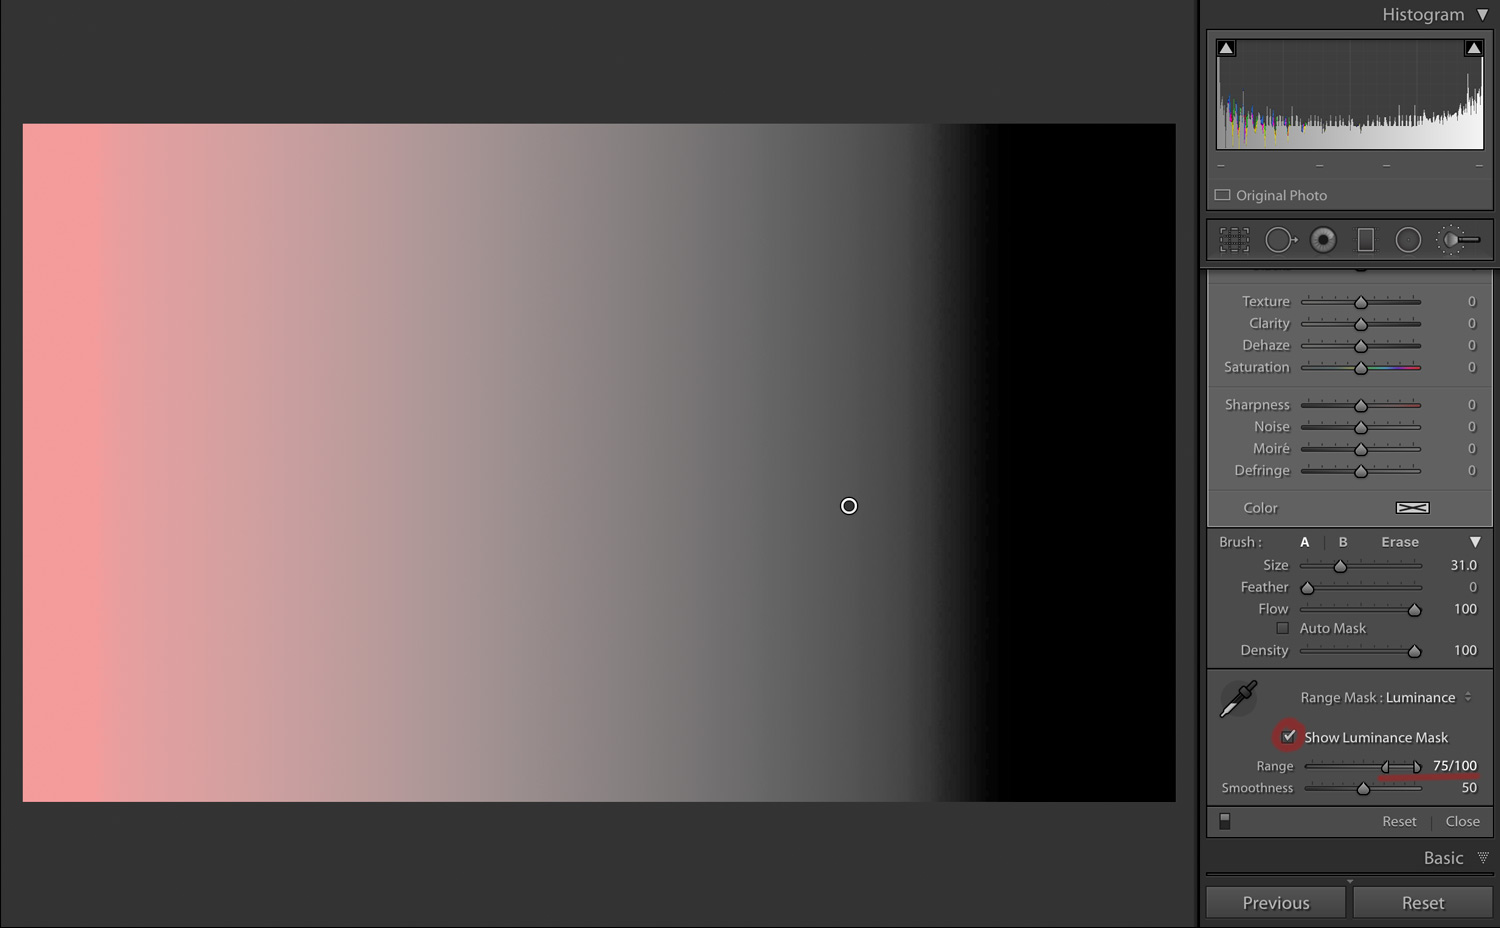
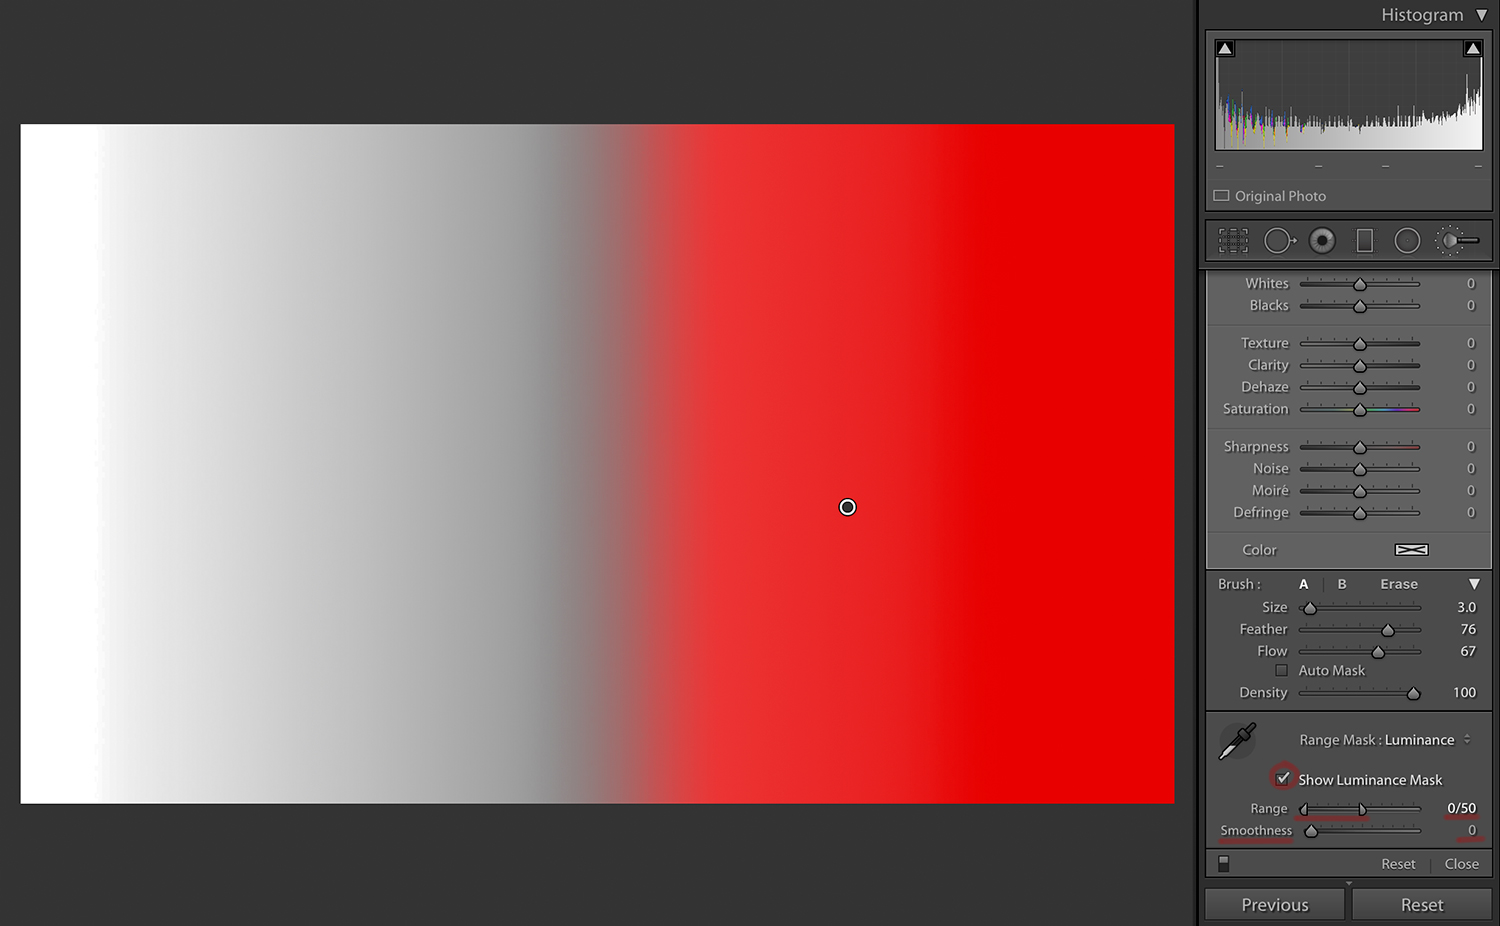
To help demonstrate the effects of the Range Mask, I created a black and white image with a gradient:
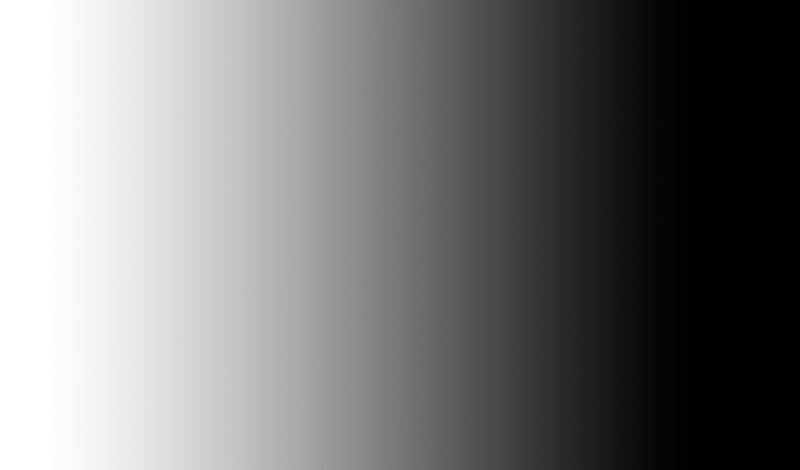
In Lightroom, I painted this in (at 100% flow and 100% density) using an Adjustment Brush. By switching on the mask (toggle this with O), you can see that it covers the entire image:
I then added a Range Mask, chose Luminance and switched on “Show Luminance Mask.” Now, when we move those sliders, we can see which parts of the image are being affected.
The Range Mask slider is unique in Lightroom, as (I think) it’s the only slider that has two tabs, one at each end, rather than a single tab in the middle. In effect, Lightroom is taking the blacks, shadows, midtones, highlights, and whites and giving them a number between 0 and 100, with 0 being the darkest and 100 being the brightest.
Keeping “Show Luminance Mask” ticked, if we move the tab on the left towards the right, the effect becomes clear. A setting of 75/100 shows that the local adjustment that I applied to the entire image using the brush is only affecting the brighter parts:
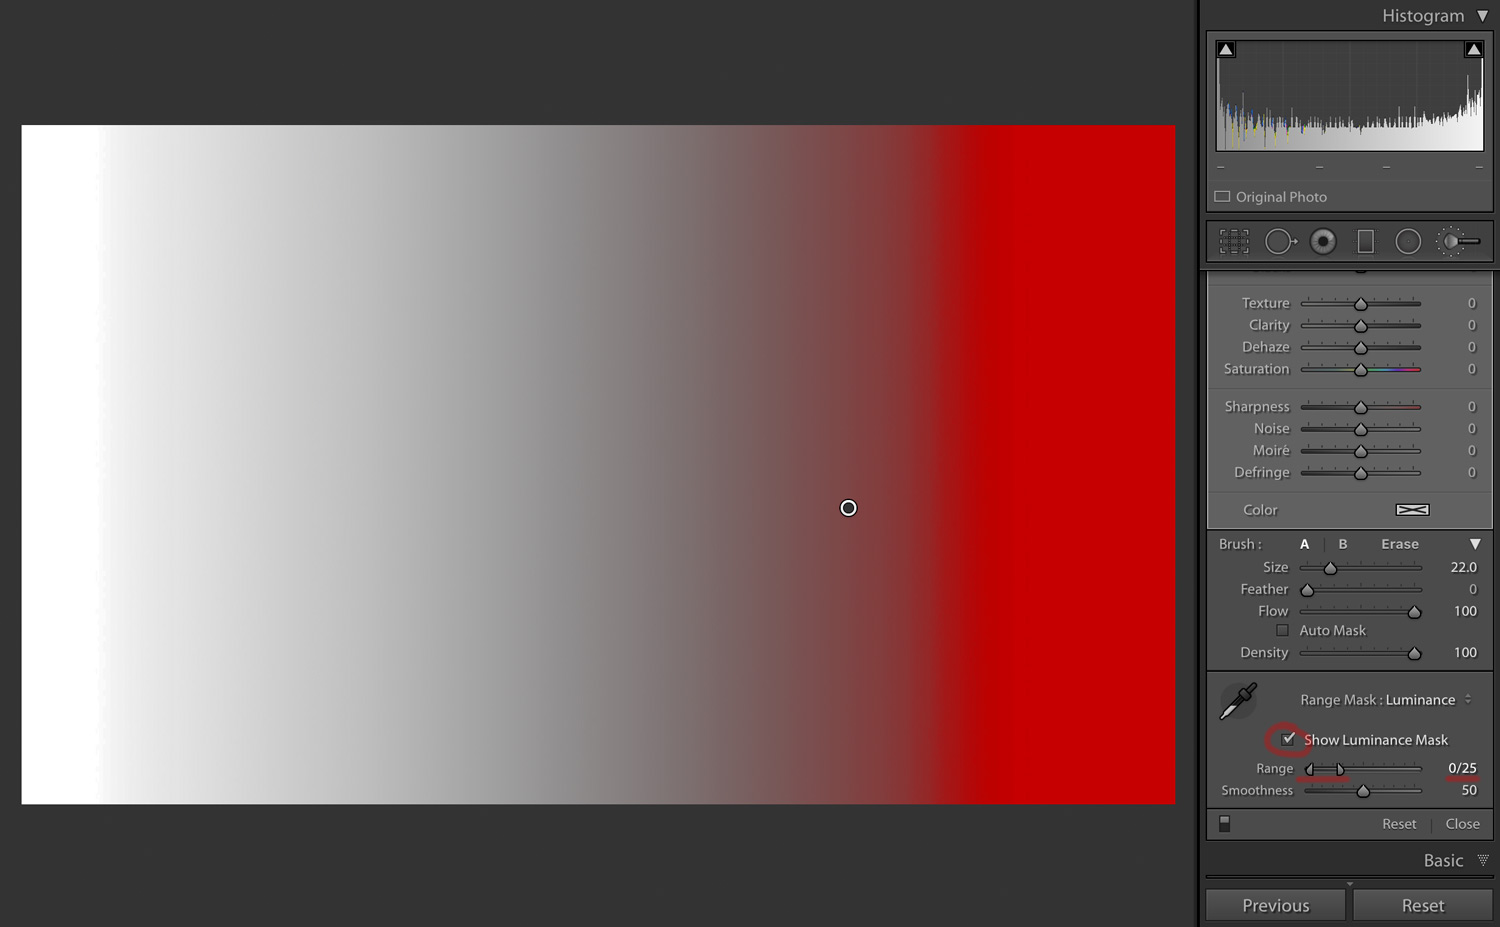
Similarly, if we go with 0/25, only the darkest part of the image is affected:
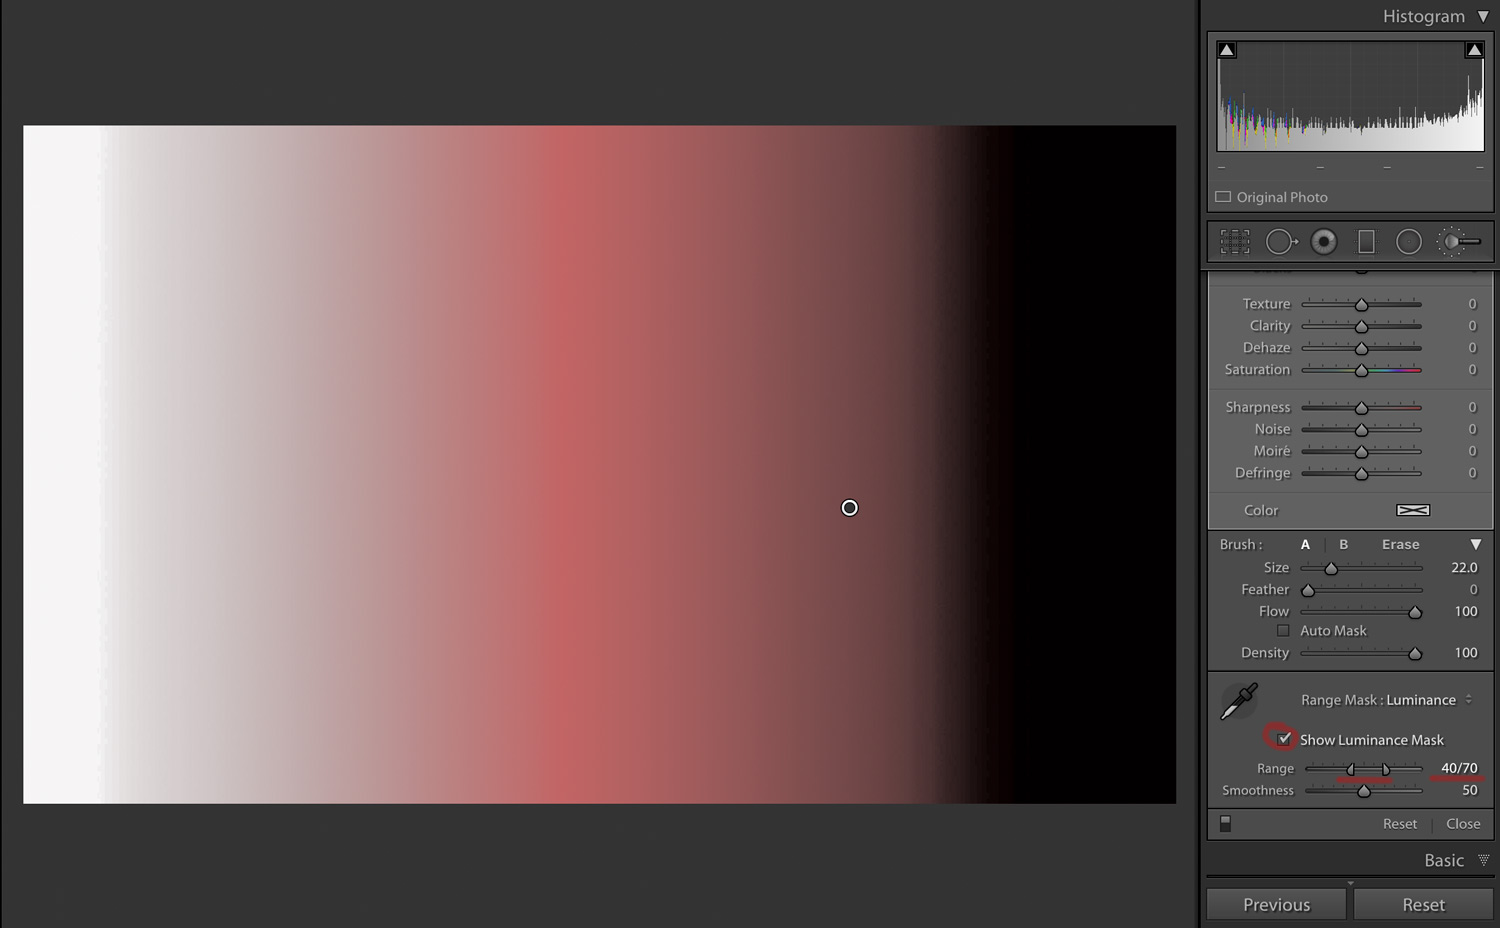
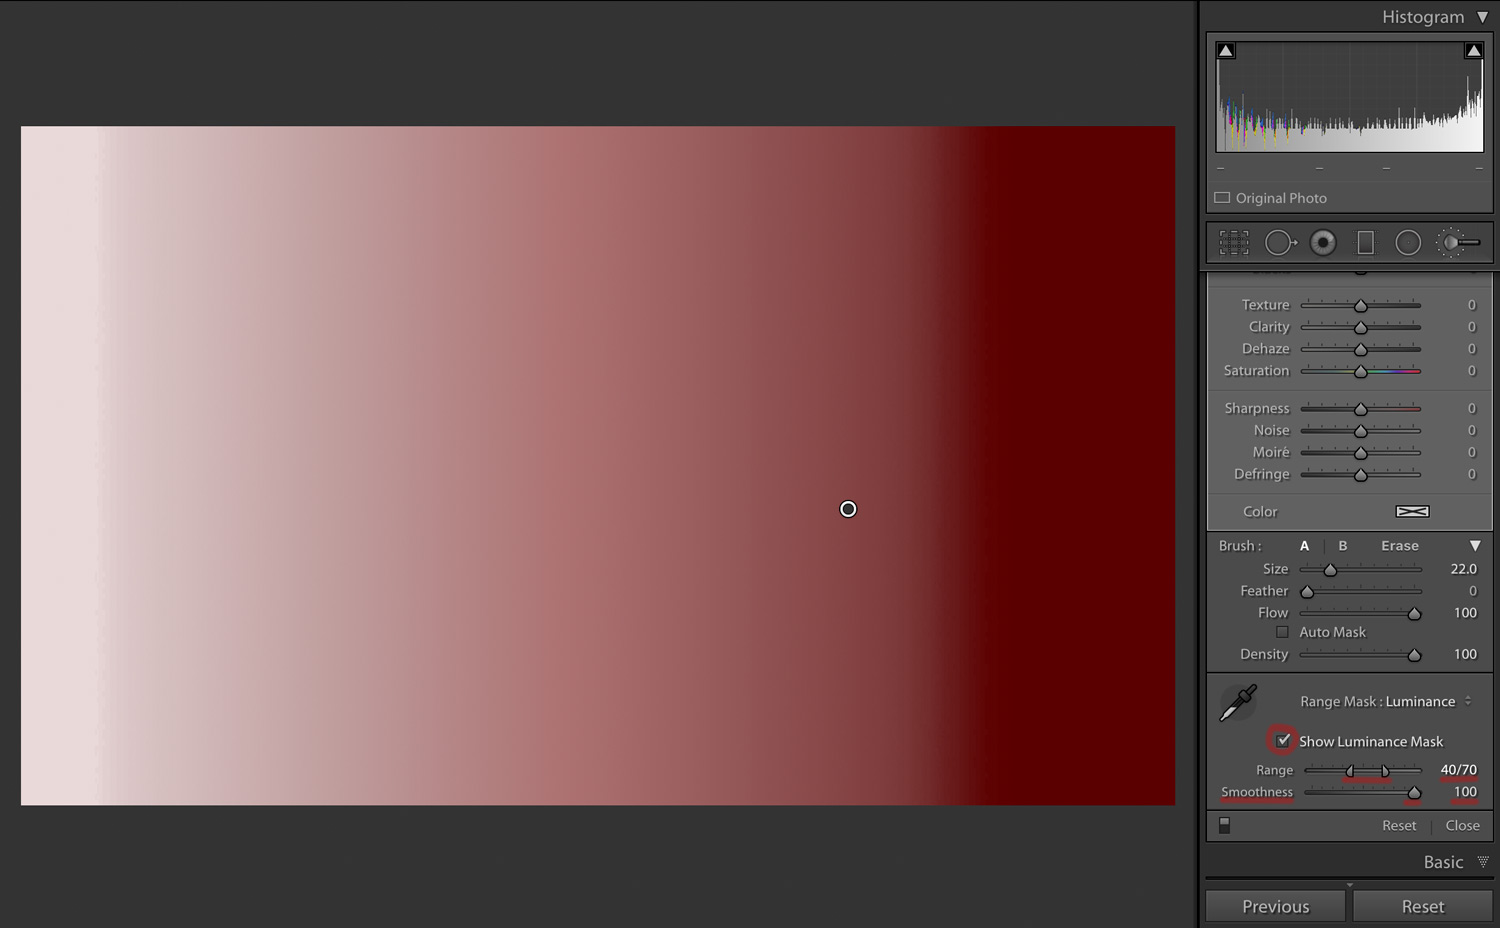
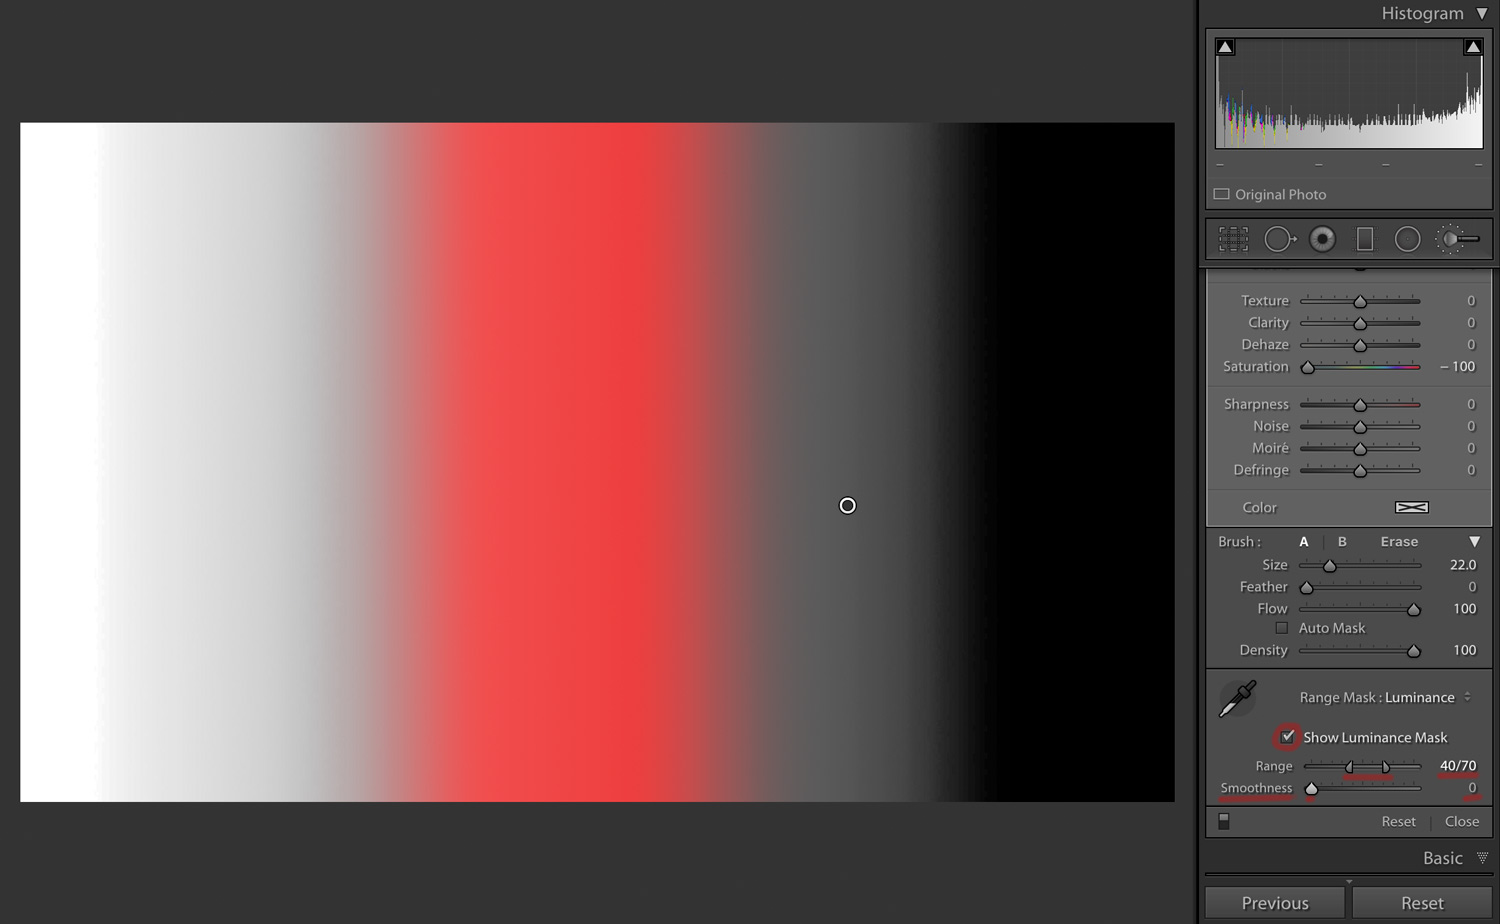
If you want to target your midtones, you could choose a setting of 40/70:
Getting Even More Control: Smoothness
You may have noticed that underneath this “Range” slider is the second slider entitled “Smoothness.” This gives you control over the transition between the parts of the tonal range that you have selected and those that you have omitted. (Lightroom will give you a visualization of how it is affecting the image if you hold Alt/Option while sliding.)
This is what happens when you take the 40/70 range and move the Smoothness from 50 (as shown above) to 100. The difference is considerable:
It's worth noting that suddenly, that range mask suddenly extends far beyond the 40/70 parameters that we specified with the "Range" slider.
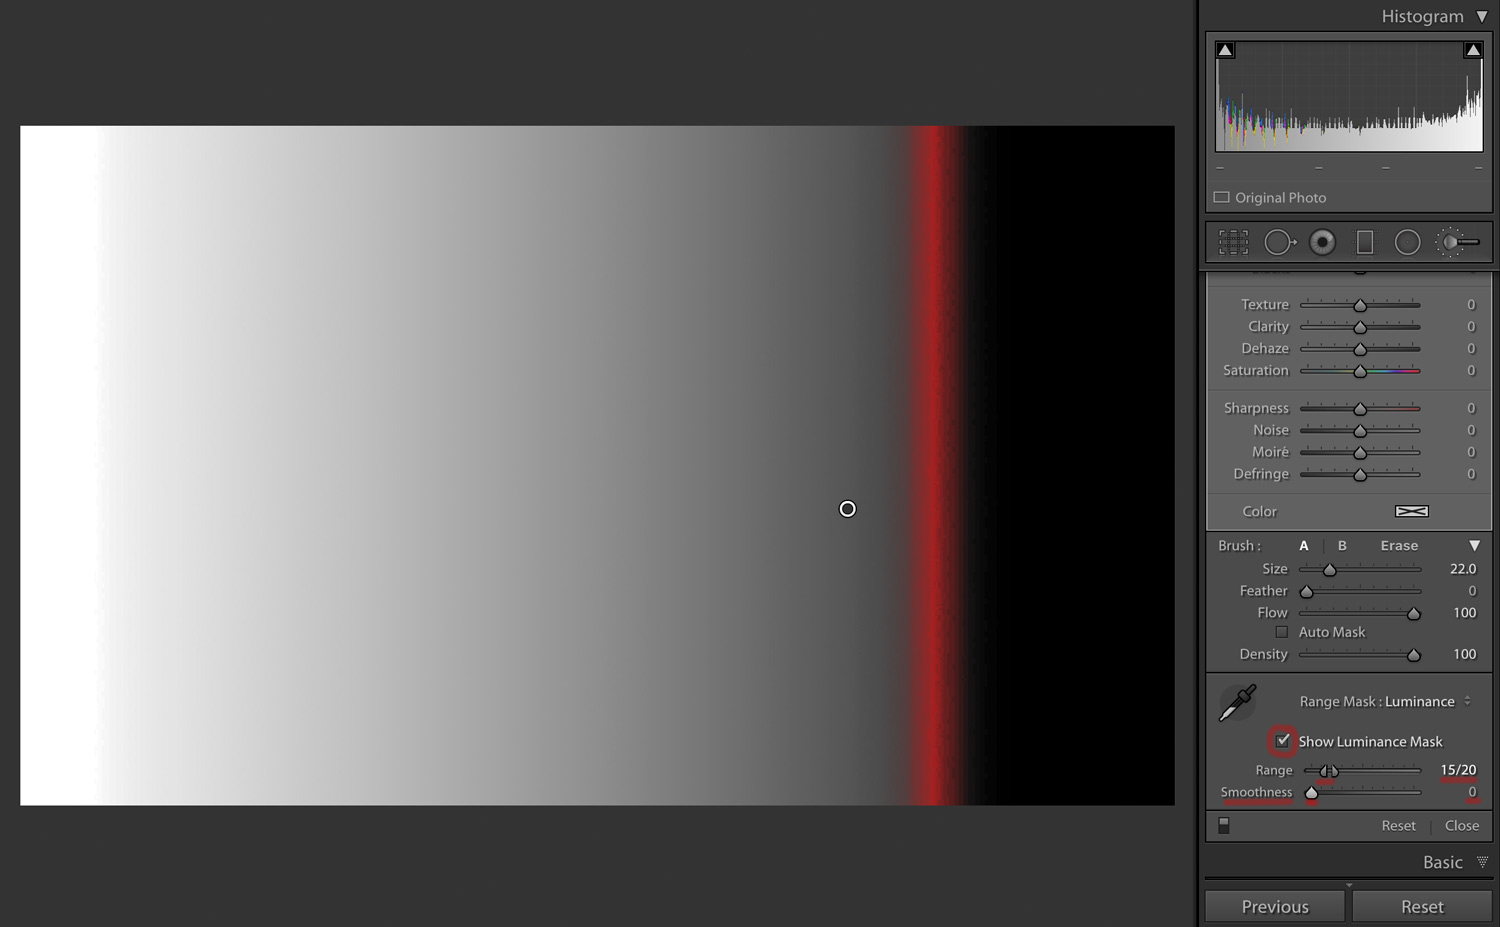
At the other extreme, here is the same Range of 40/70 but with the Smoothness turned down to zero:
I was curious to see what a narrow range with zero Smoothness would look like. I’m not sure why anyone would ever need a range of 15/20 (this is the closest the sliders will go) and a Smoothness of zero, but here you go.
And with the same Range of 15/20, but Smoothness at 100:

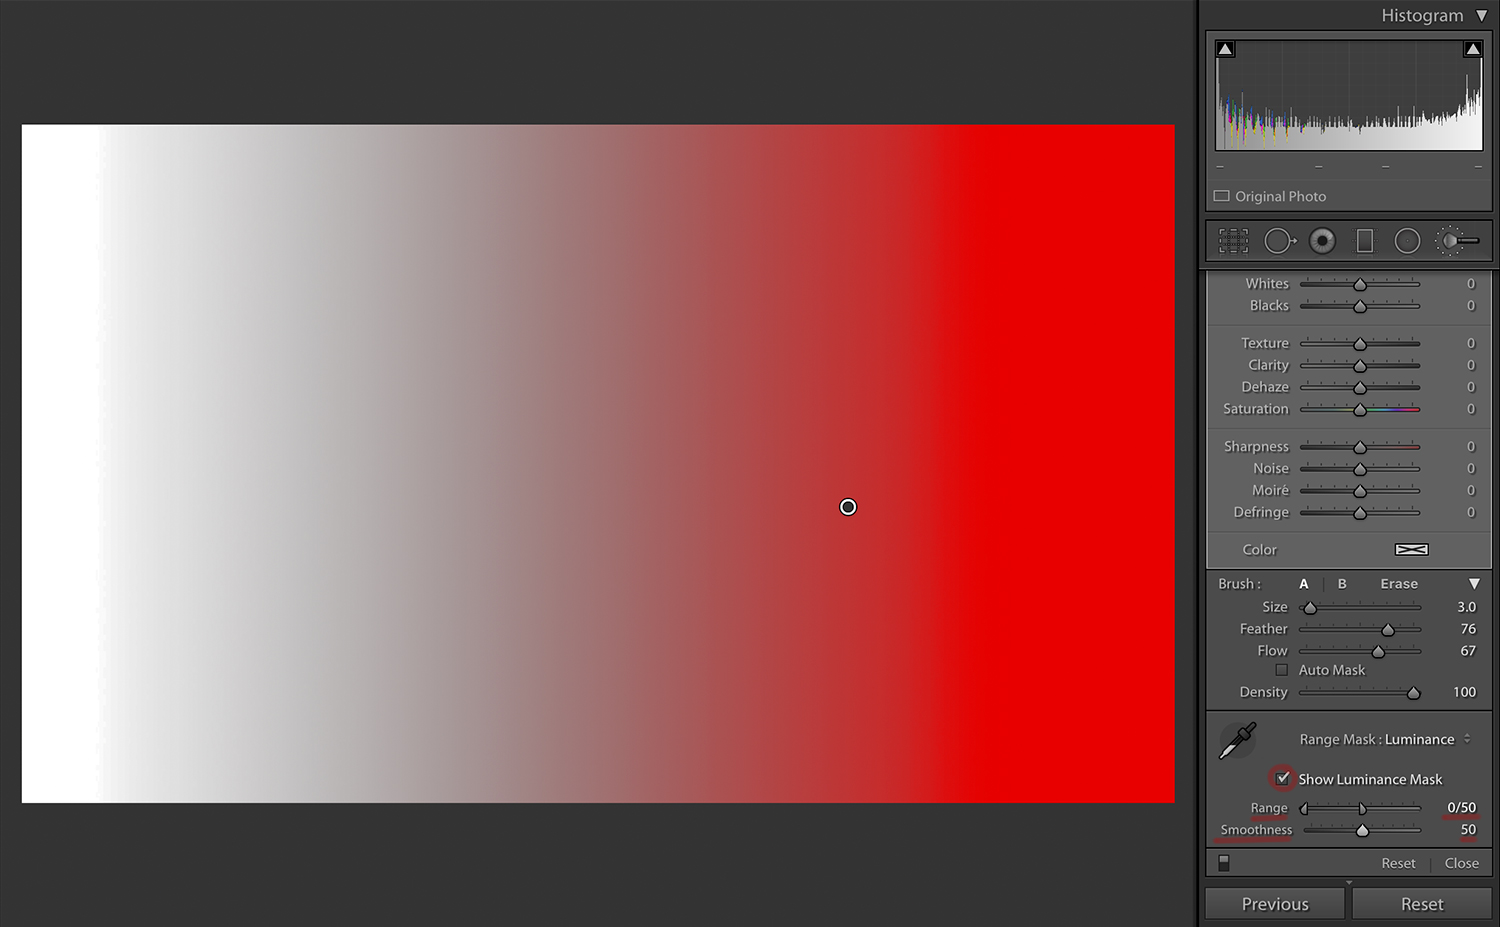
Clearly, Smoothness has a significant effect on which parts of the image are now being affected by our local adjustment. Here's a less extreme example: a Range of 0/50 (i.e., only affecting the darker parts the image) and a Smoothness of 50:
And Range 0/50 but with the Smoothness dialed down to zero. As you'd expect, the transition is much more severe:
Practical Uses of the Smoothness Slider
The Smoothness slider isn't one that I touch very often, but hopefully, it's at least useful to know how it functions. It does open the possibility of manipulating local adjustments in ways that might not otherwise be possible. For example, you could start off by dragging in quite a strong Graduated Filter with an exposure of, say, -3.5. Instead of then dialing back its effects by tweaking the exposure back towards zero, you could then add a narrow Range Mask and then set the Smoothness to 100.
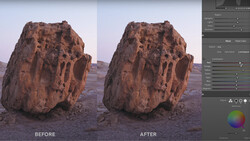
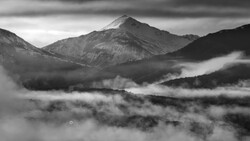
My landscape image gives you a bit of an idea of what other details in the sky can be found using this approach. On the left, the Graduated Filter is Exposure -2.35, Range 82/100, Smoothness 50. On the right, Exposure is -3.5, Range 95/100, Smoothness 100.
This is a slightly extreme example, but hopefully, it gives an idea of how different details in a sky can be extracted by playing around with these variables.
If you have any suggestions or questions, or perhaps some practical uses of when you might use the Smoothness slider, please leave a comment below.
Join the Fstoppers community for free
-
Post comments and join in the discussions
-
Browse the site ad-free
-
Share your work and get featured in the community
-
Compete in the photo contests for fun and prizes
10 Comments
Thanks for explaining this process clearly. Your examples were very helpful.
Thanks! Good to know - this one was quite tricky to write!
This is the most comprehensive and understandable explainer about LR luminance masks I've read. Thanks for your time and effort, this deserves to be a reference text. Excellent stuff!
And with the sliders in the mask you can refine the effect and even more.
How do you mean?
Nicely done! I definitely do not use this tool enough.
Awesome. I have definitely not used LR to its full extent as I was brought up on PS. I think I like your sky when it's brighter though haha!
Ha, yes, me too! 😂
Awesome explanation, Andy! :)
Thanks Nicco! 😊🙏🏻