Lightroom isn't just powerful editing software, it can organize your entire photo library so efficiently you'll never have to go searching for photos ever again.
Renaming and adding photos to folders can take a long time, and it's incredibly boring. Who wants to sit there and manually organize hundreds if not thousands of photos? Not me. That's why you should let Lightroom Classic do all the heavy lifting for you. I'll show you how to let Lightroom take control and automatically organize all your photos no matter, whether you have 200 or 20,000. You'll be able to easily search for and find a specific photo in a matter of seconds, and the best thing is you'll never have to make your own folders again. So, let's take a quick dive in, starting with importing your photos.
Import to Collection
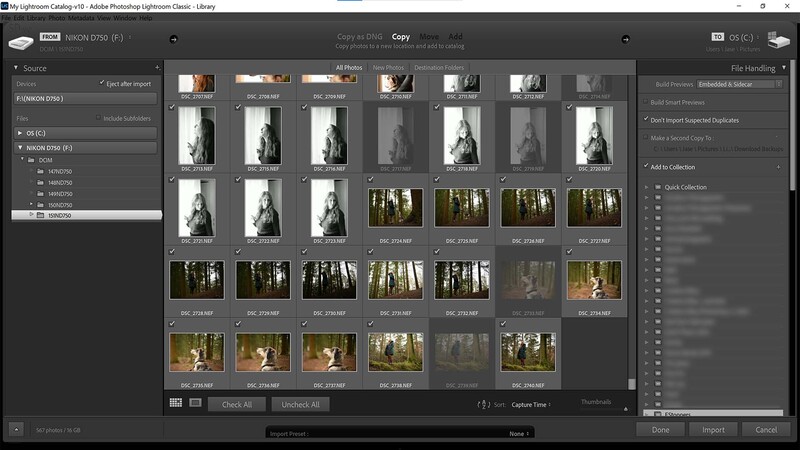
Import photos to a collection using the import dialogue in Lightroom Classic
The biggest step you can take towards getting your image library under control is to organize your photographs as they come into Lightroom Classic. That way, you won't have to sift through the hundreds and thousands of photos in the future to find that one shot you need. Go to File>Import Photos and Videos or head to the Library module, and click the Import button in the bottom-left of the window.
From here, the import dialogue appears. Select the photos you wish to import, and tick the Add to Collection button on the right pane. Make a new collection with the + icon, name it, and select the collection. This will import your photos to a kind of folder that the only Lightroom will be able to read, but it's worth it. Once your photos are all in collections you'll be able to find specific photos (or groups of photos) with ease.
Add Keywords
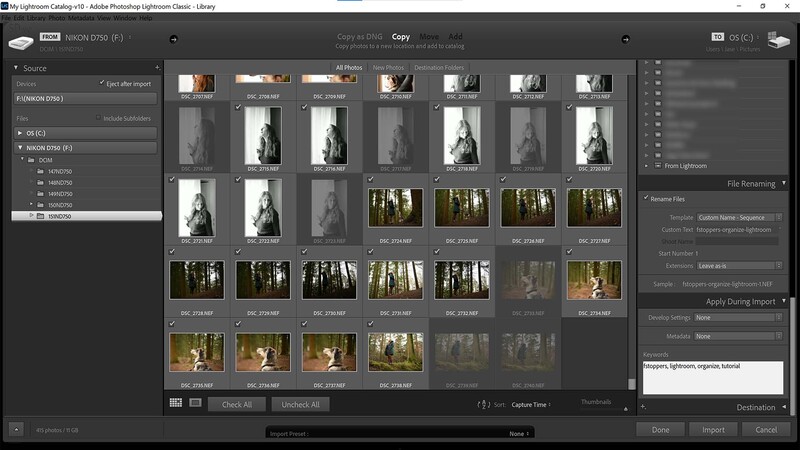
Keywords are stored in each individual photo and are useful for categorizing photos into separate collections and searching for specific shots later on
The next step from importing your photos to collections is to rename them and give them keywords. Renaming your files will make it easier to search for specific groups of shots and keywords will allow you to automatically categorize the photos in a few steps time. I can't stress enough how useful adding keywords is at this stage.
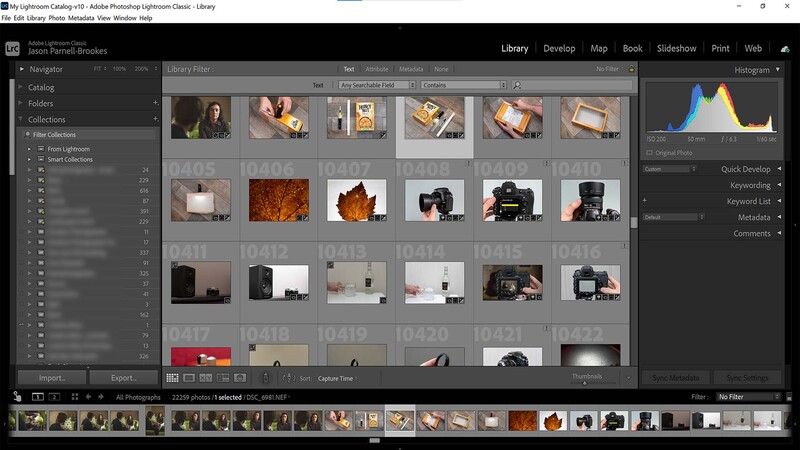
Search for Photos
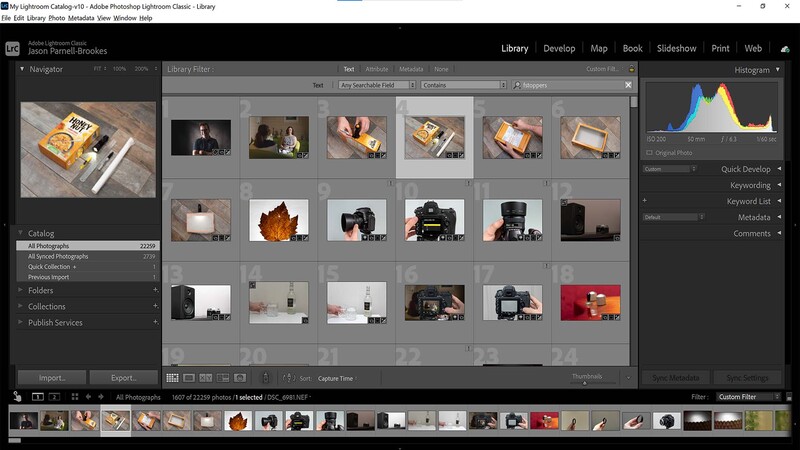
Find your photos again using the keywords you've already implemented, or any other kind of attribute you've applied
Once you've imported the photos using keywords, it's easy to find them again with a quick search. Make sure you're in the Library module and in the left pane under Catalog, select All Photographs. At the top of the middle panel, you'll see a Library Filter section; in here, select which attribute you'd like to search under. I'll be using keywords to demonstrate how the filter works, so I've selected Text and then typed in my search term, "fstoppers," in the box on the right. Now, all the photos with that keyword will appear in the middle panel.
Folders and Storage
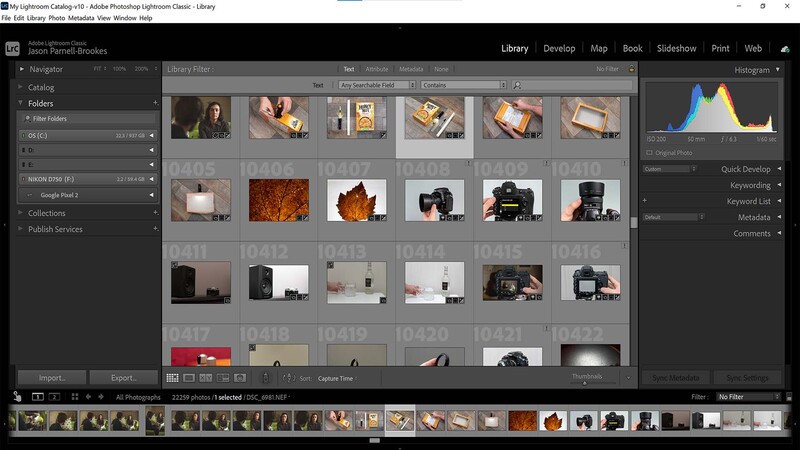
You can view where photos are stored on your internal or external storage in the Library module
Although the tips and tricks I'm showing you here will organize your photo library in Lightroom Classic, it's possible to view your internal and external storage via the Folders tab in the left pane. From here, you can view external hard drives, smartphones, and memory cards that are also plugged into the device you're using. This is useful if you want to find images stored on your computer that aren't already imported into Lightroom.
Collections and Smart Collections
Manually add photos to Collections or automatically have Lightroom add photos to Smart Collections without having to lift a finger
What's the difference between them, and how can you identify them? Collections are like proprietary Lightroom folders that hold images separately from each other in Lightroom software. It doesn't make a difference where they're stored locally on your hard drive or SSD. But it doesn't matter, because we're organizing our photos purely using Lightroom Classic. They're helpful for separating landscapes from portraits, holiday snaps from paid gigs, and astro from fashion.
You can create collections based on whatever criteria you want, but the downside is you'll still have to drag and drop them into the collection sets. That is unless you use Smart Collections. Smart Collections use information in the image files to automatically separate images into groups. Collections are displayed in the left pane as gray square folders, but Smart Collections have a small, yellow cog next to them.
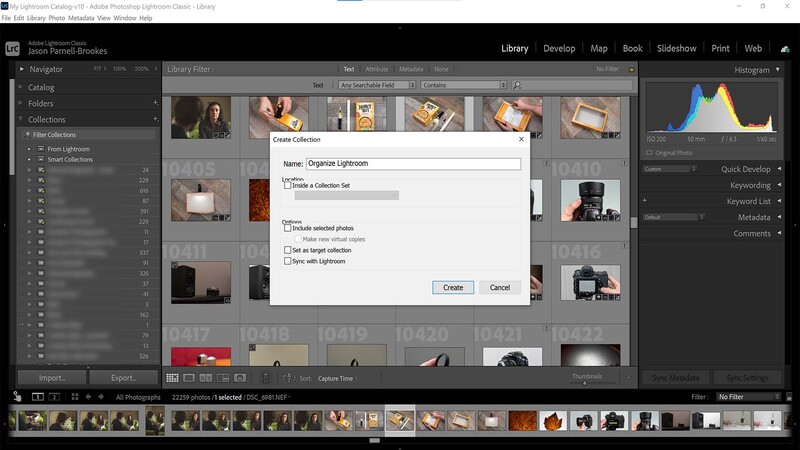
Create a Collection
Make a Collection using the Collections pane on the left-side of the Library module
To create a Collection, if you haven't already done so in the import dialogue, click the + icon next to the Collection tab in the left pane, and name your new Collection. There are other options for getting more specific with your Collection setup, but that's beyond the remit of this tutorial.
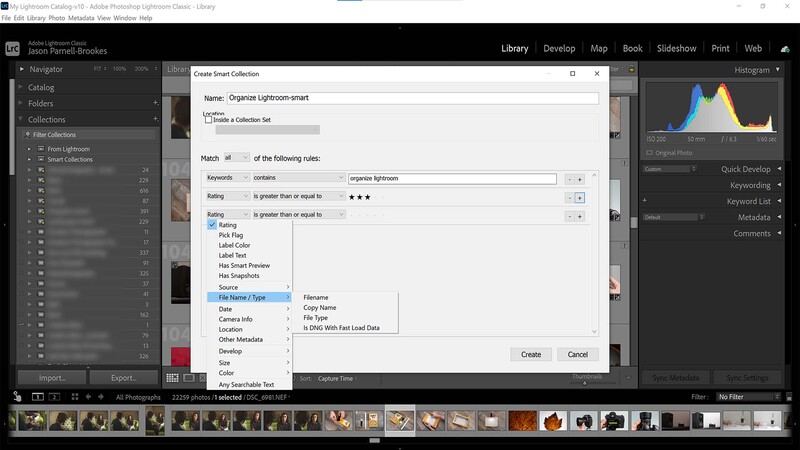
Create a Smart Collection
Smart Collections will have you wonder why you ever set up a regular Collection in the first place. Create a Smart Collection in the same way as you would with the previous step, only this time you'll have some parameters to alter. Introduce some rules to the Smart Collection. Here, I've added keywords, a star rating, and am about to add a filename rule. Once created, every photo that follows the rules of the Smart Collection will appear here. As long as you introduce these rules and keep up the naming, rating, or keywording of said photos, you'll technically never have to do any manual organization again.
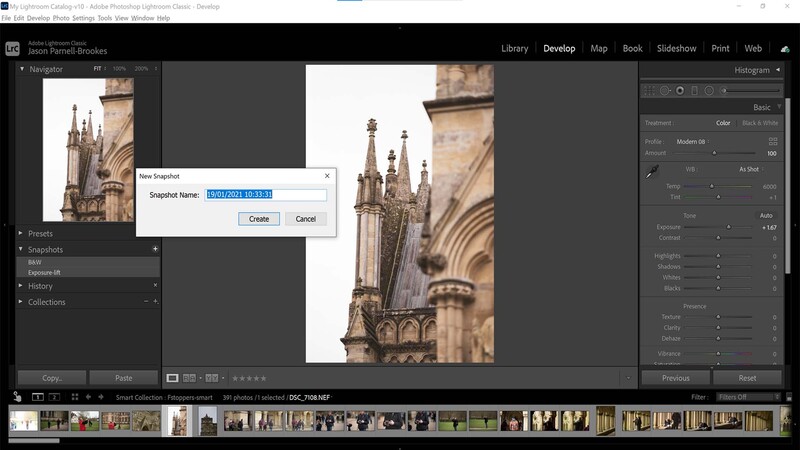
Make Snapshots
When you're not sure which edit you prefer, you can save a snapshot in the Develop module to toggle back and forth
Snapshots are useful for saving specific edits of a photo so that you can go back to them later. Often, I can't decide whether I prefer one edit over another, so I'll make several snapshots and recall each edit to compare them. In the Develop module, head to the left pane and press the + icon next to the Snapshots tab. Name your new snapshot and click Create.
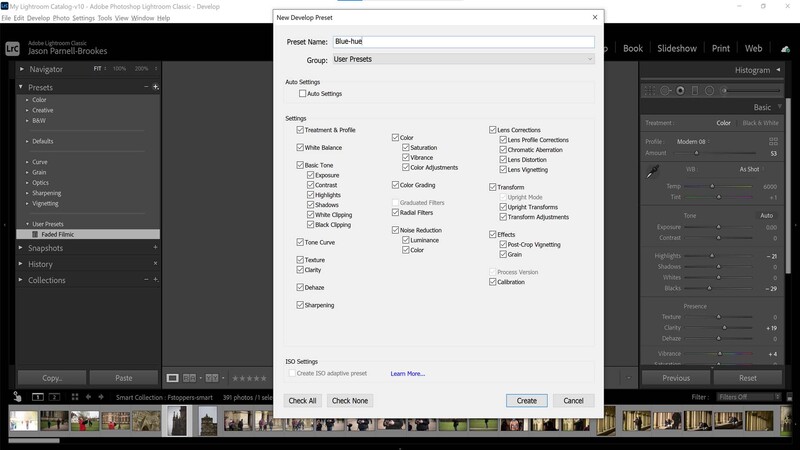
Keep Presets
Once you've found an editing style you like you can make your own preset and apply it to any photo
After editing a photo and perhaps syncing the edits with the rest of the photos in the series, you may want to apply this same edit to a broad range of other shots, past, present, and future. To do this, head to the Presets tab in the left pane and click the + icon. Name your preset and tick the edits you'd like to save, and then, click Create. Now, you can recall this editing style at any point and on any photo. This is great for keeping visual consistency if you're aiming to maintain a specific style across your imagery.
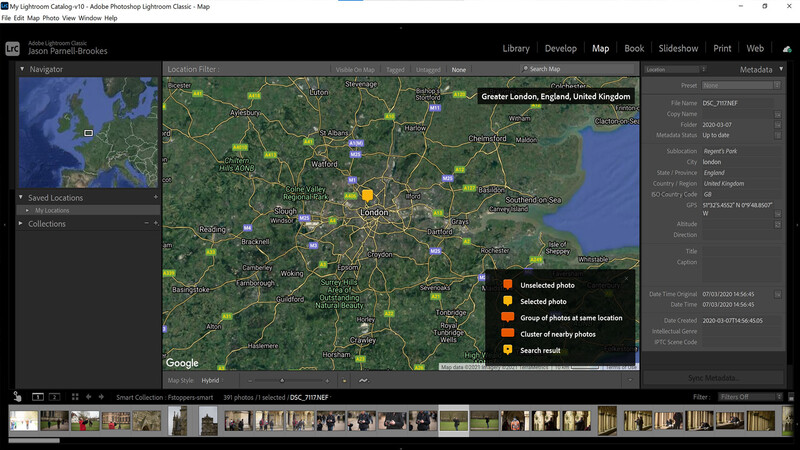
Geotag Your Images (Map)
Geotag your images manually by heading to the Map module in Lightroom
Many modern cameras now have geotagging built-in, where the GPS location is captured when you take a photo. However, for those that don't have it or have turned the feature off, you can put this back in with Lightroom. Head to the Map module and select your photo. The quickest way to pinpoint the location of the shot is to drag the photo from the filmstrip at the bottom and place it down on the map. Lightroom will then create a marker and fill in the details in the right pane. Alternatively, you could just type this in yourself, but it takes a little longer.
Export Settings
Export your photos to determine where they're saved, filenames, file types, and image resolution among other settings
By now, your photos should be organized from import to storage. But what do you do when you want to save them to an external device or have them ready for sharing with others? That's where the Export dialogue comes in. Head to File>Export (Ctrl+Shift+E or Cmd+Shift+E on a Mac) to bring up the Export dialogue. From here, specify the export folder you wish you save the images to, rename files if you haven't already done so, change the file type settings, and adjust image resolution, add watermarks, or choose a post-processing workflow. I like to create my own presets by clicking the Add button in the bottom-left of the dialogue for resolutions and export settings that I use frequently. Click Export, and Lightroom Classic will start processing and exporting them.
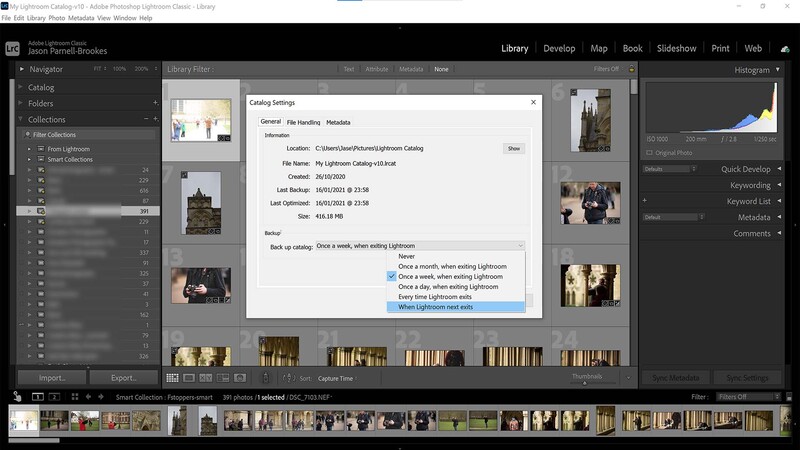
Back Up Catalog
Back up your Lightroom Classic catalog regularly to avoid any unwanted data loss from corruption
After all this organization, with the photo library in tip-top health, the last thing you'd want is for everything to corrupt and disappear. So, make sure you back up the catalog on a regular basis. Go to Edit>Catalog Settings, press the General tab, and choose your backup frequency from the drop-down menu. If you want to back up when you exit Lightroom next, choose the bottom option; otherwise, select something that'll suit your workflow, such as once a week.


No comments yet