
Encoding video files can become a crazy technical feat. I don’t blame people for using the preset options, even if they’re usually rubbish. Here’s how to fix three common problems, in unusually clever ways.
These are the three tips people have shared with me over the years, and will definitely save you time down the road. This isn’t a technical article, and it’s by no means a bible for encoding your footage. Unfortunately there isn’t a magic formula for every video you’ll make, but you can get close. While I’m using Adobe’s Premiere Pro here, the same settings show up in most places universally.
Tip 1: Exporting Quickly
You’re running out of time, the video should have been live an hour ago. You simply can’t sit around and watch a loading screen. How do you get things moving faster?
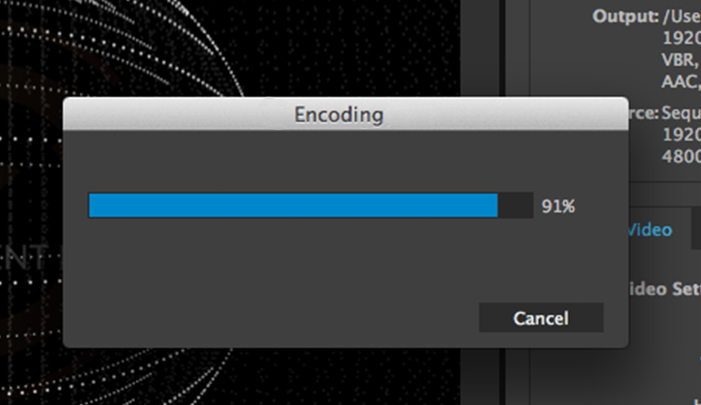
Well short of screen recording your editing system, which I’ve unfortunately had to do in the past, you can aim for certain formats and avoid others. If you export your video as an MP4, let's say, there’s a lot of compression going on. Your poor computer has to squash the video down to a small file size. However if you’re able to handle a bigger file size, you can avoid heavily compressed formats. Using Apple’s ProRes video format for example, is really easy for your computer.
So on Apple machines we can use any version of ProRes and the video will export at lightning speed. Testing it this morning, I exported the same ten second video as an MP4, and a Quicktime ProRes file. The MP4 took 24 seconds, while the ProRes only took 4. The downside is that you’ll get bigger file sizes, about five times as big.
You might assume that this is useless, but you can actually upload ProRes to YouTube! Not just 422, but the full 4444 version as well. YouTube doesn’t like it, and as such may not yield the best results, but it’s certainly the quickest way of distributing your video - granted you have a decent internet connection.
If you’re using Windows, you can avail of Avid’s DNxHD format, or GoPro’s Cineform format.
Tip 2: High Quality YouTube Uploads
I won’t go down the rabbit hole of uploading to YouTube and which settings to use here and there, but I will tell you that there’s a single setting that will greatly boost the quality of your online footage.
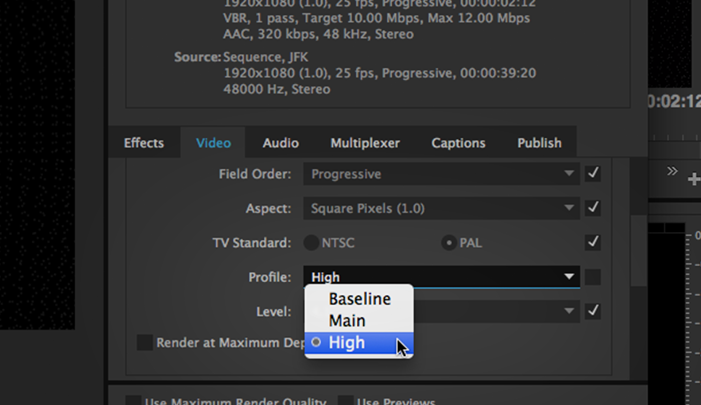
When exporting a H.264/MP4 video, you can set the profile. This defines how much your computer will be able to actually do to the video, how many "tools" it can use. By default this is set to Main, which is usually used for standard definition television. I’d recommend switching this to High, which is used for higher definition formats. It will give your YouTube and Vimeo content that extra push.
The only drawback to doing this, is that it can be difficult for computers to playback the file until it’s online. For example, if you send somebody this file via email, and they download it, the playback can be choppy. What we’re doing when we use the High Profile, is give YouTube more data than it needs, so that when it compresses the video there’s more data left over. However you should be weary that sending this file to a client directly may not work out, when you can’t be sure their computer will be powerful enough to play it back properly.

Tip 3: Avoid Lots of Moving Objects in Your Frame.
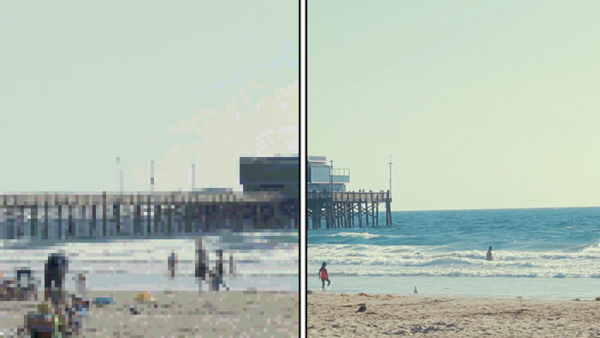
I’m sure we’ve all seen Spike Jonze’s perfume advert. Has anybody noticed how the video looks like utter mush at the end? This is because, when she’s jumping through the eye, there are particles scattered everywhere. The video compression has to account for so many more pieces of the puzzle, and it’s only got so much data to work with. Instead of making the file size bigger, it just compresses the hell out of your video. Tom Scott explains it wonderfully in a recent video.
So if you want the clearest image, avoid filling the frame up with moving objects when you can. Of course sometimes, it just looks too cool to avoid. It’s also worth noting that Sony’s famous Bouncy Ball video in San Francisco doesn’t fall at this hurdle. The image is clear as day. I can only assume that’s due to shooting in slow motion, and their amazing cameras avoiding heavy compression in the first place.
Hopefully these tips are far removed from the usual "just turn off motion blur!" pieces of advice, and save you some headaches in the future.
If anybody wants to delve into the specifics of why these tips exist, there’s a wonderful two part tutorial that I love recommending people, by David Kong. Check it out if you’re hungry for more information.
Update:
In Adobe's new 2017 release of Premiere Pro and After Effects, the DNxHD and DNxHR video formats are available natively. There's no need to install anything from Avid to get them working.


Join the Fstoppers community for free
-
Post comments and join in the discussions
-
Browse the site ad-free
-
Share your work and get featured in the community
-
Compete in the photo contests for fun and prizes
8 Comments
Apple’s ProRes video format not available for Premiere? Followed your link but it requires FCP, Motion or Compressor.
I can't actually verify, since it's already installed and working, but usually once a codec is installed it works across the board (be that MPEG Streamclip, FCP, Premiere etc).
Is exporting to ProRes really that much faster considering it creates such a large file size compared to MP4? While yes it may export faster it will upload slower. Plus you'd have a greater chance of losing an internet connection mid upload than your computer shutting down mid export no? You may want to consider testing how long an export/upload combined of an MP4 takes compared to a ProRes 422 file. Hell I'll run that test right now because now I'm curious.
Also if speed truly is a factor than maybe give FCPX a try as it has been proven to render/export faster than any other NLE.
Absolutely dependson your internet connection. I wouldn't chance this if I was running from a tethered phone, but thank god that doesn't happen often. Usually I find it takes a few minutes more from my home's connection, but that's quite fast so I might as well use it.
FCPX flies on OS X! At least from what I've heard.
I'm a fan of speeding up the process from the beginning, by editing in ProRes and making sure you're preview files are saving in ProRes - always a winner. I was only talking about exporting tricks here though and didn't want to bog the article down too much, even make more technical than it needs to be!
Ah, the first tip threw me off then because it does go into the discussion of uploading to Youtube, my bad.
I did end up doing that test though and here are the numbers for a 1 minute video that has music, titles, colour correction, audio and visual noise reduction, sharpening, and some masking applied.
Export times:
MP4 = 15 sec
ProRes = 12 sec
Upload times (Vimeo):
MP4 = 1:13 minutes
ProRes = 7:09 minutes
This is a tradeoff that people may want to take into account if it's crunch time.
Ouch, it's getting killed in the upload christ! No use trying this unless you know you have a killer connection then.
H264 profiles have nothing to do with standard definition or high definition, they each employ encoding algorithms with different complexity for different hardware. Both main and high profiles are used a lot in broadcast.
I figure this is the best way to explain the difference to people who are new to codecs, since it's so black and white. But you're totally right yeah, it's not linked to video definition directly at all.
For specs though, it's a specific difference in use for the profiles.
"The primary profile for broadcast and disc storage applications, particularly for high-definition television applications (for example, this is the profile adopted by the Blu-ray Disc storage format and the DVB HDTV broadcast service)."
http://preview.tinyurl.com/h58837b
https://en.wikipedia.org/wiki/H.264/MPEG-4_AVC