
Seldom is as much thought given to what the subject will wear than when preparing for a newborn photography session. Clients will often choose a color scheme to complement the baby room, or will select a relatively neutral palette, so that the finished artwork will look appropriate in any room. As newborn photographers, sometimes we’re called upon to make changes to the colors of a wrap, background, or accessory. Here are two fast ways of adjusting the color of a wrap using Photoshop.
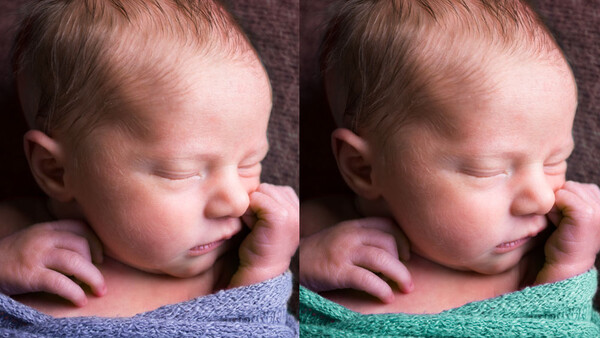
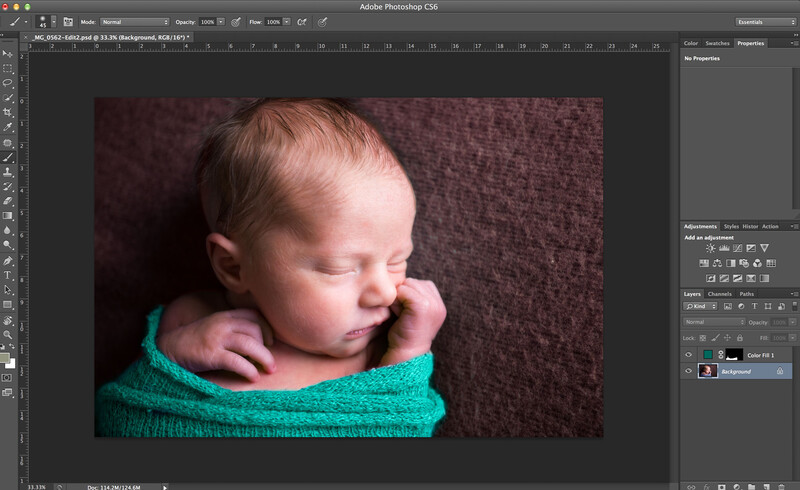
Wrapping a baby in cloth of a variety of colors will lend a few different "looks" to your images from a newborn photography session. It might seem like it would save time to simply have different colored wraps on hand, and change the wrap every once in a while during the session. But there are two reasons why I don’t like frequently changing the wrap during a session: there’s a good chance you’re going to wake up a baby who might have just taken hours to fall asleep, and changing the color of the wrap during post-processing is actually faster than unwrapping and re-wrapping a baby, asleep or not. In the image below, a mauve wrap is changed to teal using two different methods.
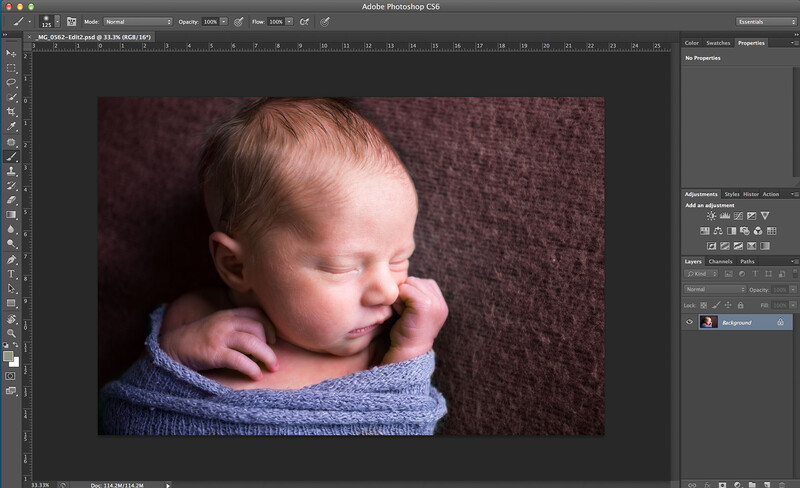
Method 1: Use a Hue/Saturation Adjustment Layer
Open the image in Photoshop. Click on the New Adjustment Layer icon (the half-filled circle at the lower right), and select Hue/Saturation. For this image, because I only want to change the color of the blue wrap, I selected Blues as the targeted color range. Hue was adjusted -70, and to tone down the intensity of the teal color, Saturation was reduced to -30.
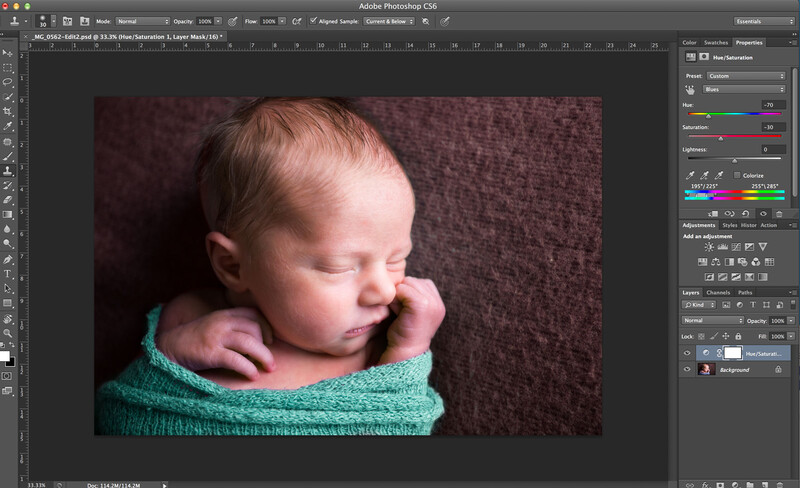
Method 2: Use a Solid Color Fill Layer Set to Color Blending Mode
Open the image in Photoshop. Click on the New Adjustment Layer icon, and select Solid Color. Choose the color that you’d like for the wrap, and click Ok. Then change the Blend Mode from Normal to Color.
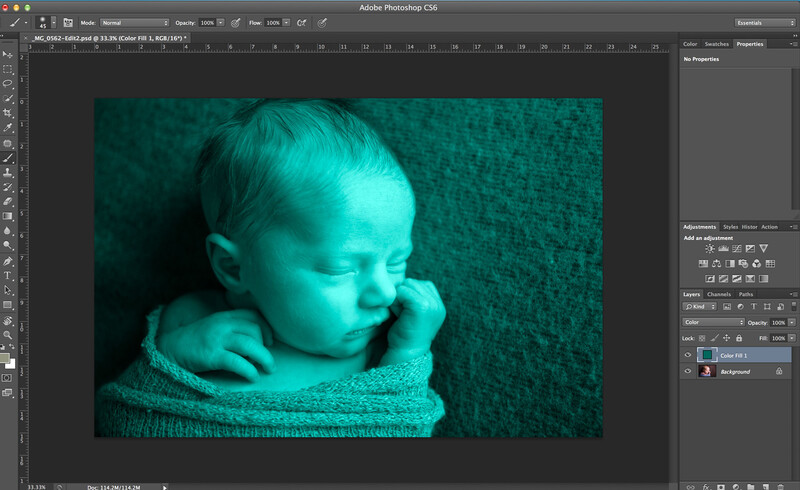
This will make the whole image take on the color cast that you chose. To restrict the color change to the wrap, click on the layer mask for the solid color layer, and invert the mask using Ctrl+I (PC)/Cmd+I (Mac). Using a soft white brush at 100% opacity, paint in the wrap. This method can take a bit longer than the first method, but once the wrap has been masked, it makes it easier for other modifications to be made to the colored wrap, such as adjusting brightness and contrast.
There is always more than one way to perform the same task to an image in Photoshop. These are my two preferred methods for changing the color of wraps, backdrops and accessories for newborn photography sessions. With practice they each take only a minute or so to perform, and can be applied to changing colors in any type of image.


Join the Fstoppers community for free
-
Post comments and join in the discussions
-
Browse the site ad-free
-
Share your work and get featured in the community
-
Compete in the photo contests for fun and prizes
1 Comment
for me this is more a problem of the way you prepair your shooting.i do not need to do such things , since i ask customers some days before session what kind of color they wish , and i have a full set of item props ready.no need to cheat color , since everything go together