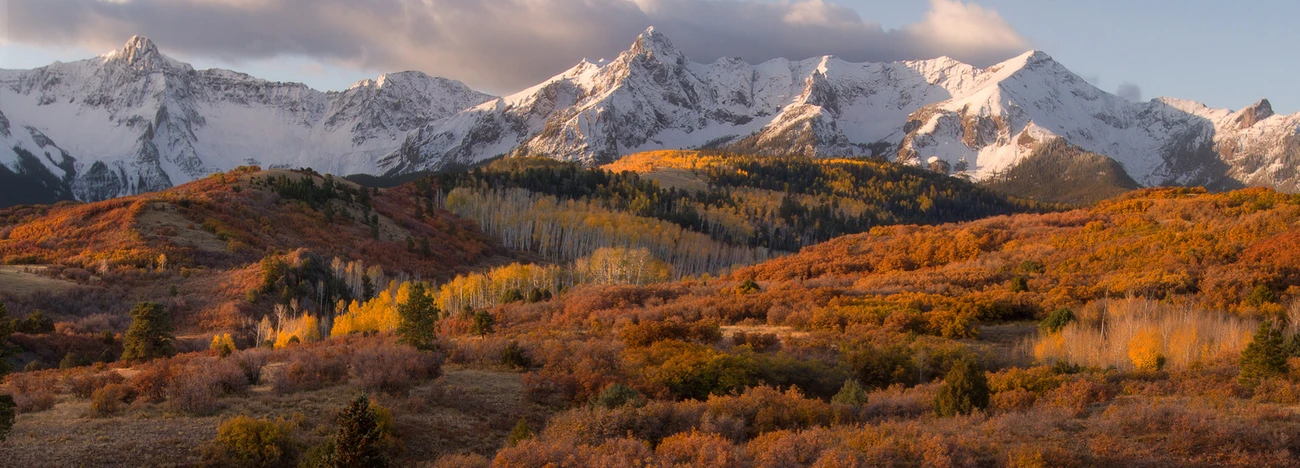
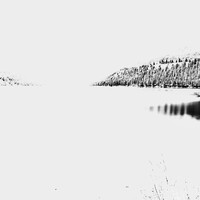
Bootjack Mountain and Rangeland
I have driven past this spot many times and often thought that if I could get the right cloud structure over it, and good light that it would make a nice image. That day happened in early June of this year. I used a Canon 6D with a Canon 17-40L lens. The conversion was done using Photoshop only. I exposed it in segments so that I could make an extremely large if I wanted to by combining them into a single panoramic image.


4 Comments
How many stitched images and what was the jpeg file size... Inquiring minds wany to know?
I haven't tried it on my new laptop but my old would chug and hang around 1.2+ GB file size.
Nice capture as well.
Okay, this is lengthy but here's what I do. Six or seven as I recall. I used the camera in a vertical orientation. My camera is a Canon 6D so each file would have been about 80mp +- Focal length would probably have been in the neighborhood of 20-30mm of length. Here's my procedure.
I set up the tripod and zero it out, meaning that the center column is perpendicular to the earth and I use a small level that I keep in my camera backpack to do that. I zero out the head so that it's parallel to the earth using the same method. I then attach the camera and I use Linhof Quickfix attachment devices for all my cameras. (It's the only quick attachment and release devices that I trust. A bit more expensive than others, but I have never had one fail, unlike other devices.) After that I make sure the camera is perpendicular to the ground after I move it to a vertical orientation. Again, use a level for this procedure, spirit levels built into pan heads and tripods are not reliable. Once the camera is attached I determine a composition and take the came off auto focus, since I want the exposure for each segment to be exactly the same. Make your first exposure, either on the right or on the left and establish a procedure for you that is always the same. I start on the extreme left of my composition and expose a little loose on my composition meaning that I include more on the left than I will use. Note where the frame ends on the right side, make your first exposure and check the histogram so you don't have clipping, highlight or shadows. Make my first exposure and rotate the camera on the tripod head to a spot that slightly overlaps the previous exposure. Make the next exposure and repeat as needed until you have included all the material you will want to show and leave some relief on the right side as well. Upload the files to your computer using whatever software you like. I use Adobe Light Room. Use Lightroom to make universal adjustments to each frame and export them to a folder. Open the images in Photoshop, again it's what I use for better or worser. I Photoshop go to image>automate>Photomerge and select one of the options. Tell Photoshop to do the merge in one of the options. It's hard to know which one will work best since it varies by the images, then observe the results. If you don't like then try the next option until you find the one that works best for your purposes. That's a rather lengthy explanation, but it'w how I do it. Others have other methods and that's fine. It's just that this is my procedure and it works well for what I want to do. BTW, I do not use jpeg for anything unless it's something like photographing a bunch of Little League kids. For work like this I always use camera RAW since it gives me the most flexibility in my final image.
Sorry I wasn't clear, Jpeg as the final image, not for editing.
BTW, I thought so but I wasn't 100%. The only reason I make an image into a jpeg is if it's to be posted to the interweb. My usual is to export it as a psd and most recently as a png with the newer version of Lightroom, which I think they have adopted as their native file type. If I have a digital image being exported it will go out as a psd. If it's a scan from a film negative I will usually save it as a TIFF.