You can hike all day, reach a location with a clean view, and still walk away with nothing because you rushed the setup. This video is about building a repeatable process so the light doesn’t decide whether you get a usable frame.
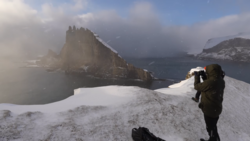
Coming to you from Dave Morrow, this field-tested video walks through Morrow’s five-step system for landscape shooting, and it starts by calling out habits that sound “serious” but often slow you down. He argues that defaulting to manual mode, leaning on autofocus, hauling too much glass, and locking yourself onto a tripod too early can turn the whole session into a scramble. Instead, he treats the hour before sunset as the real work window, not dead time. You arrive, set camp, then start building options while the light is still flat. The goal isn’t to collect random frames, it’s to remove the second-guessing that hits when the sky finally turns on.
Morrow’s first practical move is almost annoyingly simple: scout handheld first, then commit. He explains why he prefers grabbing the camera and moving fast, using a shutter speed that keeps practice shots sharp, and only setting up the tripod once the spot is chosen. He demonstrates how small shifts in height and angle change what feels like “scale,” and how quickly a locked-off setup can trap you into micro-adjusting instead of seeing new compositions. There’s also a quiet warning in there: if you only start thinking once the light improves, you’re late. He’s not trying to make you shoot more, he’s trying to make you miss fewer moments you’d actually want to edit.
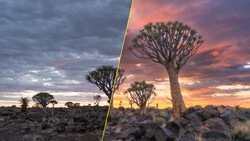
Once a frame is picked, the video gets more specific about how he tests the shot before the peak light arrives. He talks through focusing about a third into the scene as a practical hyperfocal approach, then checks focus by nudging the ring while watching live view. He pairs that with “expose to the right,” watching the histogram’s right edge, and he’s candid that the only way to know whether you need one exposure, multiple exposures, or something like focus stacking is to run the sequence once when the pressure is low. He also shows how wind changes the decision tree, including when he’s willing to bump ISO to protect the foreground from blur. It’s a calm look at tradeoffs you usually feel in your stomach when the clouds break for 20 seconds.
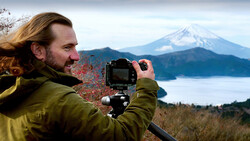
The second composition is where he sets up by an alpine lake and uses a vertical framing example to show how a wide angle perspective stretches foreground and peak size, then brings up the option to blend a second frame if the scene is too tall to fit cleanly. He also previews how he looks for color pairings when the sky shifts, and how he plans for reflections when wind roughs up the water. Later, when the light actually starts to hit the peaks, you see him switch from planning to execution: check the histogram, check the closest detail, shoot at a steady cadence, and re-evaluate sharpness before jumping straight to focus stacking. He even shares a blunt internal standard for whether a scene is worth chasing, and he doesn’t pretend the mountains cooperate most nights. Check out the video above for the full rundown from Morrow.
And if you really want to dive into landscape photography, check out our latest tutorial, "Photographing the World: Japan II - Discovering Hidden Gems with Elia Locardi!”
Join the Fstoppers community for free
-
Post comments and join in the discussions
-
Browse the site ad-free
-
Share your work and get featured in the community
-
Compete in the photo contests for fun and prizes
1 Comment
Great info, he has a very well trained "Photo Eye" and what helps he does his own editing meaning he knows before hand what editing can do. Yes few use Manual Mode most use the camera computer in Aperture mode, no one will ever know what mode you use, Duh!
First you have to out there wherever out is and with plenty of time to scan all around, you can do it in your own neighborhood or someplace near or a short drive for you see and scan as you drive to and from every day, like for those who work you spot the places everyday just can not stop but a hour early trip you get time!!!
There are apps on your phone/pad or computer where you can track the sunrise/set every day or week, like you want a combo rise and set twice a day it a happens in May and Sept the sun rises in the east and the moon sets in the west for a fore and aft capture or a 180 pano with both. TPE is a good start but PhotoPills has more than one can thing. and weather apps are a many with clouds high and low even fog. Planit Pro even has a tide view in a sinewave at the bottom so if around a beach you will know high to low and back at the times you can plan.
I traveled one time along the gulf coast from Alabama to mid Florida stopping at St. George Island the whole way was cloudy overhead but my app showed a clear night checked is and got some shut eye and got up when the MW was to rise went out the door and there it was well the camera saw it a dream come true a all night shoot.
I live in north Florida with shrimp boat pier close, getting out before a sunset and knowing cloud heights before I go there to get dinner and capture the sunset but I use Bracketing 5 at +/- 2EV with a 16mm or my 24-240mm or my old APS-C E 10-18mm (15-27mm in 35mm) f4 OSS but I use in Full Frame mode for a little light lens with panorama wide capture and all hand held captures with a Sony A7SM3 or A7RM5 and the bracketing allows for even part blue hour and sunset below.
MW capture early like 5 days or less before in March to June you can capture a crescent moon looking full below the MW.
Also know your lenses some can get close like a macro but not labeled as one for those cold morning ICE Flowers in a big Hayfield already harvested with ICE Flowers close to the ground as far as one can see.
All being said for all to look close by vs dreaming and saving for that far away place for you can train the photo eye locally.