
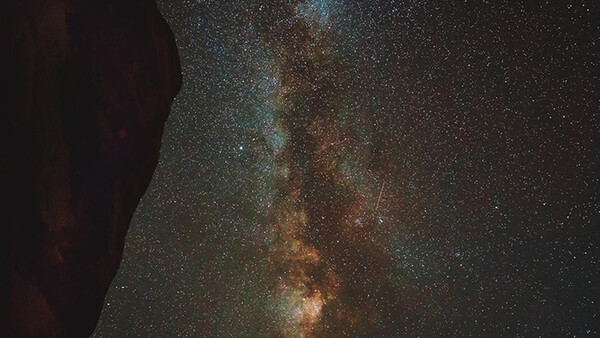
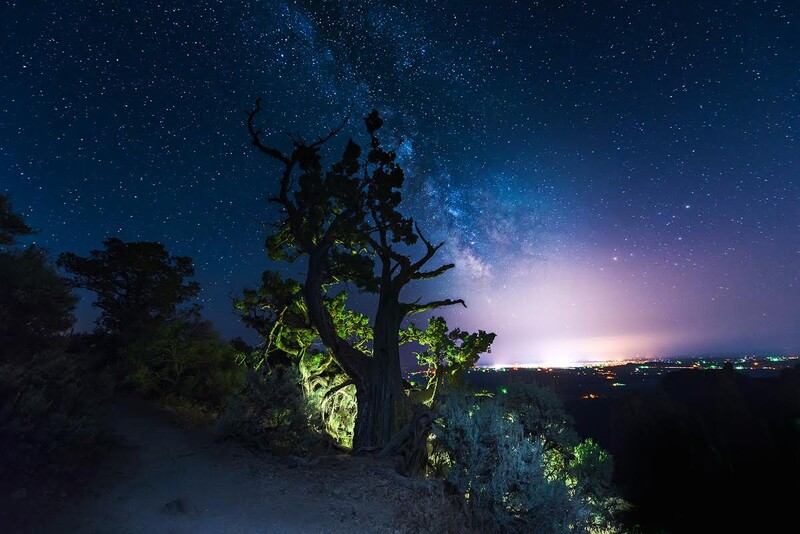
If you have ever been in a remote enough place and looked up at the night sky, you know how magical the universe can be with countless stars dotting a black canvas overhead. Many photographers capture the night sky with their camera resulting in spectacular images. But it’s one thing to step out into your backyard and point your camera up, and a completely different adventure to hike out to a remote location and capture the cosmos with the wilderness as your backdrop.
Some of the most compelling images are taken from the most remote locations, requiring skill and knowledge of backpacking, photography, and survival. If you’re looking to take your astrophotography to a new level and want to experience the thrill of pulling an all-nighter chasing the Milky Way, make sure you’re prepared and educated so you can return home with some amazing images.
Make a Plan
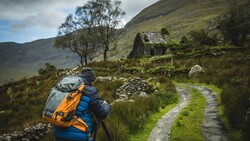
As with any hike, you need a plan. Simply setting out on even the most popular of trails without taking precautions is unsafe. Make sure to bring a friend and have basic emergency response equipment. A night hike shouldn't be your first hike so make sure you’re prepared.
Location
You’re going to be out in the dark so choose a hike you know or one you can research well and get a lot of information about. Start with your state’s local lands or any nearby national parks and forests and check out your state’s recreation websites. See where other astrophotographers have shot before and don’t feel you need to reinvent the wheel. Asking locals will give you great insider information as well.
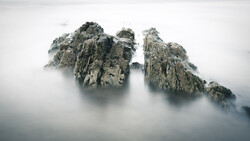
Evaluate your choices on how far you will need to travel and the activity level it will require to reach your shooting location. Some hikes are short but elevate very quickly and you don’t want to tire yourself out. Also make sure you will have a good view of the night sky. Surrounding yourself with trees doesn't make for the best astrophotography. Generally summits are great vantage points as they put you above everything else.
Light Pollution
You’re not going to be able to go out any night and walk away with amazing photographs of the night sky. Stars are bright but can easily be washed out by light pollution and the moon. Plan your trip away from cities. Even small towns can cause a haze in your photos when you’re taking 30-second exposures. Use websites like Blue Marble and Dark Site Finder to make sure your location is dark enough.
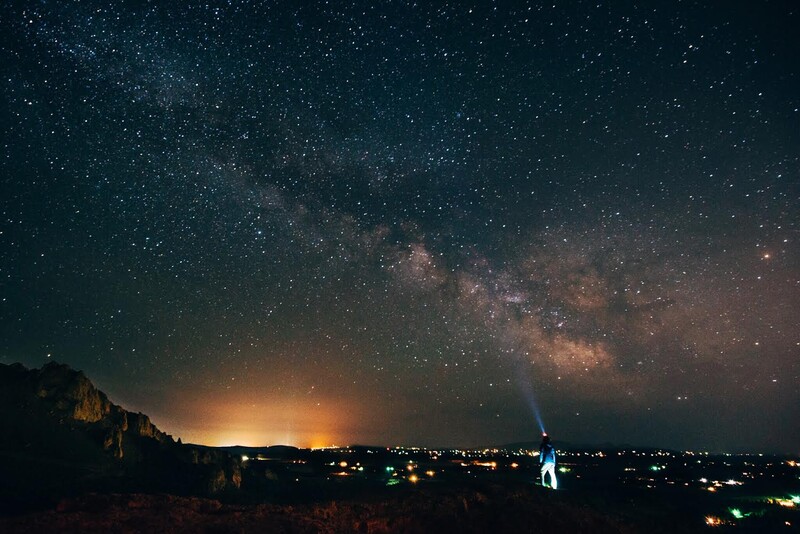
Another troublemaker is the moon. A full moon is going to light up the night sky and wash out all your images. Plan your trip around a new moon or when the moon is set behind the earth. Time and Date can pinpoint your location and give you all the information on when the moon will be at its darkest and when it will rise and set in the night sky. Especially when shooting the Milky Way, you are going to want the darkest skies possible.
Weather
Rain is obviously not ideal when taking photos outdoors, but clear skies are extremely important when it comes to photographing the stars. Clouds, overcast, and even temperatures are all important when deciding when and where to go. Look at satellite and radar maps for clear skies and check the forecast for your destination even on the day of, making sure conditions won’t distract from your images.
What to Pack and How to Pack It
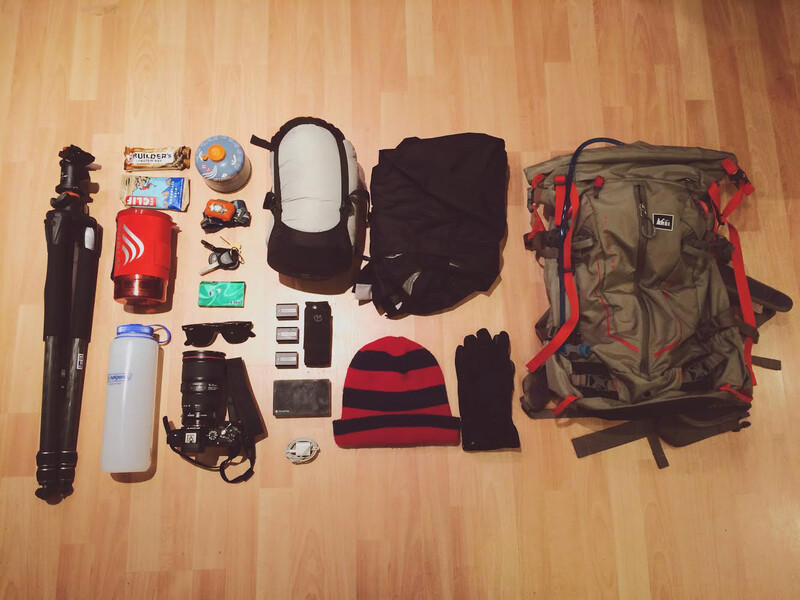
When carrying gear on your back, every ounce matters. Pack too much and you will fatigue quickly. Pack too little and you’ll have to cut your trip short. Think about the essentials and the absolute must-haves and go from there.
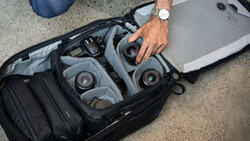
Camera Gear
A camera and a nice wide, fast lens are necessities. Don’t pack every lens you own as this just adds weight. You won’t want to be fumbling with lenses in the dark anyways. You will also need a solid tripod and a shutter release system. Use a cable release or the camera’s self-timer if you don’t have one. To get the sharpest image, you don’t want your camera moving at all. You’ll also need a way to see in the dark and head lamps are perfect for hands-free illumination.
Backpack
A simple daypack will do you just fine. If you’re planning on camping during your trip, a larger pack might be required, otherwise a 20 to 30 liter backpack will suffice. Stow bulkier, less essential gear at the bottom of your pack and more handy items you will need to get to quickly near the top or in external pockets. Pack up your bag before leaving home, making sure it fits well and is not too heavy. Walk up a flight of stairs a few times to see how you feel.
Energy
Hiking and staying awake all night requires energy. Proteins, carbohydrates, and good fats are all essential. Bring trail mix and lightweight snacks like nuts, fruit, and energy bars. Also consider a tool like a Jetboil for hot meals, but consider these a luxury if your pack is starting to get full. You might also consider caffeine to help stay awake, but you’ll be surprised how much simply moving around and your endorphins will keep you awake and alert through the night.
Warmth
It gets chilly at night, especially in high altitudes and deserts. Bring a hat and pack layers. A big puffy jacket takes up space and having a few different layers instead will help you keep your body heat in check. Stay away from cottons if you can and stick with synthetics that both allow your body to breath during strenuous hikes and stay warm when you’re standing still.
Get Out There
Now for the hardest part: overcoming your reservations and getting yourself out there. It might be easier, cheaper, and safer to stay home but you will regret it more if you don’t go. The adrenaline, adventure, people you’ll meet, and the results you walk away with will all be worth it.
Driving
Plan to leave so you will arrive at your destination with plenty of sunlight left, especially if you are not extremely familiar with the location or trail. Bring snacks, tunes, and pick a good driving buddy. When parking your car, make sure you are in an area you can park overnight. No tickets or towed vehicles, please.
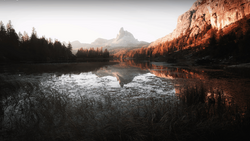
Location
It’s important to scout the area and pick out your shoot locations before the sun goes down. It’s hard to see in the dark so know where you’re going to point your camera and what elements you will have in your foreground when composing your shots. Don’t be intimidated of hiking around for awhile, even back to the trailhead or campsite before everything gets dark.
Setup
Have your camera settings, lenses, and gear ready to go before dusk. Once it's dark, find the Milky Way using apps like StarWalk or Stellarium. If it's dark enough, you'll be able to see a thick band of stars in the southern sky if you're in the northern hemisphere. Unfold your tripod and lock your camera in and enjoy the evening. Don't be afraid to try new vantage points and experiment with different techniques. You've got all night, remember?
In the morning you're going to be tired and sore, but when you get back home and start editing your images, you'll be glad you made the adventure.
What tools do you use when shooting the night sky? What are some of your favorite locations to shoot the Milky Way? Are you planning a trip to try astrophotography for the first time?
All images used with permission.
14 Comments
Going to Alaska in July. With 19 hours of daylight, I may forget to point my camera at the sky.
Those long golden "hours" are gonna be nice!
This was a month ago, my first try in Astro/Nightphotography. Since then always bad weather condition.
I might have pushed the raw proccessing too much, but whatever it's my first try and many more a coming.
Thanks for the article!
It took me a year or so of trying to get a really good shot, but it's worth the work! I'm liking the tones in this one for sure!
Yeah, I'm aware that landscapephotography, especially night/astrophotography takes alot of time and effort to master. Thanks for your comment :)
My personal favorite app is Go Skywatch Planetarium, which I am afraid is only for iPad or tablets as I could not make it work on my phone....Best locations in UK, I would say - the South Coast and more particularly Cornwall as the Milky Way spears down South on the night summer sky and in this direction you could not have light pollution. 2 years ago had some results photographing the night sky from Seven Sisters and the white cliffs....not bad results, but the Galaxy is not as bright and colorful due to the light pollution from the coast of France. Same results from rural Oxford shire where camping in summer - still see it even with your naked eye, but not as bright.
N1 location in Europe for this type of photography Canary Islands [if you considered it Europe:] and more particular Tenerife - https://youtu.be/I2WWDbsvD8A , all factors for great astrography click together there.
After that on my list are the Greek Islands in Aegean sea and the mountains of Eastern Europe - Bulgaria, Romania, etc.
Good look Everyone photographing the night sky and the MilkyWay.
Awesome! I think I want to try star trails next. Just hard to dedicate a whole camera for a few hours to one photo.
I would definitely add that astrotrackers are seriously much more affordable these days (Star Adventurer, Astrotrac, Ioptron, etc) and can create stunning wide angle shots of the Milky Way. Definitely not good if you do plan on backpacking but some of them are still relatively portable. This was shot on an APSC at about 2.5 minutes which allowed me to drop the ISO to 640 and reveal some incredible detail with creative PS editing. If you have even the slightest interest in astrophotography a tracker can be a blast to experiment with and you can even have a go at the Orion Nebula, Andromeda, etc with only a 200mm lens.
I am glad you mentioned something about getting over reservations. It can be sort of self intimidating at times but you totally nailed it--JUST GO SHOOT!
If I hadn't I would not have shot this :)
A lot of times that is the biggest hurdle for me. Getting out of the house and doing the work to get to that amazing view, summit, etc. It's always wroth it though. Even the time my camera died and I had to shoot entirely on my iphone. Still worth it.
Clear Sky Chart (http://cleardarksky.com/csk/) provides short term forecast for the night sky. There's also an Android app.
@ Arches National Park https://www.flickr.com/photos/ajithraj/sets/72157635420231511
14mm , 30 Secs, ISO 3200, No Moon day, Used "Planets"- Android App for tracking Milkyway
Only 1 lens and camera body? no remote trigger? Most importantly no flask?? I don't know guys I don't think they were all that ready to go out night shooting! lol ;)
Some situations require carrying more equipment. But when it comes to trekking into the wilderness, weight is of utmost concern. Packing only the essentials is important to energy conservation and comfort. Plus the a7s has a built in trigger so...