The soft glow effect has floated around photography for years, built with layers, filters, actions, and paid panels that promised the look for a fee. Adobe just baked it directly into Camera Raw, and the version that ships with the app beats every workaround people have relied on.
Matt Kloskowski walks through the new glow setting in the latest Adobe Camera Raw and explains why it changes how you should approach the effect. The effect, sometimes called the Orton effect, adds a soft, hazy glow that landscape shooters have leaned on for a long time, with street photographers borrowing it now and then. Kloskowski is blunt about the upside: you can apply this on a raw photo, go back later, and tweak it without ever leaving the raw space. He's less thrilled that it's stuck in Camera Raw for now and hasn't reached Lightroom yet, though he expects it to make the jump eventually. He also keeps expectations grounded, calling it an incremental addition rather than something you'd apply to every shot.
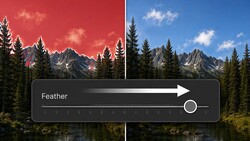
The controls get real attention in the video. The glow slider sets the amount, and it works mostly on highlights and the midtones sitting near them, leaving shadows largely untouched. Three styles do the heavy lifting: diffusion for that filmic, hazy spread across the frame, bloom for a softer glow that concentrates on bright areas, and hellation for a retro, vintage look that suits neon signs and night scenes. Range broadens the tones the effect reaches, spread controls how far the glow radiates from bright spots, and warmth pushes the affected areas warm or cool without shifting the whole image. Holding the Option or Alt key shows you exactly where each adjustment lands, painting the targeted areas white so you can see what you're changing.
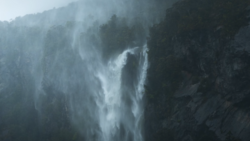
Where the tutorial gets genuinely useful is masking. Kloskowski resets the global glow, selects a landscape mask, and applies the effect only to the mountains, subtracting the sky to clean up the spill. On a waterfall scene, he masks just the water so the falls pick up a misty softness while the clouds and foreground keep their detail. The glow slider even goes negative inside a mask, so you can dial back a global glow in specific spots. He treats masking as the backbone of his editing, arguing that Adobe has handed you the tools to select nearly anything and adjust its tone, color, and contrast right there in raw.
That masking-first mindset connects to a broader shift worth understanding. For years, precise local adjustments meant a trip to Photoshop, a selection, and a stack of adjustment layers. Adobe's AI-driven masks in Camera Raw and Lightroom, including sky, subject, and the landscape category that splits a scene into ground, water, mountains, and more, have moved that work back into the raw file where it stays fully editable. Pairing the new glow with those masks fits that direction perfectly. You get a stylistic effect that used to demand destructive layer work, and you can confine it to one element, reverse it, or re-edit it months later. If you shoot early-morning landscapes or foggy scenes where a touch of atmosphere matches what you actually saw, this is where the effect earns its place. On a detail-heavy frame that already feels chaotic, a light glow can calm the noise without you committing to anything permanent.
Watch the video above to see how Kloskowski dials in each style on real photos and confines the glow to a single ridgeline or waterfall using masks.
Join the Fstoppers community for free
-
Post comments and join in the discussions
-
Browse the site ad-free
-
Share your work and get featured in the community
-
Compete in the photo contests for fun and prizes
No comments yet