
Over the years, seascape photography has become the area of my work where shutter speed decisions matter most. Waves never repeat themselves, and small changes in exposure time can completely alter how water behaves in an image. A fraction of a second can preserve structure and texture, while a longer exposure can simplify the scene and emphasize static elements. Learning how shutter speed affects water is one of the most important technical skills in coastal photography.
What often gets overlooked is how deliberate testing helps build this understanding. Rather than reacting to conditions, controlled comparisons allow you to see exactly what changes when exposure time increases. In seascapes, shutter speed is not just a technical setting; it is a creative choice that directly affects balance, movement, and visual weight within the frame.
To explore this properly, I wanted to remove as many variables as possible. The aim was not to find the best image, but to study how water movement evolves as shutter speed changes. The composition, framing, aperture, ISO, and light were kept consistent, allowing shutter speed to be the only variable. To make this possible without constantly changing filters, I used a single hybrid ND filter, the Freewell V2 Hybrid, which offers a variable neutral density range from three to seven stops. This form of test would allow me to make changes quickly, without having to swap out different filters each time, and because the conditions were overcast, the light would remain the same, more or less. Finally, as the tide was coming in, I needed to move fast; the scene would have changed a lot between shots otherwise. Everything was in place; it was time to begin.
The Test Begins
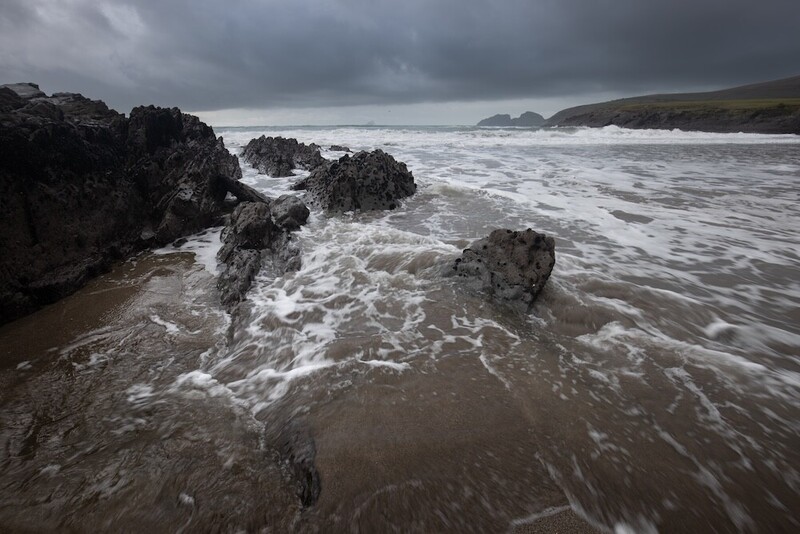
I began with a base image taken without any filters. The available light allowed for a shutter speed of 1/30 second at f/11, ISO 100, using a 16mm focal length. At this exposure length, wave motion is largely frozen. Individual shapes in the water remain defined, and texture is clearly visible. This type of shutter speed works well when clarity and structure are the priority, particularly around rocks or strong foreground elements, but for my eye, it's not a considered shot; it's more of a snapshot.
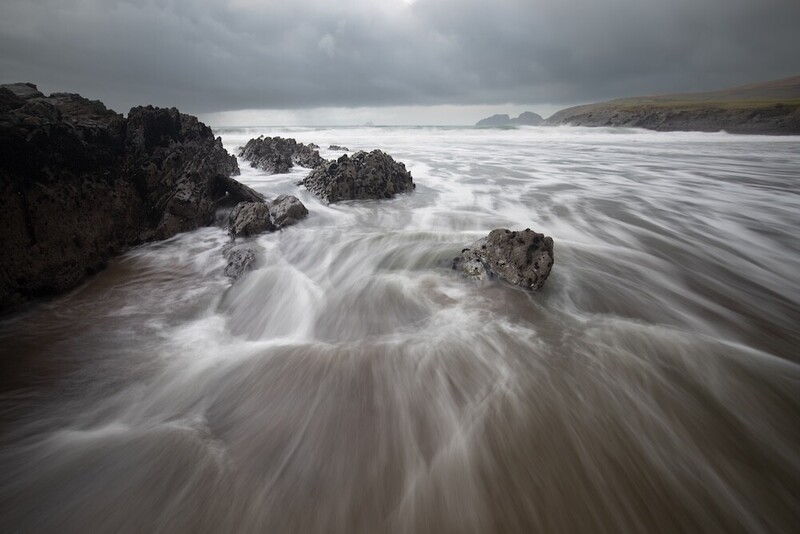
From there, I increased exposure time in stages using the variable ND range on the same filter. At 1/4 second, f/11, ISO 100, using a 16mm focal length, in the image above, movement becomes visible but remains controlled. The water begins to blur slightly as it moves, while still retaining form. This range works well when you want to introduce motion without losing detail. This was done by setting the filter to 3 stops of ND and using the built-in polarizer.
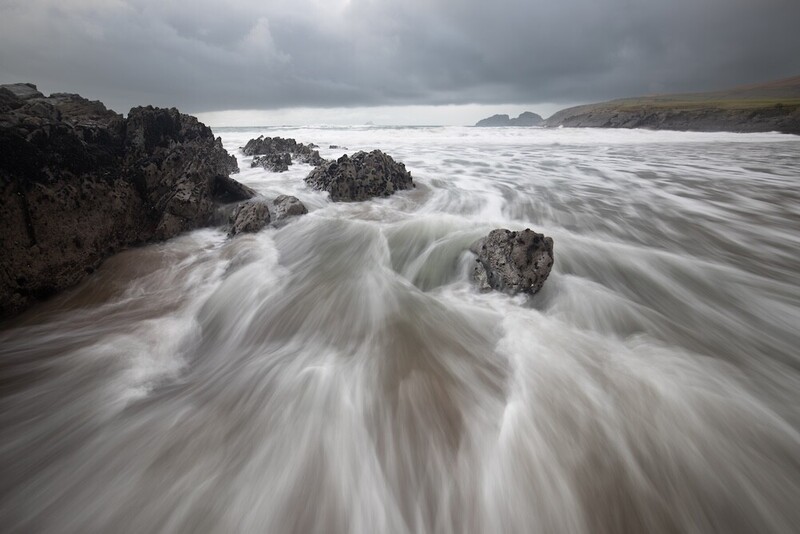
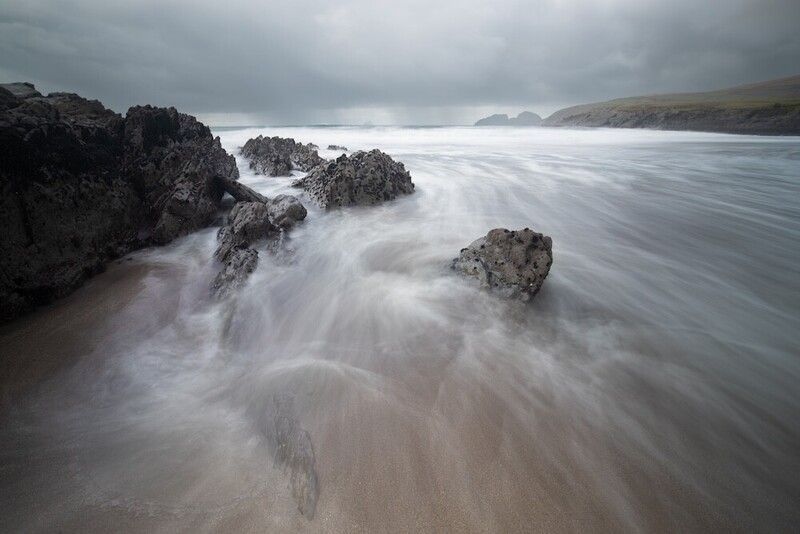
At 1/2 second, f/11, ISO 100, using a 16mm focal length, the balance starts to shift. Motion becomes more pronounced, but texture remains present. This is a shutter speed I often return to, as it shows flow and direction in the water while avoiding complete smoothing. It allows the viewer to read the movement without it dominating the frame. This was done by setting the filter to 4 stops of ND and using the built-in polarizer.
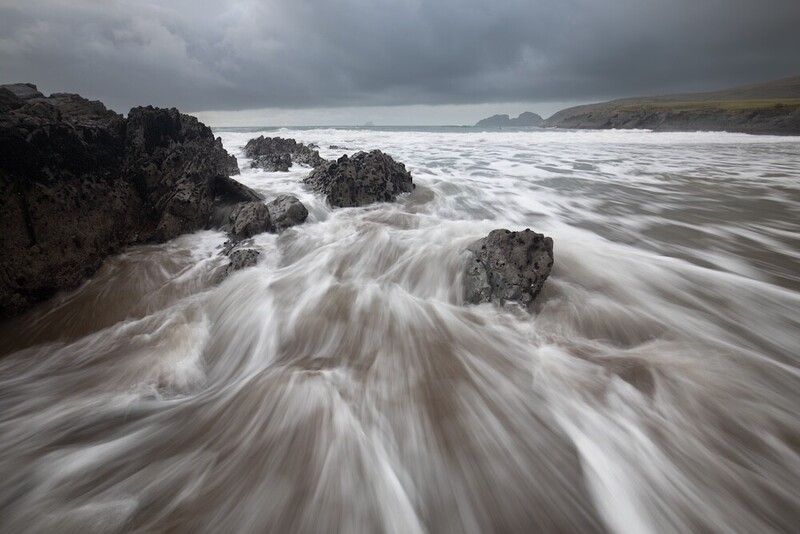
At one second, f/11, ISO 100, using a 16mm focal length, smaller details in the water begin to merge. The image becomes simpler, and motion feels more continuous. This can be effective in scenes where the foreground is busy and needs to be visually reduced to support the overall composition. This was done by setting the filter to 5 stops of ND and using the built-in polarizer.
At two seconds, f/11, ISO 100, using a 16mm focal length, the detail reduces further, and the wave structure becomes less defined. In stronger conditions, this can feel too long, but in calmer water, it can still work well. Timing becomes more critical at this point, as the direction and speed of the wave have a larger impact on the result. This was done by setting the filter to 6 stops of ND and using the built-in polarizer.
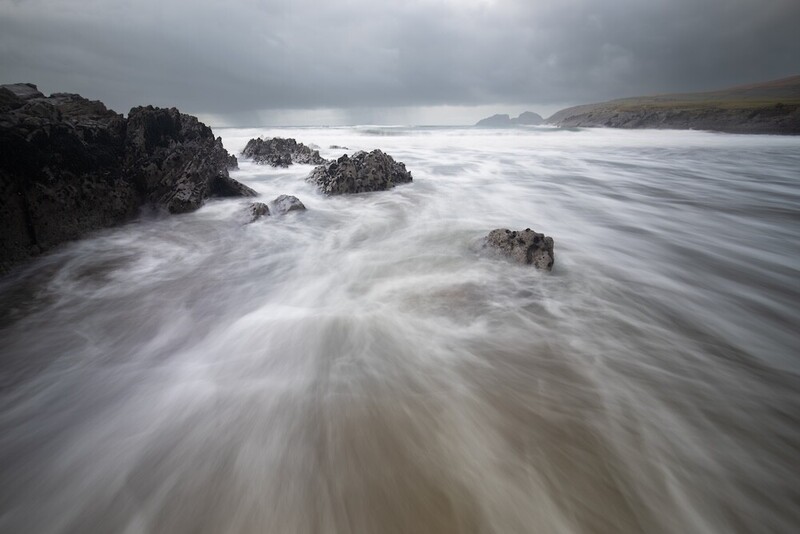
At four seconds, f/11, ISO 100, using a 16mm focal length, the water moves continuously throughout the exposure. Individual wave shapes disappear, and the water becomes a smooth, flowing element within the frame. Static features such as rocks become more dominant by contrast. This exposure length can simplify a scene significantly, but it also removes much of the energy from the water. This was done by setting the filter to 7 stops of ND and using the built-in polarizer.
The Results
All of these exposure changes were achieved using the same filter, without removing or swapping anything. This was one of the main advantages of the setup. Being able to move through multiple shutter speeds quickly is particularly useful when light is changing, or when recording video and trying to maintain a consistent shutter speed as conditions shift.
The filter also includes a built-in polarizer, which can be rotated to adjust its effect, but it cannot be removed. This means there is always some degree of polarization present in the frame. In practice, this resulted in parts of the image being polarized even when it was not always desirable. This was most noticeable in wider scenes, where uneven polarization could affect different areas of the frame. I did not find this ideal, and it requires awareness when composing and adjusting the filter.
Despite that limitation, the ability to carry out a full shutter speed study with one filter highlighted an important point. Equipment matters far less than understanding what shutter speed is doing to the water. The filter simply allowed the test to happen efficiently, without interrupting the process or changing other settings.
The Learnings
From a learning perspective, this kind of controlled testing is extremely valuable, I feel. Nothing in the scene changed, yet each exposure produced a different result. It also confirms the idea that there is no correct shutter speed for seascape photography, only choices that suit the conditions and the intent behind the image.
For photographers looking to improve their coastal work, repeating this type of test in different conditions is one of the most effective ways to build confidence and consistency. The better you understand how water responds to exposure time, the more deliberate and controlled your images will become. If you want to go deeper on post-processing your long-exposure seascapes, Photographing the World: Landscape Photography and Post-Processing is an excellent resource. The example images I took in this test show the wide variety of shots that can be achieved by just changing your shutter speed. Remember, everything else remained constant — ISO, aperture, and focal length. Only the shutter speed and ND level were changed.
Do you have a preferred shutter speed when it comes to seascape photography? For me, it's 1/2-second shots that I tend to gravitate to mostly; however, I am sure that for others, this effect isn't what they like in their shots, and of course that's OK.
Photography is subjective, and you should shoot what you want the way you want to shoot it, so I would be interested in hearing your thoughts on this subject, and if you have examples of your work, then I would love to see them in the comments below.


Join the Fstoppers community for free
-
Post comments and join in the discussions
-
Browse the site ad-free
-
Share your work and get featured in the community
-
Compete in the photo contests for fun and prizes
1 Comment
I tend to agree I'm around that quarter 2nd to half a second. I love the texture in the foreground because they are essentially deleting lines into the seascape. I love doing wave photography at slower speeds. I am either shooting at a quarter of a second to half a second or I go 30 seconds to completely flatten it out in between just leaves mush in my view. It leaves a kind of mushy texture that I don't like the look of if there is some misty light in the air then that's a little bit different as you want to capture that but it's just good to play. My other tip is don't buy cheap ND filters or cheap filters at all, they are terrible for image quality. The brand that I use even has a CPL ND in one filter. The other tip is don't use a CPL filter on a wide angle lens. It looks terrible as you end up with a circle in the top of the sky. You probably need to be 28 mm or above to use a polar are on a wide angle lens.