
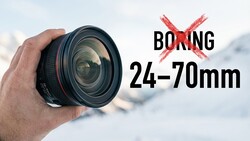
Vary your landscape photography perspectives. Learn how adjusting your tripod's height can completely transform your wide angle compositions.
In landscape photography, we often obsess over the technical trinity of exposure: aperture, shutter speed, and ISO. We also concentrate on techniques such as filters and exposure bracketing. When working with wide angle lenses, there is another variable that is frequently overlooked, mostly by beginners, yet equally critical to the final composition: perspective.
Many photographers habitually deploy their tripods at full extension, shooting from eye level for ergonomic convenience. While this approach is functional, it fails to take advantage of the unique optical characteristics of wide angle glass. The height of your tripod is not merely a matter of comfort; it is a powerful narrative tool that shapes the spatial relationship among your foreground, middle ground, and background.
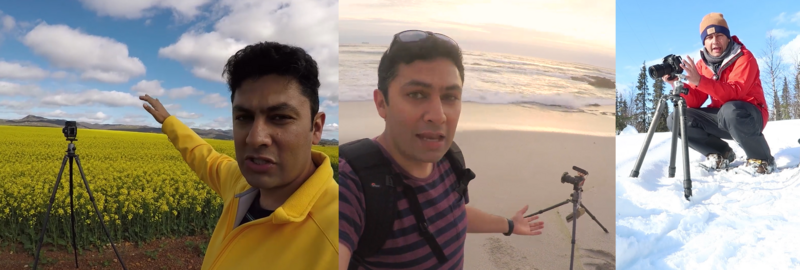
In this article, we will explore the relationship between wide angle lenses and tripod height, examining how shifting your tripod’s height can completely transform the mood and scale of an image.
The Optical Illusion: Compression vs. Separation
In photographic composition, lenses fundamentally alter the perception of space. A telephoto lens creates true distance compression by optically reducing the perceived space and making elements appear closer, which is ideal for making backgrounds more imposing. Contrarily, a wide angle lens typically expands distance, but can achieve what we can call “compositional compression” by placing the camera very close to a foreground subject, making it appear overwhelmingly dominant and creating a link to the more distant scene. Mastering both the optical flattening of telephoto lenses and the perspective exaggeration of wide angle lenses is crucial for controlling scale and establishing relationships between different elements in your image.
Because wide angle lenses make objects close to the lens appear larger while distant objects appear smaller, your tripod height determines how much “visual real estate” is allocated to the different layers (foreground, middle ground, and background) of your scene.
1. The Low Perspective: Intimacy and Impact
When you lower your tripod to its minimum height, often just inches off the ground, you drastically alter the viewer’s perception of the scene.
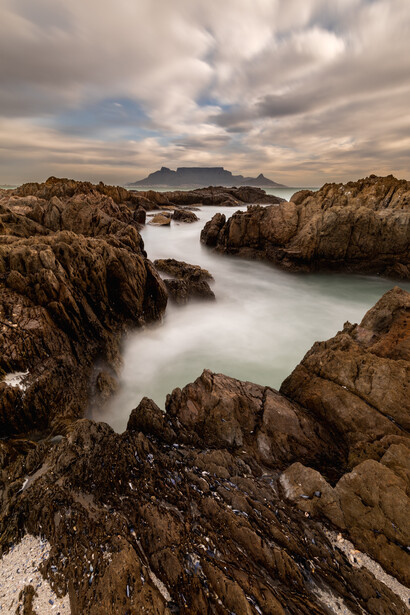
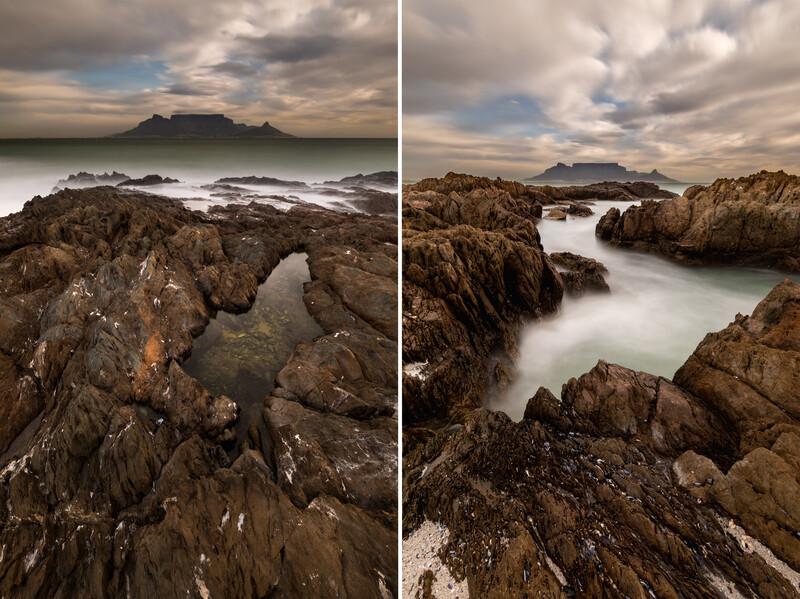
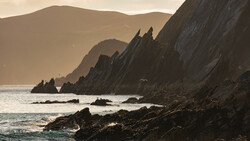
The Visual Effect: Shooting low with a wide angle lens visually compresses the middle ground. By placing the lens close to foreground elements, such as rocks, flowers, or textures in the sand, you make these elements appear monumental. At the same time, the middle ground, often the ocean or a field, is obscured or foreshortened.
The Result: This technique creates a sense of immediacy. In seascape photography, for example, a low angle can make the background mountain appear to sit directly atop the foreground rocks. The “spacer” of the ocean is removed, creating a compact, intense composition that invites the viewer to step right into the frame.
When to use it:
- When the foreground texture is the hero of the shot.
- When the middle ground is empty or uninteresting.
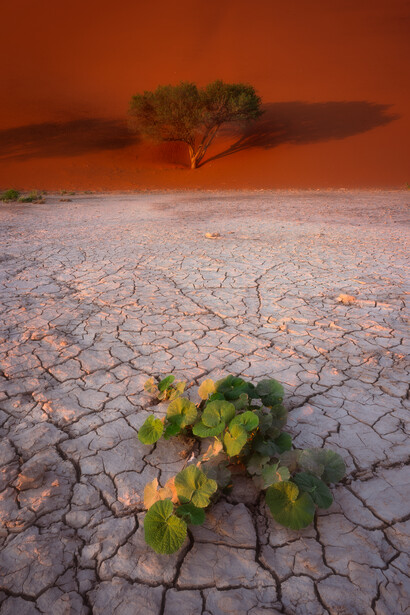
- When you want to exaggerate the scale of small subjects, e.g., a small plant in a desert landscape.
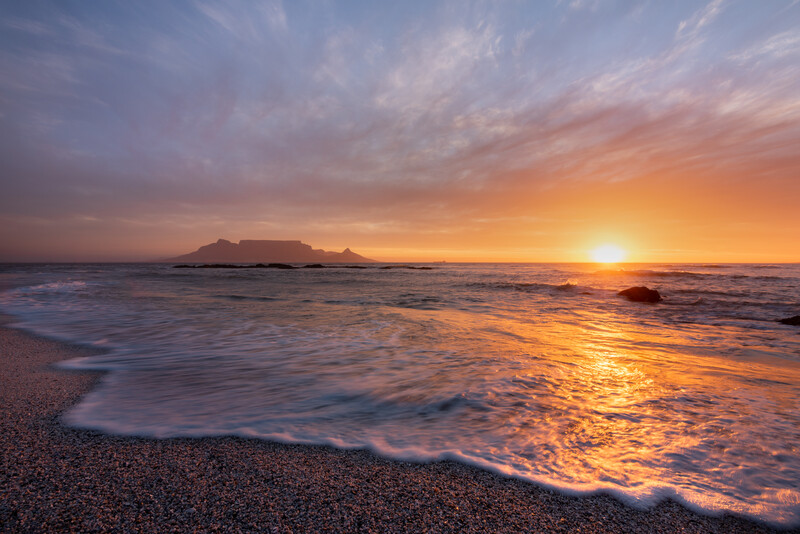
Here’s another example of a seascape where a lower tripod angle makes the foamy, receding waves in the foreground prominent, and the middle ground is somewhat suppressed.
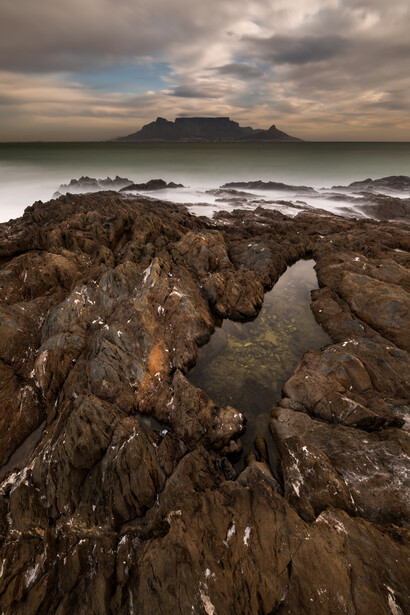
2. The High Perspective: Separation and Flow
Conversely, extending your tripod legs to raise the camera, often to four to six feet, introduces a viewpoint we can call “uncompressing,” or separation.
The Visual Effect: As the camera rises, the angle changes. The middle ground, which was hidden in the low shot, expands and reveals itself.
The Result: This creates a sense of depth. Instead of the background stacking on top of the foreground, the high angle reveals the path between them. In a seascape, this allows you to capture the textures of the water, the reflections of the sky, and the movement of the waves.
When to use it:
- When there are leading lines (like a river or path) that guide the eye.
- When the middle ground contains essential information, such as reflections.
- When you want to depict the vastness and distance of a location.
Here’s a side-by-side comparison of the two shots:
The Forest and The Desert
This principle applies beyond the coastline.
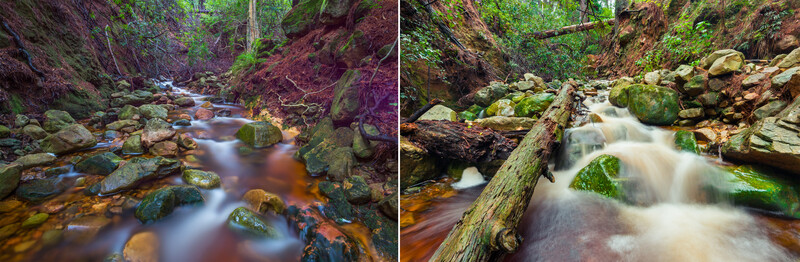
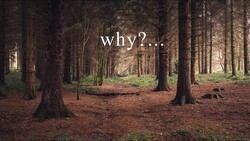
Consider a dense forest environment, such as Newlands Forest here in Cape Town. If one were to shoot from a low angle, the rushing water of a stream might dominate the frame, obscuring the path of the river. However, raising the tripod reveals the stream's winding nature, showing how it snakes through the trees. The high angle provides context and depth that a low angle conceals.
In contrast, consider a flat, cracked desert floor in Namibia with a single, small plant. Seeing it from eye level makes the plant appear insignificant against the vast dunes. By dropping the tripod low, the wide angle lens exaggerates the plant's size, allowing it to command the frame and balance the visual weight of the massive dunes in the background.
The Workflow: Don’t Fix Your Position Prematurely
The most common mistake landscape photographers make is setting their tripod height before fully analyzing the scene. This behavior limits creative potential.
Upon arriving at a location, keep your tripod packed. Move through the landscape with your camera in hand. Physically squat down, lie on the ground, or hold the camera high above your head. Watch your LCD screen to observe how the relationship between the foreground and background shifts as you move vertically.
Only once you have identified the precise height that best serves your subject matter should you deploy the tripod.
Conclusion
By its very nature, a wide angle lens is an instrument of distortion. As the photographer, it is your responsibility to control the perspective. By mastering the variable of tripod height, you move beyond simply documenting a scene and begin interpreting it, deciding whether to compress the world for impact or expand it for depth.
Join the Fstoppers community for free
-
Post comments and join in the discussions
-
Browse the site ad-free
-
Share your work and get featured in the community
-
Compete in the photo contests for fun and prizes
4 Comments
Great advice. Thank you
You are welcome.
Great article that gave me great advice to think about!
you are welcome.