A strip softbox can change the way your portraits look with one small shift in light placement. If you shoot people and want more control over shape, edge highlights, and background spill, this modifier earns its place fast.
Coming to you from Ed Verosky, this practical video walks through what a strip softbox is and how to build and use one in real setups. Verosky uses a Godox Strip Softbox with a Bowens mount speed ring and shows every part that matters: tension rods, inner baffle, front diffusion panel, and optional fabric grid. You see how the rods lock into the speed ring, how the inner baffle clips in, and why the recessed front edge leaves room for the grid. He mounts it to a speedlight using a Bowens S-type adapter, then to a strobe with a built-in Bowens mount.
Once it’s built, Verosky moves straight into real portrait uses. You see the strip used as a key light at roughly 45 degrees, slightly above eye level, angled down. That narrow shape gives a different shadow pattern than a round softbox. Catchlights look more vertical, and the falloff across the face feels tighter. He also shows a centered, high placement for a narrow butterfly look, and how to turn it into clamshell lighting with a reflector below. Starting settings are simple: ISO 100, 1/250 second, around f/8, then adjust flash power from 1/16 to 1/4 until exposure lines up. The process is methodical and easy to repeat in your own space.
Where a strip softbox really stands out is as a rim or kicker light. Placed behind and to one side, it skims along the edge of the subject and separates them from a darker background. With a round key light on camera left, adding the strip on camera right brightens the shadow edge and cuts a clean line down the hair, shoulder, or torso. Verosky shows versions with and without a grid so you can see how much control you gain over spill. The grid keeps light off the background and off the lens. Power for the rim often sits about one stop brighter than the key, then adjusted by eye. Watching the highlight width change as the light moves closer or farther gives you a clear sense of control.
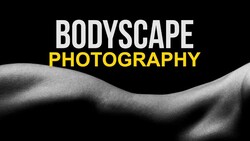
He also demonstrates bodyscape and figure lighting, where the strip’s long, narrow shape becomes the main design tool. Turn it vertical for a standing pose and light one side of the body against a dark background. Turn it horizontal above a reclining pose and rake light across texture and contour. Because the beam is controlled, especially with a grid, you can keep most of the frame black while carving out specific highlights. Camera settings stay consistent at ISO 100, 1/250 second, f/8, then flash power is adjusted after test frames. You see how small changes in angle create entirely different shapes on the body.
The final setup uses the strip as a background light to create a controlled gradient. With the subject placed 6 feet or more from the backdrop and the key light locked in, the strip is aimed at the background from low, high, or off to one side. The result is a vertical or diagonal band of light that adds depth without flooding the set. Verosky walks through balancing the background exposure separately from the subject so each light does one job cleanly. Check out the video above for the full rundown from Verosky.

Join the Fstoppers community for free
-
Post comments and join in the discussions
-
Browse the site ad-free
-
Share your work and get featured in the community
-
Compete in the photo contests for fun and prizes
No comments yet