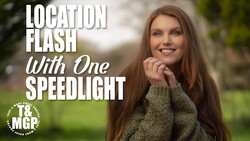
A single speedlight sitting in your camera's hot shoe can produce portrait light that looks like it came from a big window or a softbox, as long as you know where to point it. Most people never get there, because direct flash looks harsh and the usual fix is a pile of domes, diffusers, and brackets that can cost more than the flash itself.
Ed Verosky builds a short on-camera flash course around a leaner idea: one flash, TTL metering, and whatever room you're standing in. The gear list is short. You need a modern digital camera and a flash that works with your camera brand's version of TTL, so a Canon body needs a Canon Speedlite or a third-party unit made for Canon. Verosky shoots Sony with the Godox TT685S, where the "S" marks the Sony version, and Godox makes a variant of that flash for each major camera maker. He puts a lot of weight on getting a flash head that both tilts and swivels, since nearly every technique he teaches depends on aiming the light somewhere other than straight at your subject.
TTL stands for "through the lens." When you press the shutter button, the flash fires a low-power preflash, the camera measures how that burst lands on the scene, factors in your settings, and then sets the power for the real flash. All of that happens so quickly you'll barely see the preflash. Because it recalculates every frame, TTL handles changing conditions well, which makes it a natural fit for wedding receptions and events where you're constantly moving between rooms and distances. It also works in any exposure mode, including manual, so you can choose your aperture, ISO, and shutter speed while flash power adjusts on its own. When TTL guesses wrong, flash exposure compensation lets you push output up or down for the next frame. Shutter speed then becomes your ambient control: a slow setting like 1/5 s pulls in more of the house lamps, while something like 1/250 s lets the background fall darker.
Softness comes from the size of the light source relative to the subject. A flash head is only a few inches across, but the patch of light it throws onto a wall a few feet away can be several feet wide, and that patch becomes your actual light source. Bounce does cost power, since the light travels farther and the wall absorbs some of it. TTL covers much of that loss automatically, and the clean high-ISO files from current sensors make raising your ISO to 800 or 1,600 a reasonable move when the flash runs out of headroom or starts recycling slowly. Bounced light also picks up the color of whatever it hits. A beige wall warms skin, a green one can make people look ill, and wood paneling soaks up light while adding an orange cast. White ceilings and neutral gray walls keep your color predictable, which is why scanning a room for a clean surface before you start shooting is a habit worth building. The same logic explains why bounce falls apart outdoors. With no nearby walls or ceiling, there's nothing to throw the light back, and you're left with a small, hard source again.
Verosky's favorite setup is the wall bounce. You and your subject face each other about 3 feet from a light-colored wall, and you swivel the flash head toward the wall and angle it up slightly so it creates a large reflection. In small and medium-size rooms, you also get light bouncing off the other surfaces, which fills shadows from several directions. He suggests working out your own preferred distances between you, your subject, and the wall, then starting from those numbers every time and adjusting as needed. He also covers two inexpensive modifiers: the Sto-Fen Omni-Bounce, a plastic diffuser that scatters light around the room, and a homemade bounce card cut from craft foam and strapped on with a rubber band. A second bounce technique uses the wall behind you to light one or more people evenly, and it comes with a specific warning about flash angle so your own body doesn't get in the way. Even with all that emphasis on bounce, Verosky keeps a spot for plain direct flash. Pointed straight ahead with no modifier, it gives a fun, spontaneous, no-frills look that works well for quick portraits or a photo booth effect.
Verosky's starting camera settings and the full details of that second bounce setup are waiting in the video above.
Join the Fstoppers community for free
-
Post comments and join in the discussions
-
Browse the site ad-free
-
Share your work and get featured in the community
-
Compete in the photo contests for fun and prizes
No comments yet