Lightroom has some impressively powerful denoising tools, and they can help you rescue images that might not work otherwise. This helpful video tutorial will show you how to use them for landscape images.
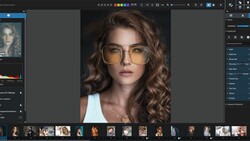
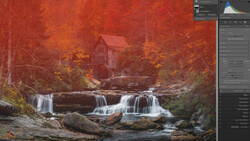
Coming to you from Christian Möhrle - The Phlog Photography, this detailed video provides a deep dive into the nuances of editing underexposed images using Lightroom's noise reduction tool. Möhrle starts with a scenario where an image shot at ISO 6,400, primarily underexposed except for the sky, demonstrates the potential of post-processing to salvage details from shadows without introducing noise. This initial situation underscores a common issue you might encounter: the choice between accepting noise or losing details. Möhrle's approach, favoring a single raw file over HDR to avoid artifacts caused by moving clouds, presents a strategic decision-making process that balances technical constraints with aesthetic goals.
Further, the video illustrates a step-by-step adjustment process, beginning with profile changes for saturation enhancement and basic corrections to improve exposure and contrast, without compromising the natural look of the sky. The emphasis on selective adjustments, like modifying temperature for warmth and applying AI denoise at an optimal point in the editing workflow, showcases an effective method to enhance image quality meticulously. This guidance is vital for you if you seek to understand how to manage noise without degrading the image's integrity. Check out the video above for the full rundown from Möhrle.


Join the Fstoppers community for free
-
Post comments and join in the discussions
-
Browse the site ad-free
-
Share your work and get featured in the community
-
Compete in the photo contests for fun and prizes
1 Comment
"applying AI denoise at an optimal point in the workflow"
This is a major sticking point - you have to generate an intermediate DNG file before you can proceed further. DxO's DeepPRIME works directly and non-destructively on a RAW file and isn't applied until final export, so there are no RAW workflow complications. For a high-volume event shooter like me, Adobe's workflow is a deal-killer.