
We are often confronted with funny fringing around contrasty edges in our photographs, especially in our first experiences with editing. Here, you will learn why they appear and how you can avoid them.
We can roughly differentiate between two types of fringing: chromatic aberration and so-called “halos”. Here, we will talk about both of them, even though chromatic aberration is a problem with a quick solution, while halos are a little more complicated.
Chromatic Aberration
Chromatic aberration appears as a colorful edge around an object, mostly when we shoot into the light in a contrasty scene. Green, purple, blue: Chromatic aberration can come in different hues and all of them look bad.
Why Does It Appear?
Chromatic aberration is a problem with our gear. When the light enters our lens, it passes different elements. The job of each and every element is to bend the light in a way, that creates a sharp image on our sensor depending on our focus point and the chosen focal length.
One of the big challenges for lens manufacturers is the different wavelengths of the entering light which we perceive as colors. As each color (and there are a lot, if not infinite, of them) has its own wavelength, it is also bent a little differently. Good lenses are built to lead every wavelength where it belongs. Yet, no lens is perfect. Even the most expensive high-quality lenses might show little signs of chromatic aberration in some situations.
What Can We Do Against Chromatic Aberration?
We can try to avoid chromatic aberration by shooting with good glass or acknowledging the weak spots of our lens. But would you simply not push the shutter release only because of some purple fringing?
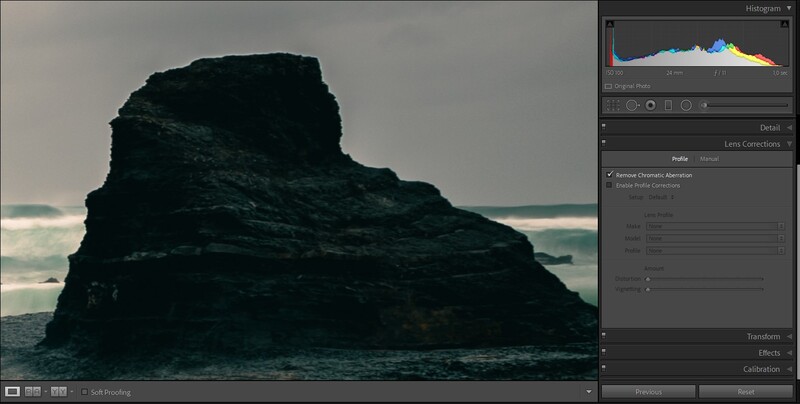
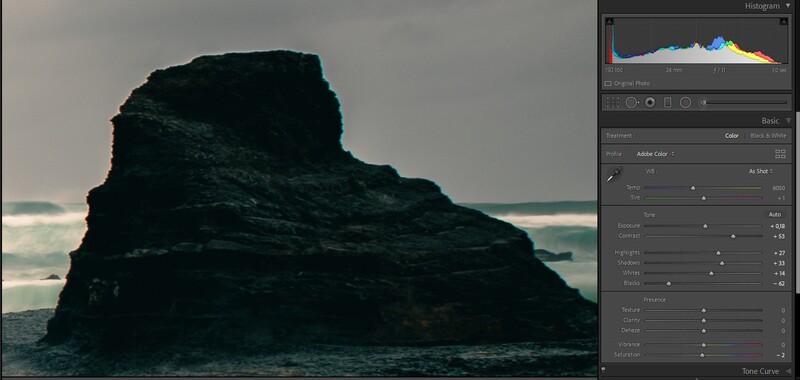
Luckily, our editing software knows about this problem all too well and offers a helpful tool. In Adobe Lightroom, you can simply hit the “Remove Chromatic Aberration” checkbox in the “Lens Correction” module. It works well for most cases.
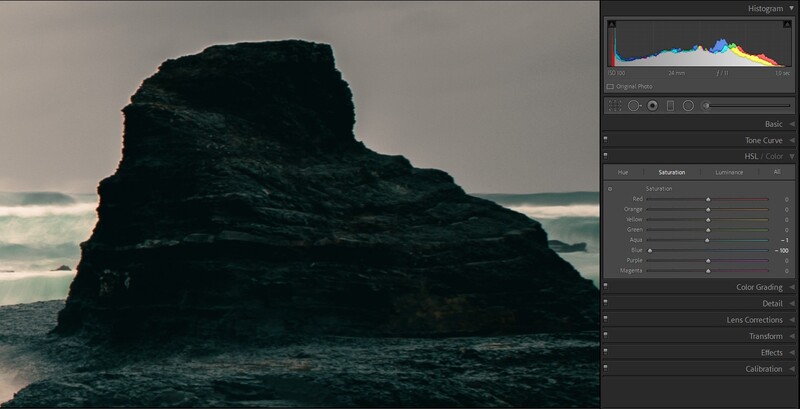
In the past, I also had to deal with some color fringing, which couldn’t be removed by checking this box. In these cases, I used to desaturate the chromatic aberration’s color in the “HSL” panel, but it only works well if that color isn’t too prominent in the rest of your image.
Editing Can Cause Halos
While chromatic aberrations are imperfections of your glass, achromatic halos are usually manmade, mostly in the process of editing. Although I have the feeling that Lightroom got better and better at avoiding halos, they still appear every now and then.
How Sharpening Affects Your Edges
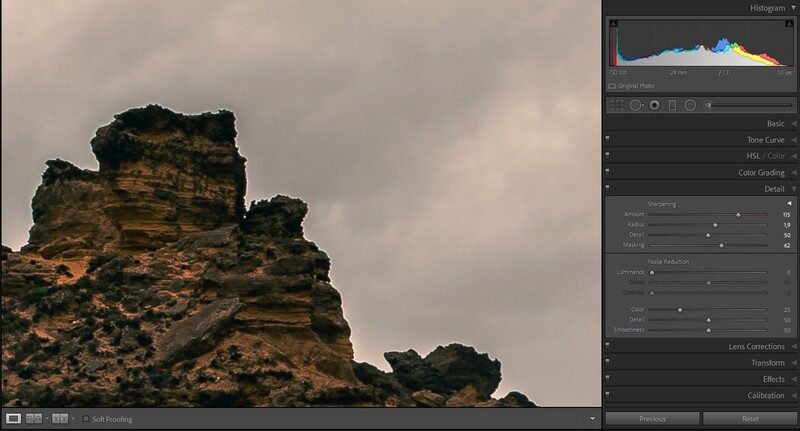
Sometimes, haloing is an effect of too much sharpening. Sharpening an image means increasing its contrast on a very small level. To increase this “micro-contrast”, our editing software makes dark pixels darker and bright pixels brighter wherever they are near each other. In many cases that’s great. Structures of rocks, water, or human eyes can be emphasized by sharpening the image. Globally and used with caution, everything simply looks sharper and more intense.
But there is a downside, too. When we increase sharpening, an object against the horizon will appear darker around its edges, which might be all right. However, the sky or another bright background can cause problems: The pixels closest to the dark object will become brighter, hence causing a small (and ugly) halo.
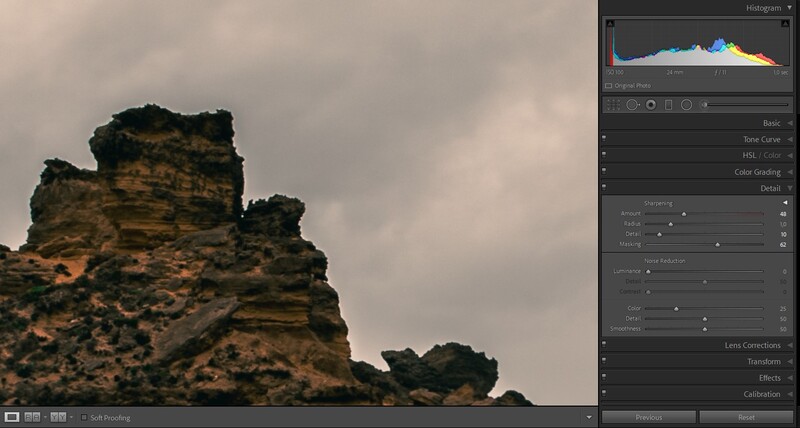
What can you do to avoid it? Simply leave your sliders where they are. If you have to decide between less sharpness or ugly edges, you should always take the first.
Clarity Can Cause Halos, Too
Not only sharpening can cause these problems – increasing clarity does it as well. Clarity works similar to sharpening only at a broader area. Hence, its haloing doesn’t appear as a small line, but rather as a bright glow around the edges. A true halo!

What can you do to avoid it? Again, don’t over edit your photograph. “Clarity” is one of the most seductive sliders, because it gives an edgy (got the joke?) look to it. When I started photography, it was my favourite slider. I thought it makes my pictures look unique. Slowly, I realized that photographs should look unique because of the way they are taken – no the way they are edited. Nowadays, I use the sliders only if I have a good purpose for them. Since the “Texture” slider appeared in Lightroom, there are even less occasions where clarity ads a lot of value.
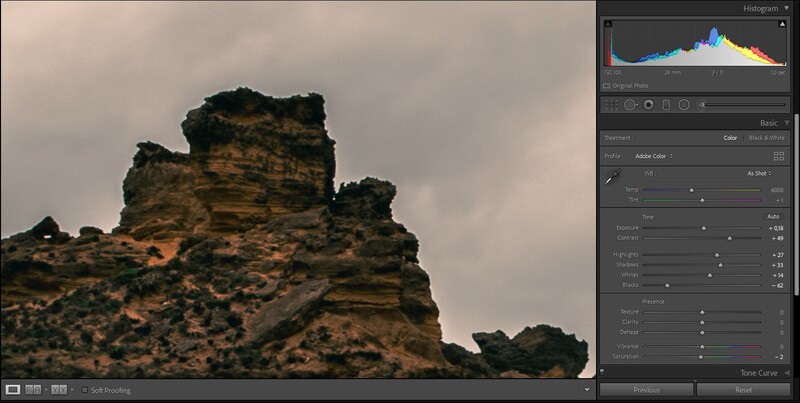
If you still need a lot of clarity, you can try to only add it to local adjustments – or use a soft “Adjustment Brush” to remove clarity from the areas where it disturbs you.
Editing the Sky
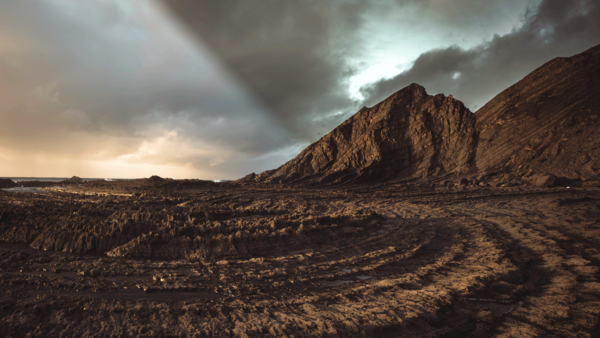
During my development as a photographer, I had to deal with haloing less and less, because my editing became more subtle. The only time it still appears every now and then is when I edit the sky separately from the ground. Using the digital “Graduated Filter” from Lightroom helps to keep detail in the sky while pushing the darker areas of the ground a little bit.
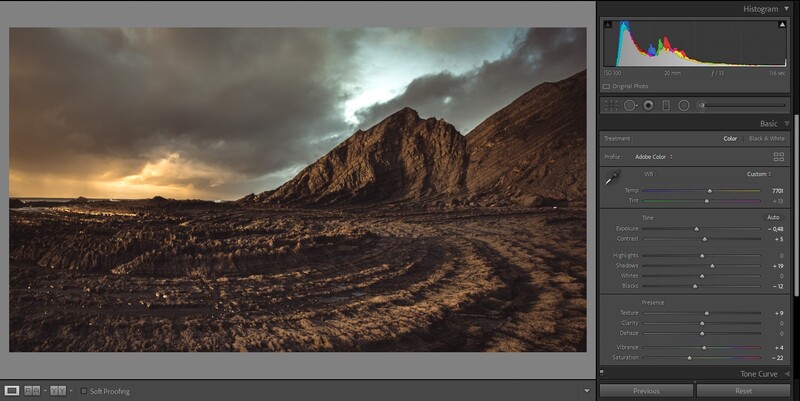
In the same way our clarity and sharpness affect the edges, other local adjustments might also cause some problems. In the case of the picture above, I wanted to push my photograph to its limits. You can clearly see the halo around the small mountains. It’s the result of heavy global editing plus a graduated filter that emphasizes the structure and clarity in the sky as well as darkening it down. It was an impressive storm on location, including dramatic sunrays and everything you could wish for as a landscape photographer. I wanted to bring this to life in the process of editing. But failed, somehow.
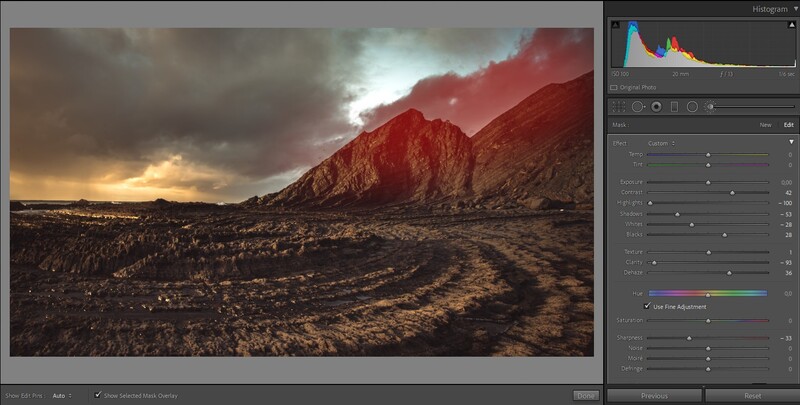
How can you deal with such a complex halo? This halo isn’t just a result of one slider. It’s a mixture of everything. One way to deal with this halo is counterbalancing it with local adjustments. There is no universal recipe, though. You simply have to experiment.
Why Haloing Isn’t All That Bad
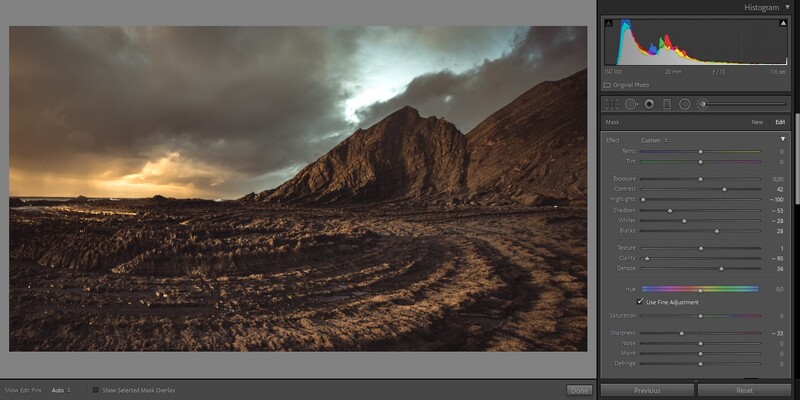
As you can see, even after editing the edges with the adjustment brush, there is still some halo left and it disturbs the image. Instead of trying to edit even harder, I can also reduce the edits and enjoy the lecture: Photographs can be edited, but you need a good basis. In this case, a softly graduated ND on location would have done the job. Our goal as photographers should be to get everything as good as possible in-camera.
Secondly, haloing can be seen as a warning sign. Especially when we edit a lot of images at once, we can become blind to over-editing. Halos are a good indicator that we might have gone a bit hard on the clarity or sharpness. In this case, halos can be a blessing, especially when you make your first steps in post-processing.


Join the Fstoppers community for free
-
Post comments and join in the discussions
-
Browse the site ad-free
-
Share your work and get featured in the community
-
Compete in the photo contests for fun and prizes
No comments yet