

Photography has been around long enough to accumulate a thick layer of conventional wisdom, and much of it is wrong. These myths get passed from forum to forum, YouTube comment to YouTube comment, and camera-store counter to camera-store counter with the confidence of established fact. The problem isn't that they're entirely baseless; most contain a grain of truth buried under decades of misapplication. The problem is that they cost photographers money, waste their time, and actively prevent them from improving. Here are ten of the most persistent offenders.
1. "UV Filters Protect Your Lens"
This is the granddaddy of photography myths, and it refuses to die because it sounds so reasonable. The logic goes like this: a $30 filter is cheaper to replace than a $1,500 lens, so you should always keep one screwed on as insurance. Camera store employees have been pushing this line since the film era, and it has sold an extraordinary number of mediocre filters.
Here's what actually happens. A UV filter adds two additional air-to-glass surfaces to your optical path. On a modern multicoated lens, this introduces the possibility of ghosting and flare that the lens designer never accounted for. You paid for an optical formula that was engineered to minimize internal reflections across a specific number of elements. Adding a flat piece of glass in front of it is like putting a screen protector on a television and wondering why the picture looks slightly worse.
But what about protection? This is where the myth gets genuinely stubborn. Yes, a filter can prevent a scratch from a stray branch or a bit of sand or even take an impact, and it's true that a higher-quality version might not adversely affect image quality. But lenses are tougher than most photographers think. Front elements are hardened and coated to resist casual contact. A proper lens hood, which you should be using anyway for contrast and flare control, provides far better impact protection than a thin ring of glass that can shatter on impact and grind fragments into your front element, creating the exact damage you were trying to avoid.
2. "More Megapixels Means Better Photos"
Camera manufacturers love this one because it's the easiest spec to market. The number goes up, the product seems better, and the consumer feels like they're getting more for their money. It's a beautifully simple story, and it falls apart the moment you examine what megapixels actually do.
A megapixel is one million pixels. A 24-megapixel sensor captures 24 million individual points of light. A 61-megapixel sensor captures 61 million. More points of light means more detail, so more megapixels means better images, right? Only if detail is the sole determinant of image quality. It isn't.
Here's what higher megapixel counts actually give you: more cropping headroom and the ability to print larger before seeing individual pixels. That's it. They don't improve dynamic range. They don't improve color accuracy. They don't improve noise performance; in fact, cramming more photosites onto the same physical sensor area tends to make noise worse at higher ISOs, because each photosite is smaller and captures fewer photons. A 61-megapixel image at ISO 12,800 will not look as clean as a 24-megapixel image from the same sensor generation at the same sensitivity.
The practical reality is that 24 megapixels produces a file large enough to print at 300 DPI at 20 by 13 inches. That's bigger than most photographers will ever print. For web use, social media, and client delivery, you're typically delivering files that display at roughly 2 megapixels on a high-resolution screen.
There are photographers who genuinely need high resolution. For the remaining vast majority, megapixel counts stopped being a meaningful differentiator years ago.
3. "You Need a Full Frame Camera to Be a Professional"
This myth is so deeply embedded in photography culture that challenging it feels almost heretical. Full frame became synonymous with "serious photography" during the DSLR era, when APS-C and Micro Four Thirds sensors genuinely couldn't match the low-light performance, dynamic range, and shallow depth of field control of their larger counterparts. That gap has narrowed dramatically, and the myth hasn't caught up.
Let's talk about what full frame actually gives you. A larger sensor provides shallower depth of field at equivalent apertures, slightly better noise performance at high ISOs, and marginally more dynamic range. These are real advantages. They are not, however, advantages that matter in every professional context.
Wedding photographers working in dimly lit churches and reception halls will benefit from full frame's high-ISO advantage. But sports photographers shooting outdoor events in good light? A Fujifilm X-H2S or Canon EOS R7 with their APS-C crop factors actually give you more reach from the same lens, which is an advantage when you're trying to fill the frame with a distant subject. Wildlife photographers have known this for years: a 400mm lens on an APS-C body gives you the field of view of a 600mm lens on full frame, without the size, weight, or cost of an actual 600mm optic.
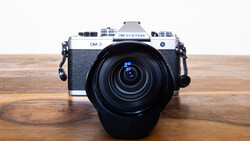
Micro Four Thirds takes this further. OM System's computational photography features (handheld high-resolution shooting, live ND filters, in-body focus stacking) offer capabilities that no full frame body currently matches. The OM System OM-1 Mark II is a legitimate professional tool that weighs roughly half of a full frame equivalent and pairs with lenses that are proportionally smaller and lighter.
Meanwhile, some of the most successful working photographers in the world shoot on APS-C and Micro Four Thirds systems, not because they can't afford full frame, but because the smaller systems better serve their actual work. The client doesn't check your EXIF data. They check your images. If you're looking to explore what different camera systems and genres can offer, Fstoppers' The Well-Rounded Photographer tutorial covers eight genres across eight instructors, demonstrating that great work comes from skill, not sensor size.
4. "Shooting Raw Is Always Better Than JPEG"
Every photography tutorial on the internet will tell you to shoot raw. Most of them will say it with the conviction of someone delivering a moral imperative, as if JPEG shooters are committing some kind of photographic sin. And for most situations, raw is the better choice. But "always" is doing a lot of heavy lifting in this myth, and it's the "always" that makes it wrong.
Raw files preserve the full data captured by your sensor, giving you maximum latitude to adjust exposure, white balance, and color in post-processing. JPEG files apply in-camera processing (sharpening, noise reduction, color curves, white balance) and then compress the result into a smaller file. You lose editing flexibility in exchange for convenience and speed.
The situations where JPEG wins aren't rare or obscure. Sports and photojournalists on deadline frequently shoot JPEG because their cameras produce publication-ready files straight out of the body, and the workflow difference between processing one raw file and processing 3,000 is the difference between making deadline and missing it. Event photographers documenting corporate functions, where color accuracy and creative editing latitude are far less important than turnaround speed, often shoot high-quality JPEG with custom picture profiles and deliver the same day.
Then there's the storage math. A wedding photographer shooting dual card slots in raw at 45 megapixels is generating roughly 60 MB per frame. Across a 3,000-image wedding day, that's 180 GB of data from one event. Multiply by 30 weddings a year and you're looking at over 5 TB of raw files annually, requiring backup infrastructure that has real ongoing costs. Shooting fine JPEG for parts of the day where creative editing latitude isn't critical can cut that storage footprint dramatically.
Raw is the right default for most photographers in most situations. But treating it as an absolute rule ignores legitimate professional workflows where JPEG is the smarter, faster, and perfectly adequate choice. If you want to get the most out of your raw files, Fstoppers offers comprehensive guides for both Mastering Adobe Lightroom and The Complete Capture One Editing Guide.
5. "You Should Never Shoot Above ISO 800"
This myth has roots in the film era, when pushing film speed beyond 800 produced increasingly visible grain that many photographers found unacceptable. It migrated into digital photography during the early DSLR years, when high-ISO noise genuinely looked terrible: muddy, blotchy, color-shifted noise that could ruin an image. The problem is that people who formed their opinions in 2008 are still giving advice in 2026, and sensor technology has undergone a revolution in the intervening years.
Modern sensors are staggeringly good at high ISOs. A current-generation full frame camera produces cleaner files at ISO 6,400 than early DSLRs produced at ISO 800. Even APS-C and Micro Four Thirds sensors have improved to the point where ISO 3,200 is entirely usable for professional work in most scenarios. And software-based noise reduction, particularly the AI-powered tools now built into Lightroom, DxO, and Topaz, can clean up high-ISO files to a degree that would have seemed like science fiction a decade ago.
The real cost of avoiding high ISOs is motion blur. There's a fundamental tradeoff in the exposure triangle: if you won't raise your ISO, you have to compensate with a wider aperture (reducing depth of field) or a slower shutter speed (introducing blur). In many real-world shooting situations, neither of those compromises is acceptable. A sharp image with visible noise is almost always more useful than a blurry image that's noise-free.
This is the principle that working photographers understand intuitively: blur is permanent, noise is negotiable. You can reduce noise in post-processing. You cannot add sharpness that wasn't captured. If you're at a reception, a concert, or any indoor event and you're choosing between ISO 6,400 with a sharp subject and ISO 800 with a blurred one, there is no question about which file your client will prefer.
6. "You Need to Learn Manual Mode Before Anything Else"
New photographers are told this constantly, and it's one of the most counterproductive pieces of advice in photography education. The logic sounds bulletproof: manual mode forces you to understand exposure, which is the foundation of everything else. If you don't understand the exposure triangle, you'll never truly control your camera. Learn manual first, and everything else will follow.
The problem is pedagogical, not technical. It's absolutely true that understanding the relationship between aperture, shutter speed, and ISO is essential. But starting a beginner in full manual mode is like teaching someone to drive by handing them the keys to a stick-shift car on a busy highway. The cognitive overload of simultaneously managing three variables while also trying to compose, focus, and time a shot produces frustration, not understanding.
Aperture priority and shutter priority modes exist for excellent reasons. They let you control the variable that matters most for your creative intent while the camera handles the rest. A portrait photographer learning to use aperture priority quickly understands how f/1.8 separates a subject from the background while f/8 keeps everything sharp. A sports photographer using shutter priority learns how 1/1,000th of a second freezes action while 1/30th creates motion blur. These are intuitive, visual lessons that build genuine understanding.
Modern cameras are also far smarter than the cameras that made manual mode essential. Matrix metering, evaluative metering, and AI-assisted exposure systems do an excellent job in the vast majority of lighting situations. A photographer using aperture priority with exposure compensation understands exposure control and can override the camera when needed, which is functionally what manual mode provides anyway, just with more steps.
Learn exposure thoroughly? Absolutely. But the idea that you need to start in manual mode or you're somehow doing it wrong is gatekeeping disguised as education. For beginners who want a structured introduction to camera fundamentals, Fstoppers' Photography 101 covers everything from exposure basics to post-processing in a way that builds real understanding without unnecessary frustration.
7. "Image Stabilization Replaces the Need for a Tripod"
In-body image stabilization has gotten remarkably good. Five, six, even eight stops of claimed stabilization means you can theoretically handhold a shot at shutter speeds that would have been laughable a decade ago. Sony's latest bodies, combined with optically stabilized lenses, promise compensation that turns a one-second exposure into something you can do handheld. It's impressive technology. It also doesn't do what a tripod does.
Image stabilization compensates for camera shake, the small, involuntary movements of your hands and body that blur an image. It does this by shifting the sensor or optical elements to counteract your motion. What it cannot do is freeze a moving subject, because the subject doesn't care how stable your camera is. A flower swaying in the wind, water flowing over rocks, people walking through a scene: these require either a fast shutter speed to freeze or a long exposure to intentionally blur, and IS doesn't change that equation.
Then there's the matter of precise composition. A tripod locks your camera in exactly one position, which means your composition doesn't shift between frames. This is essential for focus stacking, exposure bracketing, panoramic stitching, and any technique that requires multiple identical frames aligned to the pixel. Handheld stabilization keeps things approximately steady, which is good enough for single exposures but not for multi-frame techniques.
Long exposures beyond a few seconds (astrophotography, light trails, smooth water effects) are still firmly tripod territory. No amount of stabilization lets you handhold a 30-second exposure. And for video, while stabilization has reduced the need for gimbals in casual shooting, professional video work still relies on tripods, sliders, and fluid heads for the kind of locked-off, precision movement that IBIS can't replicate.
Image stabilization is one of the most transformative technologies in modern photography. It has dramatically expanded what's possible handheld. But it hasn't made tripods obsolete any more than autofocus made manual focus obsolete. They solve different problems.
8. "A Good Photographer Never Uses Auto Mode"
There's a pervasive snobbery in photography culture that equates using automatic settings with being an amateur. Real photographers shoot manual. Serious photographers at least use aperture priority. Auto mode is for tourists and people who bought a camera by accident. This attitude is nonsense.
Auto mode on a modern camera isn't the crude, easily fooled system it was fifteen years ago. Contemporary auto modes use sophisticated metering, scene recognition, and in some cases machine learning to analyze a scene and select appropriate settings. They meter accurately in complex lighting, recognize human subjects and adjust accordingly, and produce well-exposed images in the vast majority of conditions. They're not perfect (no metering system is) but they're remarkably competent.
The question isn't whether auto mode can produce good images. It can. The question is whether the photographer can recognize the situations where auto mode will fail and override it. That's a matter of knowledge and judgment, not of which mode dial position you default to.
Many experienced photographers use auto or semi-auto modes more often than they'll publicly admit. A documentary photographer working fast in changing light might rely on auto ISO with aperture priority, letting the camera handle exposure while they focus on timing and composition. A street photographer might shoot in program mode because the decisive moment doesn't wait for you to dial in settings. Even some wedding photographers use auto modes during fast-paced reception coverage when the lighting changes unpredictably from moment to moment.
The camera is a tool. Using its automated features when they serve your work is not a character flaw. It's efficiency.
9. "Golden Hour Is the Only Good Time to Shoot"
Golden hour, the period shortly after sunrise and before sunset when sunlight is warm, soft, and directional, produces beautiful light. Nobody disputes that. The myth isn't that golden hour is great. The myth is that other times of day are somehow bad, and that you should avoid shooting during midday, overcast skies, or harsh light.
Midday light is contrasty and creates hard shadows, which is exactly what you want if you're shooting architectural details, geometric compositions, or high-contrast black-and-white work. The sun directly overhead eliminates long shadows and illuminates the interior of dense forests with even, directionless light that golden hour's low angle can't penetrate. Underwater photographers specifically prefer midday because it provides maximum light penetration.
Overcast skies create a massive natural softbox. Portrait photographers pay hundreds of dollars for studio modifiers that replicate what cloud cover does for free: soft, even, wrap-around light with minimal shadows and no squinting subjects. Fashion and editorial photographers routinely prefer overcast conditions because the light is consistent and flattering across the entire scene, with no harsh transitions.
Blue hour, the period after sunset and before sunrise when the sky turns deep blue, produces a color palette that golden hour can't match. Night photography introduces its own vocabulary of streetlights, neon, headlight trails, and starlight. Fog, rain, and storm light create moody, atmospheric images that sunny golden-hour conditions never will.
The "golden hour or nothing" mentality keeps photographers from shooting 90% of the day, and it's self-defeating. The best photographers don't wait for perfect light. They learn to see and use the light they're given. Elia Locardi's Photographing the World series demonstrates exactly this principle, showing how to work with every kind of natural light across diverse environments.
10. "Higher Frame Rates Mean You'll Get More Keepers"
Modern cameras can fire at 20, 30, even 120 frames per second. The logic seems irrefutable: if you shoot more frames, you'll capture more decisive moments, and your keeper rate will go up. In practice, the opposite often happens.
Higher frame rates produce more data. A 10-second burst at 30 frames per second generates 300 images. Multiply that across a day of shooting (a sporting event, a wedding, a wildlife outing) and you're looking at thousands of nearly identical frames that all need to be culled, reviewed, and selected. The time you saved by spraying and praying is spent tenfold in post-processing, scrolling through endless sequences of near-duplicates trying to identify the one frame where everything aligned.
More importantly, high frame rates can become a crutch that replaces anticipation. The skill that produces genuinely great action photography isn't the ability to press a button and hold it down. It's the ability to read a situation, predict the peak moment, and time the shot. A photographer who understands a sport, knows when the critical play is developing, and fires a deliberate three-frame burst at the right instant will consistently produce better images than someone who holds the shutter and hopes the camera captures something usable.
There's also a mechanical and practical reality: buffer limits, card write speeds, and battery drain all become constraints at sustained high frame rates. A camera that advertises 40 frames per second often can only sustain that for a few seconds before the buffer fills and the frame rate drops dramatically or stops entirely. If you were counting on those 40 frames per second for a crucial moment and the buffer was still clearing from your previous burst, you've missed the shot entirely.
High frame rates are valuable when used deliberately: capturing a specific fast-moving action where timing is unpredictable, like the exact moment a bird takes flight or a basketball player reaches the apex of a dunk. But as a default shooting strategy, "more frames" does not equal "more keepers." It equals more work and less intentionality.
The Common Thread
Every one of these myths shares a common structure: they take a legitimate technical observation, strip away all context and nuance, and present the result as an absolute rule. UV filters can be useful in specific environments, but not as a permanent fixture. Raw is the better format for most work, but not all work. Full frame sensors have real advantages, but not advantages every photographer needs. Golden hour light is gorgeous, but it's not the only gorgeous light.
The best photographers don't follow rules. They understand principles and apply them with judgment. The difference matters, and it's the difference these myths consistently obscure.


Join the Fstoppers community for free
-
Post comments and join in the discussions
-
Browse the site ad-free
-
Share your work and get featured in the community
-
Compete in the photo contests for fun and prizes
14 Comments
Regarding dynamic range in high megapixel, the point is that downsampling 61 to 24, increases dynamic range. This is why oversampling A/D such as the quad Bayer are so often used: it is easier than increasing the number of bits in single pixelA/D and allows noise shaping.
On the negative of high megapixel which people tend to ignore is the cost of backups which grows linearly with megapixels. 61 MPx backups cost more than twice the cost for 24 Mpx
Another myth that needs to go away is that beginning photographers have to master the exposure triangle. In film days, sure. Early digital? Ok. But with the advent of Auto ISO and exposure compensation, and sensors being so forgiving, it doesn't even need to be a triangle. Just aperture and shutter. I've set my cameras to Manual + Auto ISO (set to acceptable limits) and I use exposure compensation. Much faster and easier to have creative control and beginners can focus on what matters most--composition and capturing the vision.
I've actually found this helps a lot of newer photographers overcome their technical frustrations, too. Let them focus on learning how aperture affects depth of field and shutter freezes subject, or better still set these to desired settings and just focus on the content of the photo while the camera compensates with ISO.
I agree, but you downplayed the Full Frame advantage. You say it gives a SLIGHT advantage at high ISO. My Zf looks incredible at high ISO, my Fuji looks like garbage at 1/4 of that, so much so that I refuse to use the Fuji above minimum ISO. Back to back use really highlights this.
Thank you Alex for the gentle reminders to keep it real. I appreciate what you do - it's gotta be hard to write something with so many passionate readers chomping at the bit to say this or that. I'll just say once again.. thank you!
"1. "UV Filters Protect Your Lens""
Well, in my experience, a $10 UV filter saved a $600 lens.
I was out with some friends, hiking down a river to a waterfall. The river was very low, and we were jumping rock-to-rock.
Needless to say, I slipped on a wet rock, went down, and reflexively fell forward onto my right hand — which was holding my camera! The lens hit a rock, front-first. I couldn't have planned it better!
It completely shattered the UV filter. I removed it, and the front element was unscathed.
"No amount of stabilization lets you handhold a 30-second exposure."
The fantastic Olympus OM-1 has a wonderful in-viewfinder IS aide. As long as you keep the little box within the big box, you're stabilized.
I routinely shoot 10+ second shots using this aide.
I'm convinced I can hand-hold an exposure longer than my arms would cramp or my bladder would complain!
Here's an eight-second exposure! Zoom in and check out the stars in the centre! (Stars on the edges are elongated, but due to lens distortion, not camera motion.)
I’d agree with almost all of these. However, I have had at least 2 prime lenses (possibly others?) saved because I had a filter on them. 1 of them was a ND filter that looked like a hockey puck went through it after a poorly placed tripod fell on it, but it still protected the lens. The other was a UV filter that got scratched from a tree branch during some macro work. I wouldn’t say it’s gospel to keep one attached at all times (I don’t), but I don’t think it’s a “myth” either.
In my opinion the biggest myth perpetrated in the industry is that the launch of a new camera renders the old camera models obsolete. It helps the manufacturers sell cameras but people are too easily taken in with the need to buy the latest camera rather than concentrating on how to take good photographs with the equipment that was perfectly good a few weeks before.
I like this article very much and the comments were excellent too. I have traveled with a few photogrpahers who shot for BBC and Natgeo and I found them more often than not use "auto" settings and one even argued that when you get that unusual shot like a polar bear suddenly standing up etc that Auto settings were the most reliable. I always shoot in Manual!! Yeah!
Brilliantly described! I've heard it a million times, but I really liked this summary. I was very pleased that the nonsense about UV filters is in first place, and according to the comments I've read here, it's well deserved. I don't understand how anyone can believe that a millimeter of glass can absorb the force of impact and kinetic energy in a fall. If car manufacturers knew this secret, all car bumpers would be covered with a millimeter of glass :) I kind of understand that the aluminum ring deforms and thus "protects" the edge of the lens. A reduction ring for a magnetic ND filter would be more useful, as it at least won't "bite" into the lens thread when you hit the edge of the lens, and nothing will shatter.
Mine
A new camera will inspire your creativity
You need to live in a beautiful location to take good photos
You need do reels to be successful.
Rule of thirds
You had me 100% in agreement until that last one. Even there, I mostly agree. But there's also something to be said for knowing _when_ to spray and pray.
As a 50+ sports photographer, one thing that isn't keeping up with technology is... me. My body seems to age, and I haven't found any decent manufacturers of spare parts. When I first entered the sports photo realm, I was shooting with almost the most non-sports camera ever: a Nikon d800. If I was shooting something at a dead stand-still, the pictures were superb, but 4 fps just won't cut it when you're shooting pro soccer. So I stopped using burst mode entirely, and spent a few years honing my reflexes and using my knowledge from the years I played to assist me in knowing when to shoot, to give me a better chance of getting the shot I needed.
And then I got my first Nikon Z, and my burst shot up to the point where I could capture multiple shots of a penalty kick, or a keeper diving on a save.
I shoot now with a z8, and my go-to is a 70-200. I put my camera in burst mode, but while it's shooting at high speed, there's a nice offset to getting bloated with images - burst limiters. I might shoot at 20 fps, but I won't capture more than 5 shots when I push the button. I'm not aiming to get an action sequence, but to allow for the quick action that happens on the grass between one step and the next, and sometimes between one player's eye blink and the next. (Soccer players are incredibly inconsiderate of how much blinking they do, and how their closed eyes ruin so many potentially great shots!)
On the whole, I would say that burst mode has its place, and that it can be a very helpful tool if used right. And if your reflexes aren't what they were a decade ago.
I've had to replace UV filters several times due to bashes and scratches (one time I bashed the lens into the end of a metal pole, the other time it got hit by stray gravel near a dirt track). In all cases I've also had a fairly large/robust lens hood on. Context is also important here - if you're in environments where there are greater risks of things hitting the front of the lens, a UV filter is a very cheap insurance policy. There can even be extreme environments (e.g. burning steel wool photography) where they are basically mandatory. I can mentioned that I know of at least one lens manufacturer (Irix) who in some of their manuals actually recommend adding one for additional protection against the elements. If there is a myth here, it is that they impact negatively on image quality, which in most situations (especially if you're using a lens hood anyway) they do not - I've also seen tests done that demonstrate it is impossible to see any difference in image quality as a result of using one. (If the addition of air-glass surfaces was a problem this would be a big issue for modern lens designs as the number of elements is vast compared to older designs). Then again, I shoot JPEGs all the time on my K1, so someone is bound to tell me that I'd see the difference in the RAW files. ;-) But good stuff otherwise, I like a bit of myth-busting. :-)
Since I became more involved photography I found most of the pundits just said some form of Do this ... and you'll get great photos. BS.
I had a Nikon D5500 and borrowed a 500 or 600 Zoom, had a monod and used it 2 days,1 hr each. Then I bought a OM-D E-M5 iii and never looked back.
There are few Absolutes in photography
https://larrysphotography41.blogspot.com/2023/07/its-not-that-simple-th…