
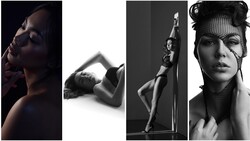
For my latest photoshoot I decided to use harsh light to photograph my buddy Bart in two different ways. If you've wanted to learn how to get that vintage movie style look, you'll enjoy this full tutorial.
We create tons of free content on a weekly basis for our YouTube channel, but until now, we have exclusively sold our "professional" photography tutorials on the Fstoppers store. But today, thanks to a few sponsors, we've created a free 30-minute tutorial on portrait photography.
Over the next few months, we will be filming photoshoots from start to finish using gear and software donated by a range of different sponsors. If you like this free content, please let us know in the comments below, subscribe to our YouTube channel, and share this new content.
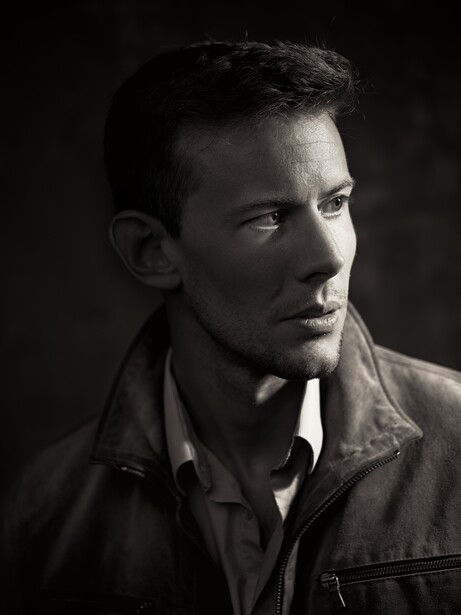
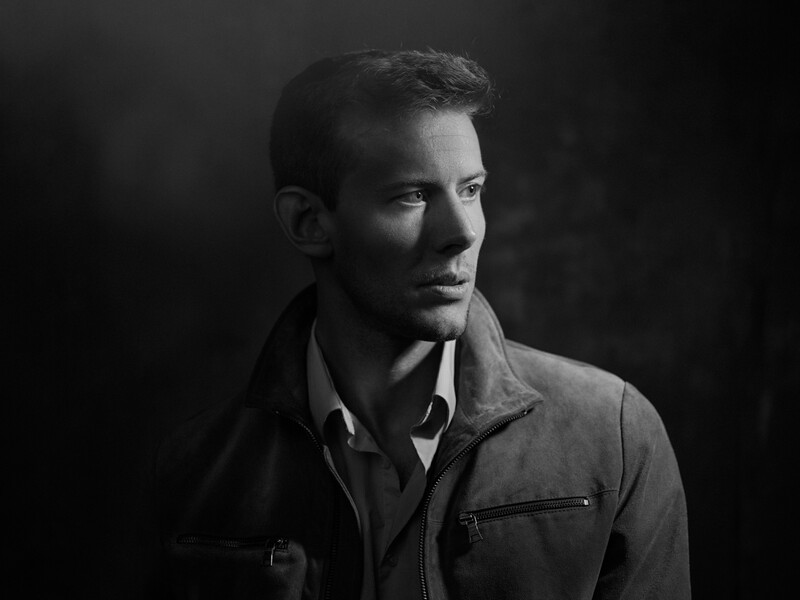
In the video above, I photography my buddy Bart with Hard light from two different directions. I can't possibly go over every detail of the photoshoot in writing, you'll just have to watch the video. But, I do want to quickly thank the sponsors that made this video possible.
Fujifilm GFX 50S
I was first introduced to the GFX 50S by Elia Locardi when we filmed "Photographing The World 4." This camera is one of the first "affordable" medium format digital cameras on the market, and photographers have been loving it. Not only do you get the gigantic 51.4MP CMOS sensor, but you also get the incredible build quality of Fujifilm. Unlike other medium format cameras that can cost more than four times the price, the GFX 50S is actually weather sealed. I've been on so many shoots where a "high-end" medium format camera has failed for one reason or another. With this camera, you're getting medium format quality and standard DSLR reliability.
Fujifilm 120mm f/4 Macro
The 120mm f/4 lens is great for products as well as portraits. It's half the price of its competitors but is still built like a tank and shoots razor-sharp images. Keep in mind that this lens will have the same field of view as a 90mm lens on a "full frame" camera and will create shallow depth of field like f/3.1.
Manfrotto 055 Tripod
For this shoot, Manfrotto sent us the 055 carbon tripod. This tripod is extremely light and rigid, and it has been upgraded from an early version we used years ago. My favorite feature of this tripod and other Manfrotto tripods is the ability to mount the center column horizontally to shoot straight down. This version is slightly larger than the 190 version that we used in the last tutorial.
Manfrotto XPRO Ball Head
When I'm shooting video I like a pan and tilt head but when I'm shooting stills, I want a ball head. For this video Manfrotto supplied us with the XPRO Ball Head. It's big enough to hold a heavy camera like the GFX50s but it's still smaller than any other type of tripod head. I particularly like this one because it has a friction knob that can balance your camera perfectly based on it's size and weight.
Alienskin Exposure X4
I've been using Exposure for over a decade now. It's by far the best software I have ever used to "finish" an image, but it's much more than that. Exposure X4 is now standalone software, and many photographers are using it as their raw processor. Depending on the type of editing you do, you may not ever need to open Lightroom or Photoshop again.
Exposure X4 is most known for its incredible film-replicating presets. Simply mouse-over hundreds of options, and your image will instantly change. Before I send an image to print or to the web, I always run it through Exposure first.
The software is 100% free to try, and if you decide to buy it, you can save 10% with the code "FSTOPPERS."
Gravity Backdrops
When we moved down to Puerto Rico, we needed to completely redesign our photo studio. Instead of setting up a bunch of plain white or gray fabric backdrops, we thought it might be more interesting to hang a few hand painted canvas backdrops. The canvas backdrops we wound up shipping to Puerto Rico are made by Gravity Backdrops, and I have to say, they have really given our studio and Youtube videos a unique look compared to the backgrounds we used to use in our old studio.
These backdrops come in a ton of different sizes, colors, and textures, and what's best about Gravity is they ship anywhere in the world. We ordered 3 different backdrops and received them within 7 days which is pretty crazy considering how large the overall package was and we are on an isolated island. Definitely check out Gravity backdrops if you are looking for a reasonably priced one of a kind background.
If you enjoyed this tutorial make sure to check out or full length tutorials at Fstoppers.com/store.

Join the Fstoppers community for free
-
Post comments and join in the discussions
-
Browse the site ad-free
-
Share your work and get featured in the community
-
Compete in the photo contests for fun and prizes
2 Comments
I really enjoyed these long tutorials you've started doing. I would really love to see some video related topics also in the future....
If you look at minute 7:35, Lee's face himself was video-lighted exactly how he intended the outcome of his shots..
Lightingception :-P