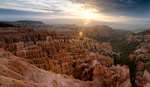
Changing the overall color tones in your image can be very powerful. You can drastically change the emotions or the vision of the shot by simply color grading the image. If you are not exactly sure on how to create your own gradient maps, this might be the perfect tool for you.
NBP Colourmap X is a color palette exploration tool that allows you to extract the color tones or the "essence" of an image. Within a few clicks, you can extract a color palette from a source image to be applied as a gradient map layer to your work. Recently, the panel did get a much-welcomed update with a few previously requested features that I think will help speed up your color grading workflow. NBP Colourmap X currently works in Photoshop CC15 and newer.

New Features and Benefits
- Analyze a Selection. You can now use your preferred selection tool to select any area of your source image and have NBP Colourmap X analyze the color palette from that selection. Previously it would analyze and extract the color palette of the entire image so if you wanted a specific area, you would have to crop that source image to include only the colors you wanted. It's not limited to one selection either, you can create multiple selections throughout the image and NBP Colourmap X will analyze those selections together and create your color palette.
- Select Default Blending Mode. Previously, you had only one default choice of the blending mode on your gradient map layer when it was applied to your image. Now you can choose to set your default from three different blending modes; Soft Light, Linear Light, or Overlay. While maybe may use Soft Light as their preferred blending mode, if you like to use "Overlay" or "Linear Light" instead, you can now set that mode as your default saving time from having to go back and make the change.
- Select Default Layer Opacity. I rarely use 100% opacity, so the ability to set the default layer opacity setting to what I find works best for me helps to see a more accurate initial result.
- Presets now output with named layers. If you like to apply multiple gradients maps, the organization of these layers is a bit easier now. When you are exploring color palettes from your presets, these new layers are all labeled with the preset name.
- Shift Color Threshold. You can choose between 0 and 30 for the Shift Colors option, allowing for subtle or radical palette color shifting.
- Sort by Luminance. You can now re-sort your palettes in order of luminance for smoother gradients map results when you manually modify the colors.
- Minor performance and speed increases. This update is pretty self-explanatory.


Using NBP Colormap X
Since the plugin's debut, I have been using NBP Colourmap X in all of my photos to varying degrees. Some shots include one gradient map while others may include multiple gradients maps, all set at different opacities and extracted from multiple sources. Instead of sitting behind the screen trying to pick colors I think would work from a source image, NBP Colourmap X does all the heavy lifting and extracts a smooth gradient that's completely customizable. This plugin can be used in any genre of photography and any photographer that uses Photoshop can benefit.
Here are a few different examples to show the difference between what I started off with and what they could look like using NBP Colourmap X to apply gradient maps to the photos. A few of these I would use, but I wanted to show off some of the capabilities fo the tool.


Model Maggie Judge


Model Maisa Kehl


Model Kathrine Haus


What I Liked
This is the entire focus of the plugin but I really like the capabilities of selecting a source area or an entire image and extracting a color palette to be used as a gradient map. This makes creating and apply different color palettes so much easier, within a few clicks I can have several options to choose from.
What I Thought was Missing
An apply icon for faster application of the gradient map. It's a minor nuisance but I would like to click the icon instead of having to click the menu icon and then click on "apply color grading".
I do like the addition of the layer names when applying presets, but let's face it... the layer name is quite long. You can see this in the video when I can barely read the actual preset name, but if you are not watching the video the default name is "NBP ColourmapX - "your preset name". A short and quick fix would be to have it name the layer "NBP CMX - your preset name". Maybe this could be in the preference setting where you can change the default naming convention of the layer. Of course, I could also make the layers panel longer but I like the way my workspace is currently set up.
The ability to extract preset. We won't all have the same source images to extract our color palettes from, so the ability to share presets may be a welcome addition to the panel for many. Of course, a current way around this would be to simply share screenshots of our presets to those we want to share them with. Probably a lot easier than the latter.

Here's an example of how we could share our presets or even create our own collection of presets to use.
The last feature I would like to have added would be the ability to group the presets together. Let's say I want all my saved skin tone presets in a collapsible master folder or group in the same way layers can be grouped. I could have another folder for warm tones or have them grouped by colors. If you would like to save all your presets, the list could get very long. My current idea to get around this would be to create libraries from screenshots of your "grouped" palettes. Example, I could create several presets for different skin tones and then screenshot those. Save that file and erase my presets and do it over for each set of presets I would like. The issue would be when I want to add more, it's a few more steps than simply adding the new preset to the group within the plugin.
Final Thoughts
I enjoyed using the first version of the panel and with the newly added features, it makes my color grading workflow a bit faster as my preferences are saved as the default among the other improvements. With the inclusion of NBP Colourmap X to my workflow, I find testing different palettes much easier, not to mention being able to extract those palettes from multiple sources in a matter of minutes instead of manually creating them. If you are looking for better ways to create your own gradient maps and color palettes, this is a great choice at an excellent value.
If you are looking for more on NBP Colourmap X including tips and best practices, head over to Nino Batista's channel to see more videos on this panel. So what are your thought on NBP Colourmap X Photoshop plugin? Is this a plugin you can see yourself using in your workflow? What are some other key features that you think are missing?


You have a ground loop somewhere with your new mic setup, giving you a bed of hum. Most DAWs and video editors have noise reduction modules, if all else fails. ;-)
Thanks for that feedback.