

There is one versatile and affordable modifier called 5-in-1 collapsible reflector kit that practically every photographer owns. As the name implies, it can be put to use five ways, but have you ever tried all the possible usage variations of this babe? Usually, it is a double-sided material with four different finishes: gold, silver, black, and white, which is zipped around a white scrim frame. We are going to analyze the characteristics of each side and see how and when to use them to our advantage, and trust me it is going to be more than five usage tips.
Reflect and Deflect
The most common usage is of course, using the sides as a reflector or deflector. Silver and white work on the same color scheme. However, silver will reflect more light. So consider using the proper one depending on your setup. These two work great as additional light source for studio lights, especially for headshot and beauty work. Think of using the silver side if you lit your subject from a distance and the white, when you just need a bit of fill for the shadows. The gold side might also be used in the studio, but because it gives a warmer light, you might want to use it outdoors most of the time (depending on the colors you wish for). When positioned properly, reflectors might become your favorite on the go rim light and add a new dimension on your work in almost no time.
https://fstoppers.com/photo/71775
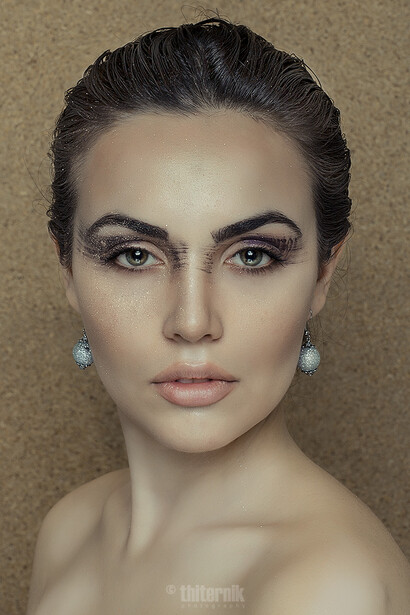
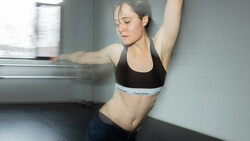
White side of the reflector was on the level of model's chest to give a little bit of fill.
The black side acts as your usual black flag. It will prevent lens flare, control spill light from other sources or isolate light from reaching an area on the set. Imagine having a tiny room with green walls and a beautiful window light. You will have a soft wrapping light but the walls will bounce the green cast to your subject, this is where you might reach for your black side to prevent that cast.
Backdrop
Most of the time, photographers stick to black or white backgrounds or backdrops, which to be honest becomes boring quickly. But if you feel like being creative with backgrounds, look no further than your reflectors! When used correctly, the silver and gold sides might turn into an ingenious backdrop. One useful trick to always obtain a balanced outcome is to pay attention to the color scheme for the overall styling done on your subject. For example, you might consider using the gold side of the reflector as a background if your model has a bronzed makeup. The same logic applies if your model is wearing a cool metallic eyeshadow. Pair it then with cool toned, but bright lipstick in front of the silver side of the reflector. Don’t be afraid to light up the reflector background for even more interesting feel.

Out of all the options, the scrim is my favorite tool to use when I work. Even though I mostly use it outdoors to even the light, it has turned out to be a great way to have a perfect white background if I am on a budget. Try using it as a backdrop by putting a light behind it and just use your regular portrait setup. You will enjoy a neat white canvas for your portrait work. This scenario will also work on location and you can spice it up by incorporating some interesting shadow patterns.
Play With Background
Some of you might own a studio filled with numerous lights. But others just work hard to get a place with a window and use a couple of reflectors to produce the same kind of images. Having constant controllable light is perfect, but what do you do when you are tight on budget? Stock up some reflectors! There are many options online for any budget and they all do great job. Try arranging a couple of reflectors behind your model and direct the available light source to create non-flat background.
If you have one light source, say a speedlite, and only one reflector kit, you can still get various moods. Instead of aiming the light directly to your model, try aiming it to your reflector, and bounce the light back on your model with a more even and softer light.
Uncommon Usage
Now that we have talked about all the common ways photographers can use the 5-in-1 collapsible reflector kit, I would like to talk about a few uncommon, but handy, uses for it. There are times when we do not have an assistant to take care of our gear, or we do not have the perfect weather conditions. It might be too hot and sunny for your model and for yourself, and you are forced to keep all the equipment under the direct sun. As most camera and equipment bags are black, they will absorb sunlight and will become hot in a very short time. To prevent this, just open up your reflector with the white side facing the sun. It might not be the most perfect solution, but you will at least have some protection, as the white will prevent overheating and save you some time. It is also very handy, when nature decides to shower you with rain. Having a large reflector will be a temporary saving solution until you find a better place to hide.
A big size reflector might also be a good friend for your model. Most of the time, you will have found a location where there is a decent place to change outfits. But it is not always possible, especially in outdoors when you do not own a changing cabin! The big size reflector might act as a wall between the model and the rest of the set, to give a little privacy when needed. Don’t forget, we are talking about budget teams and equipment, so it is impossible to have a model who will say no to this privacy.
Reflectors are also my lifesavers when I am shooting under direct sunlight, I always use the scrim to control the sunlight on my subject, but also get under it myself to view the result on the camera screen. It is literally impossible to see anything when there is bright sun high in the sky. It I also a handy tool if you have to quickly fix your model’s makeup or provide a short comfortable break while under the sun.
These are the ways I use this simple, yet so effective modifier. Do you know any other ways of using it? Share in comments!
Images used with permission of Khatleen Minerve.


Join the Fstoppers community for free
-
Post comments and join in the discussions
-
Browse the site ad-free
-
Share your work and get featured in the community
-
Compete in the photo contests for fun and prizes
16 Comments
Love this. I have only just recently started taking people pics so learning about blending light is such an obvious thing that i have missed.
Thanks your posts have inspired me to do better, and look at the more obvious!
very glad to hear that! don't stop experimenting, you will be proud of yourself after every new modifier you nail !
As a background! How did I never think of that?!
Thank you Emma. And such varied beauty and effects.
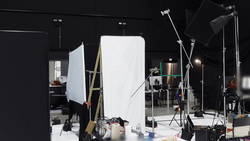
We used our reflectors throughout this shoot a few days day... and here, having a friend on hand to scrim the light over me and the model made such an appreciable difference even with this quick peek behind the scenes. Finished images (with help of the reflector) coming soon.
https://youtu.be/1XZOSQcc7t8
that is a true lifesaver tool! share the result with us, the youtube link doesn't work
Try now
seems you had some productive time and I liked the guidance with hands, was thinking about an article on "feeling comfortable and nice" topic
Would enjoy reading your insights.
Great article! I can't imagine shooting outside without a reflector! But, I had to switch from the 5-in-1 to just a silver and white sided one because switching from white to silver required unzipping the outside cover, turning it inside out, then reattaching and zipping it up.
Another great use is when you don't want to get your clothes all sandy!
that's a really smart way of using it ! thanks for the tip!
in order to save time I have 2 reflectors in the kit, as you can get these for really cheap price it's no issue to have several
Nifty solution!
I always do the same! :D
omg yes as a backdrop gold :D
I would like to note something I have also done in an abandoned building was bounce light towards a location using 2 reflectors you need an extra pair of hands if no stand to hold the reflectors
for sure! light doesn't have to be aimed just on the model and a pair of good assistants is always a huge plus
There is another way to use this wonderful object, you can make wind shaking the reflector, giving that cool motion effect in models hair.
totally on point! did that just today
Use it as a fan