
Getting accurate Autofocus must be one of the most frustrating things an event or wedding photographer deals with on a daily basis. How many times have you been in the right place at the right time, taken a photo at the absolute peak of the action, and then found yourself cursing under your breath when you review the image only to find it wasn't in focus? This used to happen to me a lot at weddings, and I still see many of my assistants struggling with autofocus in extremely low light situations. Luckily there is a very simple solution that works everytime.
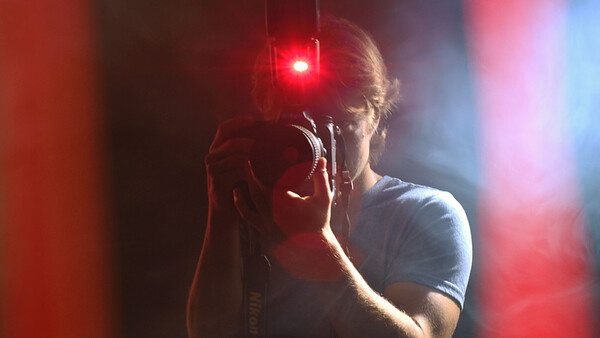
I have found that by far the most accurate and reliable way to achieve razor sharp images in low light situations is to use your on camera flash's AutoFocus Illuminator. The AutoFocus Illuminator, sometimes called AF Assist, is a fancy infrared light that throws a large grid pattern out in front of your camera. It is important to understand that what I am talking about is the assist lamp on your speedlight and not on your actual camera body. Unlike the camera's bright white autofocus lamp, the AF Illuminator's light is less intrusive and much more accurate because it projects a very sharp contrast pattern on your subjects. Also, because the Autofocus Illuminator is projected from your hotshoe flash which sits a few inches above your lens there is little chance that the light will be blocked by your lens's hood. The image below shows the difference between the AF Illuminator on your speedlight and the bright white AF Illuminator on your camera body.
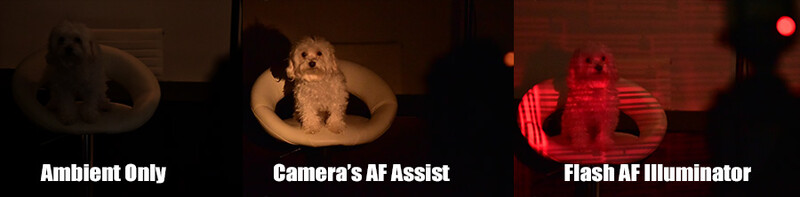
It has always shocked me when I see so many event photographers who do not know what the AF Illuminator is or how to activate it. From my experience shooting wedding receptions and outdoor night events, I can pretty comfortably say that more than half of my images would be out of focus if I completely relied on dim ambient light for my autofocus. It will be near impossible to lock your focus correctly if your subject is backlit, there is fog or smoke, or the DJ's lights are constantly moving randomly across everyone on the dance floor. Things get even worse if the DJ or venue decide to turn their lights off or if you are simply hired to shoot outdoors at night with absolutely zero event lighting setup.
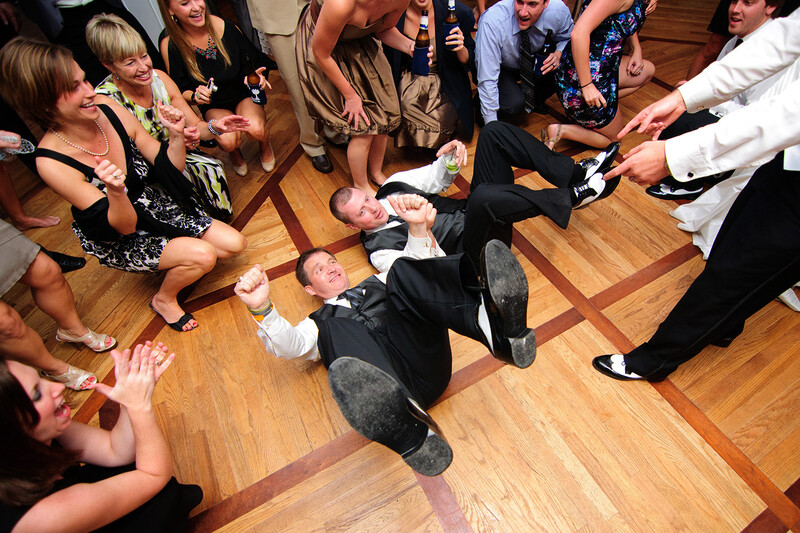
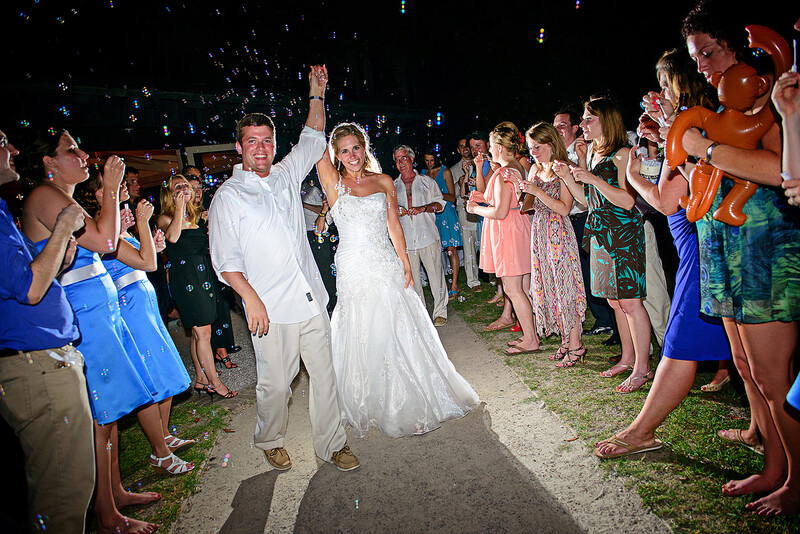
Once you start relying on your speedlight's Autofocus Illuminator to help light your subjects, you will find that you can increase your in focus shots from 50% to almost 100%. The lamp also makes it incredibly easy to shoot from the hip or shoot from over your head and guarantee that you are focusing on the correct subject without even looking through the camera's viewfinder. Simply trigger the autofocus on your camera and point the red grid at your subject. With a little luck you can take great compositions from unique angles that wouldn't easily be possible otherwise.
So how does the Autofocus Illuminator work? Here are a few steps and tips you need to know to make sure that your AF assist lamp is always projecting in low light situations.
1) Add The AF Lamp - First you need a hotshoe flash or accessory that projects a red autofocus assist light onto your subjects. Most of the Nikon Speedlights and Canon Speedlights do this natively. Some Yongnuo speedlights do it but others do not have this feature so consider that before purchasing the absolute cheapest flash model. If you have wireless remote triggers like Nikon's SU-800 commander or Yongnuo's YN622 radio triggers, they also have Autofocus assist lamps built in. These are great if you don't actually want to mount a speedlight on your camera and want the absolute smallest trigger on your hotshoe.
2) Check The Focus Mode - Next you need to turn your camera to one of the focusing modes that supports AF Illumination. Most DSLR cameras cannot project the autofocus assist lamp while they are in continuous focusing mode, so make sure you are in the single focus mode (single servo). This is the mode that snaps into focus and doesn't track your subject as they move.
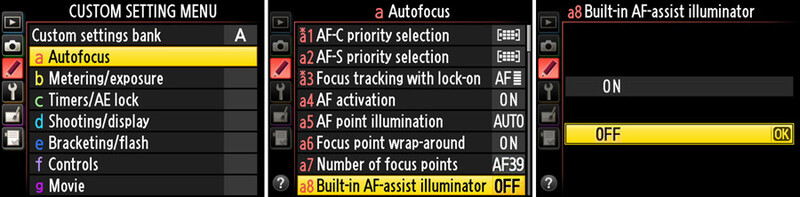
3) Set The Focus Points - Depending on which camera you own, you also need to set the correct number of focus points. In the past, if you shot with a Nikon camera you had to have the focus point set to the center AF point in the view finder. With newer cameras they have expanded those focus points to include a bunch of points around the middle of the view finder. For years I simply used the middle point but now with my Nikon D750s, I prefer using the Group focusing mode. Do note that even if you use Group focusing or another cluster focusing mode, you still have to set the general group area to be near the middle of the frame. The AF Illuminator cannot accurately focus on the far edges of the frame and therefore many cameras will not even let it activate if you have an autofocus point set too far to one side.
If for some reason you find the AF Illuminator isn't projecting, chances are you have either set your camera into Continuous focusing OR your focus point is not set near the middle of the frame.
4) Activate AF - To actually project the focusing grid from your speedlight, you need to simply press the shutter halfway down to start the autofocus process. This will activate the infrared grid. If you have set one of your rear AE-L / AF-L buttons to work as autofocus, those buttons will also activate your flash's AutoFocus Illuminator as well.
5) Beep Confirmation - Finally, now that your AF Illuminator is working you can simply snap the photo once correct autofocus has been achieved. I like to keep my camera's AF beep option turned on so I can easily hear when autofocus has been confirmed since it can be tough making out sharp objects in the tiny viewfinder. This also lets you shoot without looking through the viewfinder and know exactly when your camera has locked onto your subject.
6) An extra little tip - I will throw this tip that I use every time I pick up a camera, and it involves the AF-L button on the back of the camera. I have configured my rear AF-L button to lock focus only when it is pressed and held. This allows me to autofocus with the shutter button pressed halfway, and then when I'm ready to take a photograph I can simply hold the AF-L button down to prevent my camera from trying to refocus as I press my shutter button down to snap the photo. This has been such a life saver in situations where your subject isn't moving towards or away from your camera but the peak of the action is taking longer than you want. With this technique, I can prefocus for the first kiss or for a bouquet toss, let go of the shutter and wait for the moment of action, and then quickly fire the shutter while holding the AF-L button and know for certain that my camera is going to fire instantly and that my focus is locked on the last thing I focused on. When I was first shown this technique it instantly helped me improve the number of in focus images I was taking at every wedding.
But I hate shooting with flash!
At this point you might be asking "What if I hate bouncing my on camera flash and prefer shooting with natural light only?" Well the good news is that most speedlights that have an Auto Focus Illuminator will also let you turn off the flash while still keeping the AF assist lamp on. Since I'm only familiar with Nikon speedlights I'll outline that process below but most other brands will have a similar menu option as well.
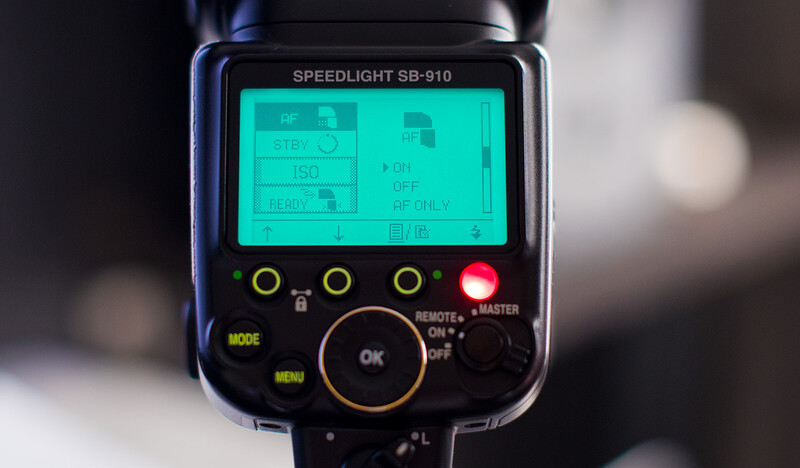
First you need to go into your flash's menu. Each brand of flash and model are going to be a little different so resort to your user manual for the specific menu location. On the Nikon SB-910 there is a menu option called AF where you can choose a few options. The "ON" mode is how your flash is shipped from Nikon, and it allows both the AF Illuminator and the Flash to both fire when the camera is triggered. If you set the mode to "OFF," you can turn off the AF Illuminator which I would never recommend unless you are on set of a big movie and can't have any AF assistance at all. The third option is "AF Only" and that mode allows you to use the AF Illuminator without activating the Flash when the shutter is triggered.
I rarely ever turn my flash to AF ONLY but if you do use this mode, make sure you remember to turn it back on when you are done or you might drive yourself crazy trying to figure out why the AF Illuminator isn't working next time you pick up your camera. Another little tip I use for when I want natural looking shots in low light, but still need AF assistance, I will turn my flash down to the lowest setting (1/128) and bounce the flash behind me or far away from my subject. In many cases this tiny amount of bounce flash will not affect the exposure in any way and you can keep your AF lamp working without having to dig into the menus.
One final suggestion I would give when it comes to autofocus assistance is to go ahead and completely turn off the On Camera Autofocus Assist Lamp (the bright white one). This lamp is supposed to help with autofocus but it usually doesn't work well with large professional 2.8 lenses because they often block the lamp altogether. Also because the light is so bright, it works great for red eye reduction, but it completely destroys any chance of you taking a candid photo because it lights up the entire area in front of you. Unlike the autofocus illuminator in your speedlight, this lamp is rarely useful and becomes obnoxious in low light settings. My recommendation is to turn it off entirely.
This is a super simple Photography 101 tip that for some reason photographers often fail to incorporate into their event work. Even though it's a simple tip, it is one that can literally save your ass over and over. I require every one of my wedding assistants to use the AF Illuminator during the reception because the results are night and day. If you do not have an on camera speedlight that has this feature, I would highly recommend you picking up one or two just to use on your main cameras. Remember some radio triggers also have built in AF Illuminators too so you don't always have to buy a new flash to gain this feature. I hope this simple yet effective focusing technique can help many of you gain confidence in your low light shooting and wind up with many more images you mark as keepers and deliver to your clients.


Join the Fstoppers community for free
-
Post comments and join in the discussions
-
Browse the site ad-free
-
Share your work and get featured in the community
-
Compete in the photo contests for fun and prizes
59 Comments
Good & helpful article. One nitpick: I think when you said near the end that "you might drive yourself crazy trying to figure out why the AF Illuminator isn't working", you meant instead why the *Flash* isn't working.
No I meant it the way I typed it. Sometimes your flash will not activate the AF Illuminator even though the Flash will still fire when you release the shutter. The reason for this is because your focus selector and focus mode needs to be on a very specific setting for the AF Illuminator to activate.
More context may be helpful - your error occurs in the couple sentences near the bottom of the article where you're cautioning about setting the Speedlight's AF setting to "AF ONLY". This is the situation where you can drive yourself crazy if you make this setting, and then a couple days later, pick up your camera and get frustrated that your Flash doesn't fire (with the AF Illuminator working just fine).
Ah yes I see. That is def a setting you need to check often if you turn off the flash setting.
Hello Patrick! Thanks for the great tips! I've got a situation here where i have mounted a SU-800 on the Nikon DF and with the AF-Light activated, the "Auto-ISO" doesn't seems to work at all. Is there a limitation on this because I was relying on the auto-iso setting to enable me to capture shots easily in low-light situation. I love this small AF-Assist on SU-800 but i wouldnt want to compensate with the lost of auto-ISO feature. Appreciate your good advice on this matter ! cheers !
I've never used auto ISO in low light environments where I'm shooting with flash. My suggestion is to set the ISO to a reasonable level like 800-3200 depending on the scene and then balancing your flash power with a slower shutter for ambient light. In most cases, your flash should freeze the motion of your main subject while the slower shutter will let interesting ambient light burn into the frame.
Hi, I've got a problem with this technique, I end up with a ton of photos that still have the red light pattern captured in the photos. What could be causing that?
That's strange. Are you using the same flash as the brand of camera you are using? This sounds like a sync issue since the IR grid should cut off immediately when the shutter is activated. You can always try to replicate the problem in a dark room. Set your ISO really high and set your shutter to say 1/2 a second. Most flashes will let you turn off the flash while still using the IR illuminator for focus. If you can take a photo without the flash firing yet still see the IR grid, then something is wrong.
I'm using the Yongnuo flash for Nikon, and I had it in rear curtain sync mode.