

In the first year or so of learning how to edit images, photographers are completely bombarded by information regarding the dos and don’ts for what makes a good photo. This is one area of post-processing that continues to be misinterpreted.
In this article I want to talk about blown highlights. Contrary to what you might think, if your image has blown highlights, you didn’t necessarily “blow it.” In editing, beginner photographers sometimes trust what they hear over what they see. This can be very evident in how clipped windows or skies are handled in post-processing, bringing them from white down to a gray.
I got rid of that clipping warning, boss.
The Cause of Misunderstanding
There’s no blame or shame here. I’ve done it, and most people reading this have probably done it before too. There’s just so much to learn with photo editing that no one can be expected to get it right straight away.
What I think happens is that photographers fairly quickly learn about the clipping mask in their editor. The first thing they are told about the clipping mask is that when it shows up that means their photo needs work and the best way to do this is boosting the shadows or dropping the highlights.
There is a caveat to this, however. When the camera’s sensor doesn’t have any data recorded for areas that exceeded its dynamic range, dropping the highlights doesn’t bring any detail back and instead the editor will begin to turn the pure whites into pure gray.
This creates a conflict, because a beginner is trusting the software and their teachers over what they can plainly see in the resulting image; Gray open windows in an interior photograph, a gray sun in a landscape, or gray specular highlights shining off a car.
Managing Blown Highlights in Post-Processing
For open windows, probably the best way to manage this after a shoot is to let it be. Windows that are pure white do not look unnatural in a photograph, despite the fact that our eyes have the dynamic range capability to see both inside and out in real life. You’ve probably seen thousands of images that you liked that didn’t have any detail through the windows. However, now that your are scrutinizing your own image, suddenly it might look wrong. But don’t fret, blowing out the outside detail in windows is a great way to simplify an image which makes for a stronger connection to what was important that you were photographing inside.
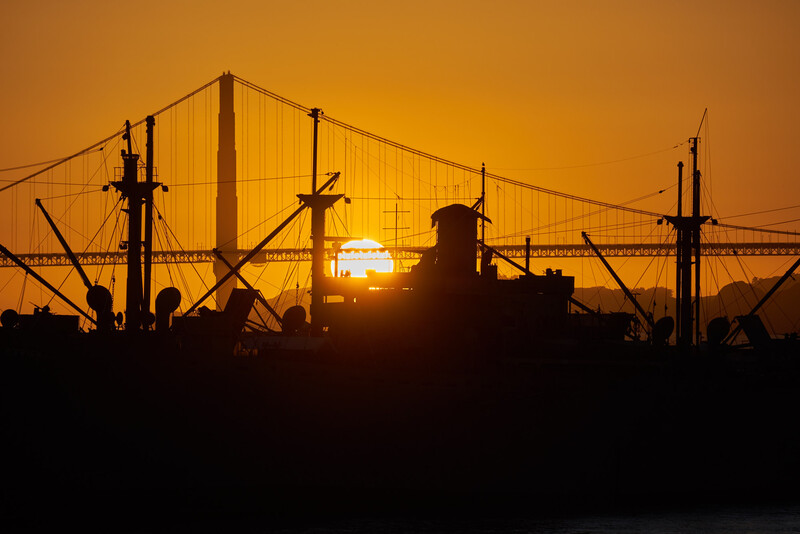
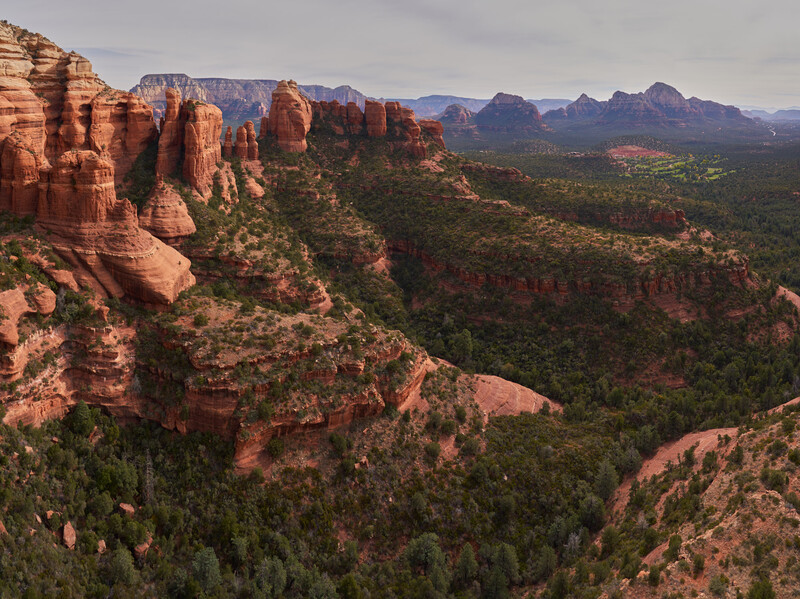
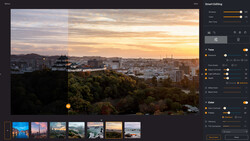
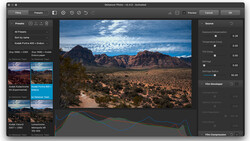
For landscapes, a common mistake is to bring back highlights for everything including the sun. Unfortunately, most sensors can not capture the dynamic range of everything in a landscape scene plus the sun in frame for one photo. There are a couple options here, one being to return the highlights as far as it will go but don’t enter into the gross gray area. This will leave you with some pure whites, but like the windows, nothing looks unnatural in a photograph when the middle of the sun in pure white; the same can not be said when the sun is gray. Another method I will sometimes use involves split toning. In essence, using split toning on the highlights and filling the sun in just a touch with a creamy yellow will get it looking a little healthier. When I say a touch, I do mean just a small 1 percent difference between being pure white; do not overdo it or we’re no better off than the sun being a gray blob.
If the sky itself is completely gone to white, there’s the option to perform a sky replacement in certain cases. Check out this tutorial for further details on how to do it in Photoshop.
Lastly, one other area that commonly gets reduced to gray are specular highlights. These are the bright, flashy, sparkly reflections that come off reflective surfaces. This one is easy, because if you see these in an image, you know to always leave them as pure white. Even in person, these bright reflections are blinding to look at and are hot white.
Do you have a favorite way of dealing with blown highlights? Leave your tips and tricks in the comments below.


Join the Fstoppers community for free
-
Post comments and join in the discussions
-
Browse the site ad-free
-
Share your work and get featured in the community
-
Compete in the photo contests for fun and prizes
14 Comments
Yup, first time I used the zebra thingy in camera, I would expose until I don't see zebra lines. I thought that would be exposing to the right of the histogram. Now I use the zebra feature to put highlights where I want them to be.
well said
Good article. I would add something that we old timers learned in the film days. It’s called getting it right in the camera. Today’s technology has taught us to snap now and fix later. The great Ansel Adams wrote the three greatest treatises on photography. The Camera, the Negative and the Print. In those days, the goal was to print. In order to make a good print, it was imperative to create a good negative. If you didn’t understand your camera and light meter, making a good negative wasn’t possible. Today, we have all the tools to make a good raw file. First, we have the immediate gratification of seeing an image right after a capture. More importantly, we have a histogram right on the camera that provides the exposure range. In addition, we have multiple metering modes. The great photographer’s of yesteryear had none of those things. If we get the image right at the point of attack (I.e. in camera), our post processing will be enhancing rather than fixing. Moreover. When we see that we are beyond the dynamic range we can employ HDR for landscapes or creatively using flash in portraits. So a blown highlight is indicative of poor camera work. Learn to use the camera and post processing will go much better.
Mind you, while digital photography allows around 4EV of underexposure, film allows at least 4EV overexposure - it’s really hard to ever truly blow highlights with negative film. Obviously it’s better to get the exposure “correct” first time but film can be just as forgiving, if not more so than digital.
Also, digital doesn’t have the gradual roll off that many films do, so if you preserve highlights at all costs you would lose shadow detail if the dynamic range of the scene is too great.
Francis, without getting too deep in the woods, I humbly disagree with your statement about film. If highlights are placed above zone viii, they are unprintable. If shadows are below zone ii, they are unprintable. I refer you to AA’s book, The Negative. Also, print materials are a factor that limits dynamic range with film. Now, there is a way to expand and compact the dynamic range of film through reduced exposure and increased development time, or increased exposure and reduced development. However, both of these processes are done on purpose by measuring the brightness range of a scene. The technique doesn’t work with sloppy metering and camera work. Again, I refer you to Ansel’s book, The Negative. Regarding digital my main point is that you obtain immediate results at the time of exposure to use as input. In film, you don’t really know anything until you proof your negatives. I still grieve an over exposure that I did at the Grand Canyon many years ago where I mishandled the highlights by 1.5 stops. In the digital world I would have known immediately.
Snow. I just went through this discussion with a photographer friend. His snow was grayish. As Megs said, you need to ETTR and trust your histogram. And then gently massage the image it in post.
How can you trust your histogram with ETTR when it is a representation of the JPEG data not RAW? Unless you are shooting snow tethered and can see the histogram in capture one/lightroom then all bets are off.
You have to learn your camera's sensor's capabilities and limits and "map" them to your camera's histogram and light meter's output.
May be this will help: "The most intriguing tidbit, and one we actually hadn’t heard of up until now, is that you camera’s histogram shows JPEG information even if you’re shooting RAW only. Editing software, on the other hand, shows you the RAW histogram.
This means the histogram on your camera will clip the highlights and darks before they’re actually unrecoverable, because your RAW shot has more information and latitude than the JPEG your camera is using to generate the histogram. Keep this in mind when you’re working with the outer edges of your histogram." So there is actually more info than the jpeg histogram is showing if you are shooting raw........
On Sony, use the flattest creative style you can. I use neutral, with -3 contrast and -3 saturation. It gives you a better idea. Also, always try to expose for how you'll want to process your images. If you can, take test shots and see for yourself if you'll be able to work with it. When I can't get test shots and adjust my settings to make the most out of the capture, I tend to underexpose by 0.7 or 1 EV just in case.
I don't use Lightroom, but Darktable, and I've been using the Levels module to increase contrast and not have shitty grey highlights. I first adjust the base curve, then the tone curve, then the levels. Only sometimes do I use the shadows/highlights module. The base curve should be used to pull out details from the shadows/highlights, and make the image flat. The tone curve should be used to make it pop more. Then the levels should be used as the finishing touch, in terms of exposure. Then I like using specific modules for colors, then adjust the sharpness/noise reduction using various modules.
Very much appreciate a common sense dose of reality about the difference between a photograph and the human eye. I have overworked too many windows, rarely happily, and now I will approach the issue more realistically. A real case of less is more.
One of my favorite tricks to recover a sky more evenly is to use a radial filter around the sun with a 100 feather to lower the highlights of everything but the sun. That usually brings down the rest of the sky enough to get some color (especially on a cloudless day) but leave the sun bright like it should be. The feather allows me to drag the filter out from a sun a bit to get a gradual falloff of light so it doesn't look unnatural. That's probably been one of the simplest solutions I've found for dealing with it.
Woah great tip, Dave! Thanks!
I used to do that, and there was always something funky in my images from it. Looking at other people's images I liked, I saw they adjusted the levels to remediate to that. I also notice they did the same for shadows, making sure there are some deep blacks where there needs to be.