
Have you ever felt like your photos were missing something? In this quick Photoshop tutorial, learn how to make your photos pop with this simple sharpening technique to bring your photos to life in minutes.
In the days of most media being consumed on our cell phones, we want our photos to stand out on people's feeds. In this quick Photoshop tutorial, dive deep into my workflow and see how I sharpen my photos. We'll be exploring sharpening through blurring and sharpening through added grain. Let's jump right into it!
Sharpening Through Blurring
This technique is used to simulate the effect that you shot at a shallower depth of field and at the same time makes the image pop more.
Step 1: Copy Background Layer Twice
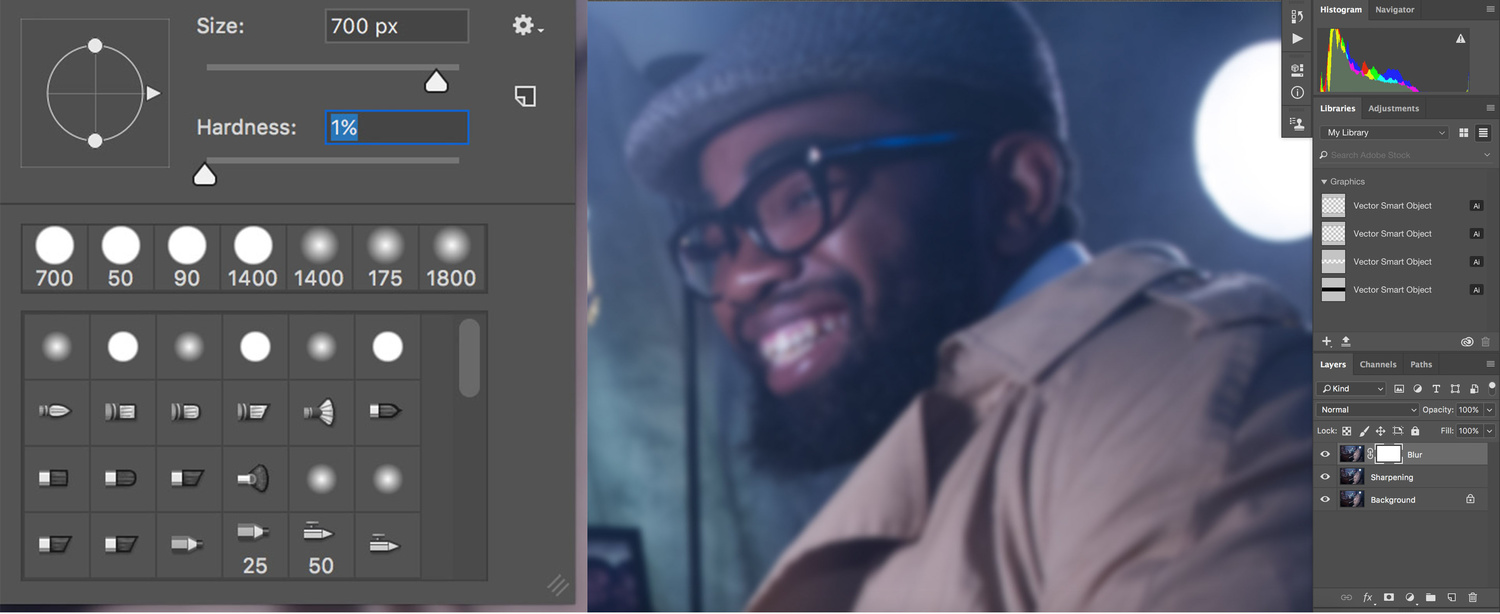
Once your image is opened in Photoshop, duplicate your background layer twice. To duplicate your background layer, press Shift+Option+Command+E. To duplicate, press Command+J. When you duplicate your initially locked background layer, you are making all your adjustments in a nondestructive way, giving you optimal control over the final results. Call the bottom layer "blur," and the top layer "sharpening."

Step 2: Apply Blur Filter
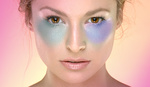
To add an extra layer of depth to your portraits and bring the audience's attention to the important areas of the frame, this a quick way to do it. Click on your blur layer, go over to the top of your menu panel, and select Filter - Blur - Gaussian Blur. Once you're in the blur panel, put your percentage at 5-8 percent. Press ok. You want everything to be blurry at this point.

On your blur layer, make a layer mask. Once your layer mask is added, grab a soft brush using and paint with 100 percent opacity and flow. You always want to start by removing the blur around the areas like the eyes, face, and clothes. Once applied at the fullest amount, turn your brush down to 50 percent opacity and paint around the areas like the ears and hair. This will give you a gradual falloff in focus, much like a shallow depth of field lens would give you.
Step 3: Add Sharpening Filter
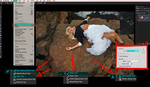
There are dozens of ways and tools to sharpen your images, but I prefer using the High Pass Filter. It gives the most natural-looking effect in my opinion. The high pass filter is located on the top menu bar under Filter - Other - High Pass. Once you're in the sharpening panel, put your radius to 7-8. Press ok. When you press ok, your entire image will look like a drawing. To get rid of the drawing effect, in your layers panel, change the blending mode to "soft light."

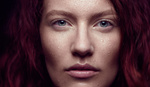
The Results


Sharpening With Grain
Step 1: Copy Background Layer Twice
Once your image is open in Photoshop, duplicate your background layer twice. Call the bottom layer "noise" and the top layer "sharpening."

Step 2: Apply Noise Filter
Once your layers are named and duplicated, on the noise layer, we will apply our noise/grain effect. For this effect to be the most effective, we put the grain first and the sharpening second. The sharpening layer is sharpening the added grain. So to add the fake grain, head over to Filter - Noise - Add Noise. Once in the noise panel, turn the amount to 5 percent to make it look the most natural. Anything above will start introducing distracting artifacts into the final image. Check the button to Gaussian. This will give you a concentration of grain that will help bring out skin texture and the environment. Next, check the box that says "Monochromatic." When the monochromatic option is added, it blends the grain into the scene and helps match the original colors. Press ok. Once the effect is added, head over to the opacity of the layer and knock it down to 60 percent or so.

Step 3: Apply Sharpening Filter
To enhance the grain we added in this effect and bring out all the texture, the high pass sharpening filter will serve to sharpen the grain, not the actual image. This intensifies the effect. Once you're in the sharpening panel, put your radius to 7-8. Press ok. When you press ok, your entire image will look like a drawing. To get rid of the drawing effect, in your layers panel, change the blending mode to soft light. Holding down shift+G, highlight the layers and make a group. Lower the opacity of the group to 60-70%.

The Results


For the work I do, the texture in my photos is what stands out. I've used these two techniques for the last few years and they've worked miracles in my photos. In just a few simple steps and a few minutes in Photoshop, you can make your images come to life through sharpening. How do you sharpen your photos? Let me know in the comments below!
If you'd like to take your photo editing to a new level, make sure to check out the variety of Photoshop tutorials and plugins that will speed up your workflow and help you create stunning, professional work. Save 15% by using "ARTICLE" at checkout.


Very nice! Thanks! :-)
Thanks Sam for the feedback! Glad you liked it!
I like the end results, but I would love to see the before version that has corrected exposure. They are all underexposed and the edits are all much brighter. Makes it harder to see exactly what your suggested edits are doing. But I like this kind of post! Good job!
Was gonna post the same thing.
Same - worst before/after examples ever. That is more like a before/after of all post processing. Not just the technique described. Contrast also gives perceived sharpness, so it really tells us nothing.
Thanks for the feedback. Noted
Sure. I'm sorry about that. Will do next time. I'll attatch a shot by shot with just the sharpening below here.
This may be just me, but i prefer to forgo the sharpening steps you illustrated, and just use a good quality lens for my sharpness. Just curious, looking at your before photos- what lens(es) do you use?
With even the best lens in the world, almost every digital image can use some post production sharpening due to the nature of digital photography and how sensors work in producing images. Especially when shooting raw. Even SOOC jpgs generally have some sharpening applied in camera.
Thanks for the feedback. For these photos i'm using a canon 5d mark 3 and a Rokinon 50 1.4. My favorite combo. Stay tuned for a write up on these manual film lenses later this week!
Looks like a lot of additional color grading going on, too, thus kind of rendering the before and after comparisons moot.
I hear. My apologies about that.
I'd love a follow up on how you changed the colour - I think that probably has changed the image more than sharpening? Thanks! (and: the end result looks fantastic!).
It would be easier to compare the before/after if the images were same sizes and had the same WB edits.
Good point! I'll work on putting them together then posting below in the comments.
I'm not sure if I get this straight, but if you duplicate the background layer two times and apply noise on one and high pass on the other, how exactly do you sharpen the noise if you apply high pass on a copy of the original where there is no noise ?
Thanks for your question. When you first open your image and duplicate your image, there are no adjustments made thus nothing changes. When you make your high pass sharpening layer on the top layer and set it to soft light, it's telling photoshop to only apply the sharpening to the layer below. On the layer below thats where your adding your noise. So the high pass filter on the top layer is sharpening or enchaining the layer below it which is the noise. Let me know if you have further questions. I also offer mentoring sessions if you're interested.
First of all, I think the tutorial is very helpful, I know it is just one of those little tricks that could really set a photo apart and for that, thank you very much for sharing your techniques.
Secondly, sorry that some people are so negative here.. I don't see as huge of a problem with the comparisons, is just giving an idea on what could be achieved plus further editing, this is never a complete start to end tutorial anyway, so that is more than enough.
Thx again and hope to see more tips from you down the road.
Thanks for seeing that in this article! Glad it helped!
I don't quite understand this step, which seems no effect to the image.
Step 2: Apply Blur Filter: "Once your layer mask is added, grab a soft brush using and paint with 100 percent opacity and flow"
It makes more sense to use an eraser.
Thanks
Hi! Thanks for your comment. The key here is to create a smooth and natural gradation from blurry to sharp. The sharpest parts of the image (The face) is where you start by brushing at 100% opacity, but then set to 50% opacity you brush away the effect around the areas like the hair, ears, and areas closest to it. With the eraser tool you really don't have that control.
The order of layers have also been changed, in "Sharpening through Blur", step 1, you say call the top layer "Sharpening" and the bottom layer "Blur" (- this is actually the middle layer). But the second photo in Step 2 shows the top layer, that you are adding the layer mask to, is now "Blur" and the middle layer is "Sharpening".
Whoops! Sorry! Thanks for pointing that out!