
No, I don't mean car chases, transforming CG robots, and explosions. I'm talking about small budget videos and films that sometimes require a lot more investment than you or your clients might think.
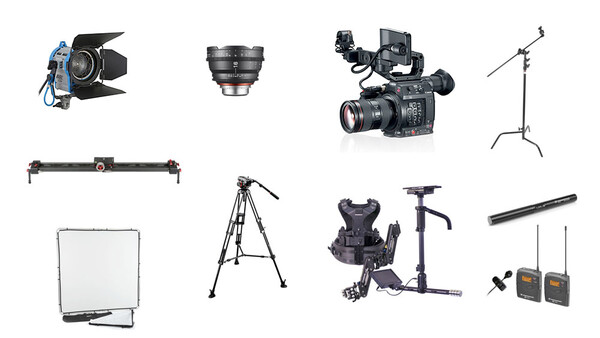
In a previous article I talked about the small amount of money you might need to shoot your first short film if you had a good knowledge of working with light, followed basic directing principles, and had a good story. Here I will talk about common situations where you ought to use more gear in order to achieve a desired result. The information can be particularly useful for those of you who are just starting out or those who haven't come across such situations yet. I will list the prices of gear that may not be the most expensive one, but won't be the cheapest one either.

The Movie Look
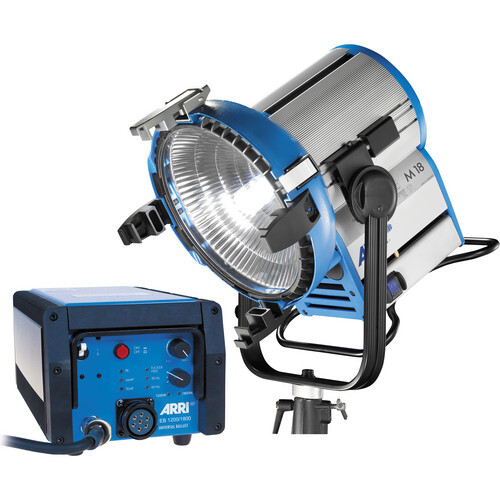
You've got a DSLR worth several thousand dollars and it shoots gorgeous pictures. It has 14 stops of dynamic range, but when it comes to video, it looks like the video from your cell phone. You may not want to admit it, but it's true. When a DSLR shoots video it doesn't record with that high dynamic range than in still images mode. The video from a DSLR usually has that "plastic" look where shadows are completely black, highlights are blown out, and there's no smooth transition to the midtones which usually look fine.
If you want to have that "movie look," you either have to shoot in situations with a low contrast light, avoiding back-lit shots, specular highlights in the frame, or scenes that have very dark areas. If you stick to those rules, your DSLR footage can look like in the movies, but if you want more you may need a cinema camera. This can cost you between $1,000 and $50,000 just for the body.
Long Shoots
You've got a video recording DSLR that you plan to use in low contrast situations. What can go wrong with shooting your film? It's all about the look, they say. Unfortunately, still cameras are not designed for long video takes, neither for extensive shooting. They tend to overheat or their memory buffers become full and you can't shoot lots of minutes without stopping. In such case you need a real video camera.
Panning and Tilting the Camera
It may sound obvious, but you need a tripod with a video head in this situation. While you can shoot a whole film on a tripod designed for photography, you can't do smooth panning or tilting with it. It can just hold the camera steady. You don't believe me? I didn't believe that either and I tried to use a photography tripod on my first short film just for a simple pan. I had to do about 10 takes each time that I got the smoothest motion possible, and yet it wasn't smooth enough. I purchased a fluid video head.
Professional video tripods are usually consisting of two parts: legs (frequently called "sticks") and a head. The heads can be all sorts, but they have a common feature: smooth motion. Regardless of the technology they use, you need one. Depending on your camera and rig weight, there are different options, but for small and mid-size cameras you may spend between $500 and $20,000 on a tripod with a fluid head. Your camera rig may include heavy sliders in the future, so be aware of that when you estimate its weight.
https://youtu.be/0pyHqCJEIjc?t=27
Sliding the Camera
Moving the camera in one direction whether it's panning sideways, moving forward, or backwards, is usually achieved with a dolly. In order to move the camera 10-20 feet, you need to have either a long enough dolly track or wheels that allow for smooth movement without the vibrations are transferred to the camera. Dollies are usually used in bigger productions. For smaller productions sometimes it's not a manageable solution, because you need a dolly, tracks, and a few assistants to help you set it up while everyone else is waiting. Sometimes small dollies just for our cameras or wheels under our tripods can get the job done. Both of these require a smooth track to ride onto. If you already have a relatively smooth ground, dollies can utilize it quite well. The disadvantage is the long time to setup. For smaller productions, bringing a full-sized dolly is not an option, because you don't have that much space in your car, your truck, or your van. For such camera moves we can either use budget solutions like dolly wheels for tripods or a slider. The second one is a compact solution, but it won't give you a long enough track for shots like in the video above. It can be used for small subtle movements for interviews, time-lapses, product shots, interiors, and landscapes. If you'd like to have a real dolly in your arsenal, you can invest in a sub-$3,000 one with rubber tires that can be used without a track.
If you plan to get a slider, know that most of them can be placed directly on the ground, but also may be attached to a video tripod or on a pair of light stands. If you want to use your video head, you may need one or more extra adaptors that could cost you a $150 more.
Smooth Handheld Camera Movement
When the actors are not limited by markers they have to hit, they have more freedom to act, especially when their performance can be recorded by the camera operator in a way that immerses the viewer into the action. Using the camera in a handheld fashion gives the opportunity to work much quicker than waiting for dolly tracks to be set up just for a few seconds of footage. There are advantages and disadvantages of each camera system and one doesn't completely replace the other. Because of the non-smooth camera movement when the camera is directly held by the hands, a man named Garrett Brown used simple mechanical principles to discover a mechanism called Steadicam.
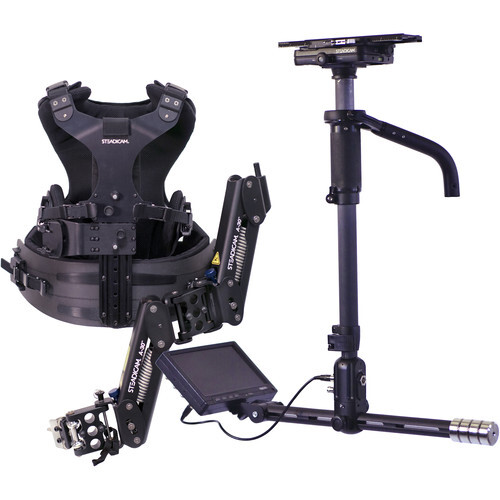
A lot of things changed with the invention of the Steadicam and the higher accessibility to video recording gear. Many companies started to produce similar stabilization systems for different camera sizes. Some are motorized, others are completely mechanical. The motorized solutions rely on electronics and gyroscopes in order to keep the camera steady and sometimes allow to shoot very complex movements that are not possible with the Steadicam. A great example of a motorized gimbal is the MoVi:
Investing in such a tool is not cheap at all. If you are shooting with a mirrorless or a DSLR, a small stabilizer system can do the job. Once you start to rig your camera with more gear like microphones, heavier lenses, cages, monitors, you may need a vest that will transfer the weight of the system to your shoulders and hips. With or without a motorized gimbal, stabilization systems usually start from about $1,000. The standard price is about $3,000 to $15,000 for a professional system for small-budget productions. Those systems usually require having a V-Mount battery for powering an external monitor and other accessories (including the camera). If you don't have a V-Mount battery yet, you have to have at least a spare $500 for one battery and a charger for your basic needs.
Focus Pulling
You are shooting an over-the-shoulder close-up scene of a man and a woman talking about two feet apart. You have a 85mm photography lens set at f/2.8, i.e., you have a shallow depth of field. You need to focus on the closest person and then on the other one. With that photography lens you have to turn your focus ring with a clockmaker's precision, because the offset has to be very very small. If you have lots of situations where focus needs to be adjusted during the filming, you may consider either a follow focus device that gives you a longer ring travel, you have to buy a cinema or a pseudo-cinema lens, or buy both. A decent pseudo-cinema lens starts at $2,500, but if you are not too picky, you can get cheaper ones too. Their focus ring has a lot more travel when you have to hit close focus points.
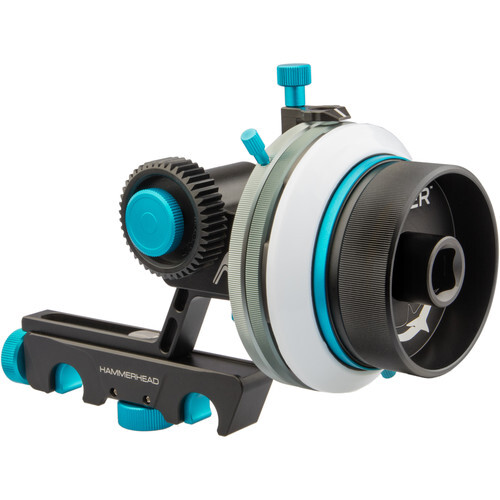
If you want to pull focus while you're operating a camera stabilizer system, you have to buy a remote follow-focus unit which requires an assistant to operate it. This will cost you at least $1,100 more just for that piece of gear.
Push-Pull, Dolly Zoom, or the "Vertigo" Effect
You've seen the famous "Vertigo" shots or the scene in Steven Spielberg's "Jaws" where the camera moves forward while zooms out or vice versa. Maybe you have tried that with photography lenses and you found the result was jumpy and far from smooth. Unfortunately, you need a variable focal length cinema lens here, and they are not cheap at all and start at about $3,800.
The Anamorphic Look
Adding black bars to your videos is the incorrect way of how a poor man's anamorphic look can be simulated. If you want to get a real anamorphic look, it's not the frame ratio, but the optics being used. A professional anamorphic lens costs a fortune. Most of them are above the $25,000 price tag, but there are small companies such as SLR Magic that can give the small budget shooters access to the elite world of anamorphics at an affordable price between $800 and $6,000. Of course, there are some compromises with the quality, but comparing your other options, you don't have to complain. There are even cheaper solutions: anamorphic adapters. But you shouldn't expect a brilliant quality there. It's an option though.
Shooting for Visual Effects
I'm not talking here about making the next "Transformers" on a DSLR, but sometimes you may need to shoot a scene on a green or a blue screen or even try to replace the sky or a similar visual effect. If you have worked with compressed camera footage for VFX before, such as a 4:2:0 footage which most DSLRs give, you know what I am about to say.
The compression of the footage produces artifacts which makes keying hard and far from perfect. Even if you have a relatively still object, two adjacent frames are never the same. For that reason they are not separated from the background in the same way. This produces flickering dots over the edges which can be eliminated by sacrificing the quality of the final key. This is shown in the video above where you see a close-up of a person's back head recorded on a dark blue screen, keyed out, and put on a light blue background. In order to avoid that you have to record on either a higher-end camera allowing at least 4:2:2 compression or using an external video recorder that supports a 4:2:2 or 4:4:4 compression.

A handy external video recorder is the one that is combined with a monitor. Pricing starts from about $500, and many times you have to spend a few hundred more on external mini SSDs. This will require you to invest more in computer storage capacity where you have to keep the countless gigabytes of data.
Monitors
The on-board monitors of most cameras, even cinema ones, are small and you, the director, or the client might want to see what the shot looks like on a bigger or a portable screen. I would recommend to invest into a monitor that is combined with a portable recorder. This way you can have an on-set backup too. If your monitor has an ability to use LUTs this will make the shoot much more pleasant as people will be able to see graded footage on the fly. If you just need a viewing device, you can spend less than $500 on it.
Slow Motion
Your phone can make a 4K video at 120 fps, but your DSLR or expensive cinema camera barely does 60 fps at full-HD resolution. Why is that? If you compare the quality and the compression of the final footage, you will see that the phone cheats a lot sacrificing quality for impression while with real cameras you have quality first and following by gimmicks. If you are happy with your current camera quality but you still want a higher frame-rate recording to convert it to a slow motion result, you can use an external recorder. They don't do miracles, but some affordable ones can deliver a 4:2:2 4K footage at 60 fps. For higher frame rates you better rent a camera capable of recording such.
Drones
Aerial videos can bring a lot of production value if you know how to use them properly. It is not just about purchasing a good quality drone. You need training, a lot of times, permits, and you have to be aware of the technical limitations its camera has. If you are planning on buying a drone just because it looks cool, you better don't spend your money on it.
Audio
As I said in the previous article about shooting your first film on a budget, audio has to be considered a valuable asset in your investment regardless of the size of budget. You need to have a high quality microphone and a recording device. You can record the sound directly into your camera or you can use an external audio recorder and synchronize the sound in postproduction.

Microphones
If you use just one microphone and don't want to spend much on audio, invest in a high-quality shotgun microphone. This may cost you at between $200 and $600 just for the microphone itself. You have to use a shock-mount holder to eliminate possible vibrations. The microphone can be placed on the camera, on a boom, or on a microphone stand. If you plan to shoot outside, you may need to spend between $200 and $600 on a wind-shield and a blimp.
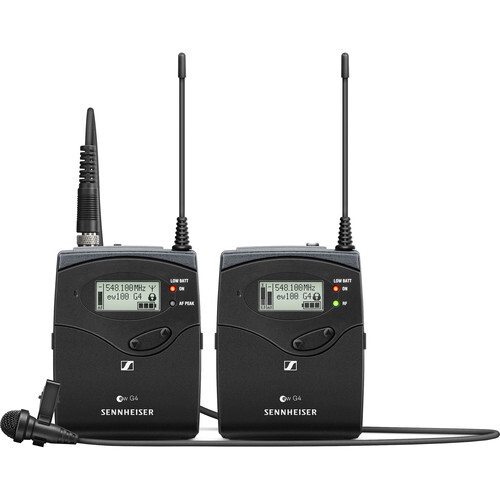
Shotgun microphones are picking sound mostly from one direction. If you use a lavalier, be aware that it records sound coming from all directions. On a similar price level shotgun microphones produce a better sound quality than the lavaliers, but most people won't hear the difference unless the audio is compared one against the other. You will also need headphones to monitor the sound whether or not you use an external recorder.
Audio Recorders
A portable audio recorder allows you to have more precise control over the input sound. It also gives you the opportunity to record backup audio signal or a signal from several microphones simultaneously. A drawback is the need to synchronize the audio in post, but there are many automated solutions that can help you do so.
A classic clapper board is used usually for audio synchronization (apart from the written information on the slate). If you don't want to spend money on that, you can simply clap with your hands and use that as a reference sound peak when combining the external microphone sound with the video reference sound (in case your camera has an internal microphone).
https://www.youtube.com/watch?v=UyoSqLVg0cs
Light Sources and Light Accessories
If you want a professional looking video, you have to be able to work with light. If you want a shortcut to having a film that looks like a film, get a high-dynamic range video camera and invest in lighting (both knowledge and gear).
Working with available light is cheaper, but harder to control, especially when dealing with natural sources, such as the sun which won't give you a constant light throughout the day, but if you are smart enough, you can take advantage of its powerful, beautiful, and freely available light. Using artificial light sources has only one advantage: control. Everything else can be counted as a disadvantage: it's much more expensive, it takes more space, it runs on rechargeable batteries, or requires a power mains outlet or a generator.
Light Modifiers
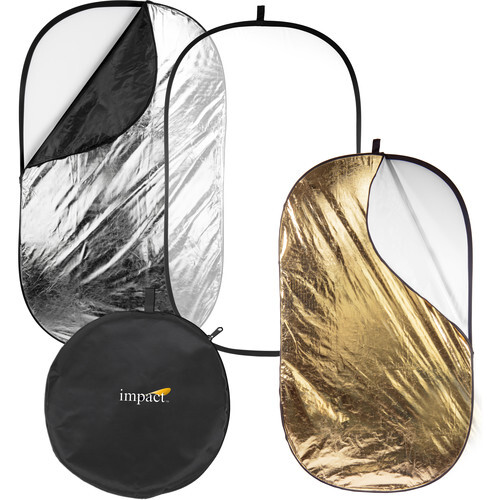
Whether or not using artificial light sources, you will need to modify the light. There are three basic light modifiers in video: reflectors, light blockers, and diffusers. Reflectors reflect or absorb light. There are white, black, silver, and gold reflectors on the market. There are different types of "white" reflectors depending on the material they are made of, but this is a personal preference. A typical choice of the small budget production are the collapsible reflectors. These can cost you between $30 and $200.
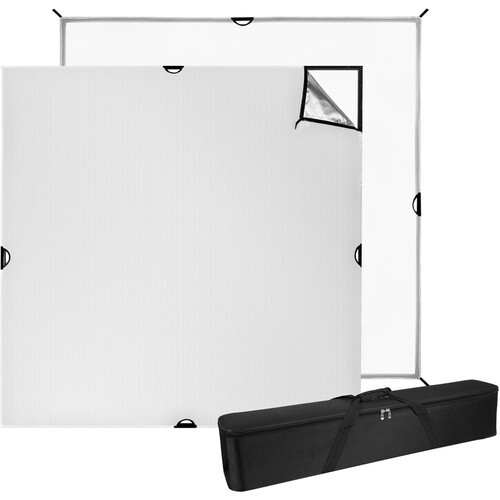
Another type of modifiers are the rectangular scrims. They are basically a collapsible metal frame with a fabric or a net used to diffuse, block, or reflect light. The scrims have a greater variety and usually require a light stand. Their prices vary between $20 and $1,600 depending on the brand, the size, and the materials. Most scrims and bigger reflectors require grip arms and light stands, so be sure to plan for paying between $50 and $100 for grip arms and holders.
Light Stands
Light stands are often an ignored expense, but can be take a considerable part of your budget. Buy heavy and sturdy light stands. You won't regret it. The wider the feet can spread, the sturdier the light stand is. Usually you will need high light stands, so plan on buying those that can extend higher. The price range for an affordable heavy-duty light stand varies between $70 and $400. As I mentioned above, they are not used only for lights, but also for light modifiers and sometimes for attaching sliders on them.
Light Sources
In general, there are four more common light sources used in productions today: tungsten, fluorescent, LED, and HMI.
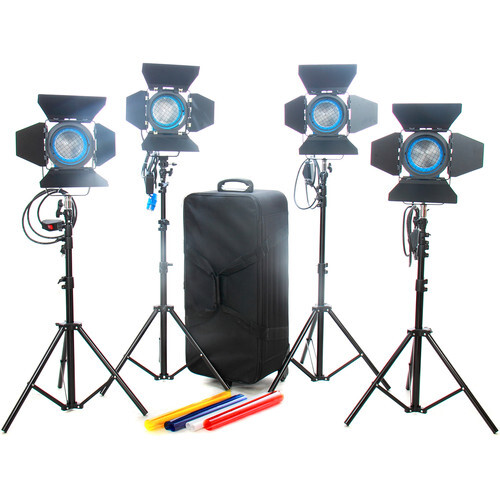
Tungsten Lights
You will also find them under the name "halogen lighting." They are the most affordable and at the same time powerful light sources. They can give you a high power output at the expense of a high power consumption. They produce a lot of heat and require a power outlet or a generator to operate. The advantage is their wide variety and affordable price. Their prices vary between $100 and a few thousand, but in most cases a $150 to $400 light gets the job done, especially for interiors.
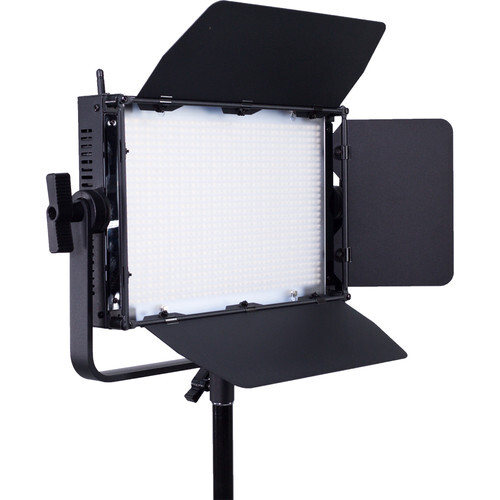
LED
Those lights are famous for their low power consumption, ability to work on batteries on location, and their lack of showing the full light spectrum. The more expensive an LED light is, the more of the full spectrum it covers. A typical household LED lacks the red color hues and this is why shooting indoors under such lighting conditions has a yellow-green color cast. Unfortunately, you can't do much in post with cheap lights. All LEDs remain relatively cold when they work and their power output is weaker than the similarly priced tungsten sources. LED lights' prices vary greatly, but you can get decent ones in the price range of $300 to $1,000 per item.
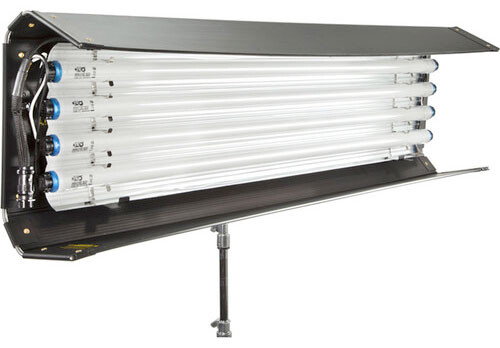
Fluorescent Lights
They are weak in power, but most models are affordable. They can be used with various photography modifiers, because they don't emit heat as the tungsten ones. For about $300 to $800 you can get fluorescent lights and modifiers that can help you light dim interiors. More expensive solutions are the Kino Flo's that give you more control over the light shape and power output of the banks.
HMI
If you want to simulate a strong sun light or you need a lot of light, the answer is HMIs. Those are usually rented by the smaller production teams, because most brands are selling them at very high prices. These types of lights have two parts, an electronic ballast and a head. They are very powerful as light output and it's worth buying these only if you need a strong beam of light. The ones that are outputting more than 1,000 watts are starting at about $2,000 for a head and a ballast which is quite cheap compared to the more expensive and powerful lights.
Light Meter
In the digital era you can achieve good light ratios without a light meter, but if you want to be consistent or you want to make sure the monitor is not lying to you, you better use such a device. Starting at about $200, these toys can become the tool that you're going to use second to operating the camera.
Batteries
Batteries sometimes become hidden from the budget planning and can be very expensive. Having at least one more battery for everything that requires one is a must. Sometimes you have to buy an extra charger that you can charge several simultaneously.
Bags and Cases
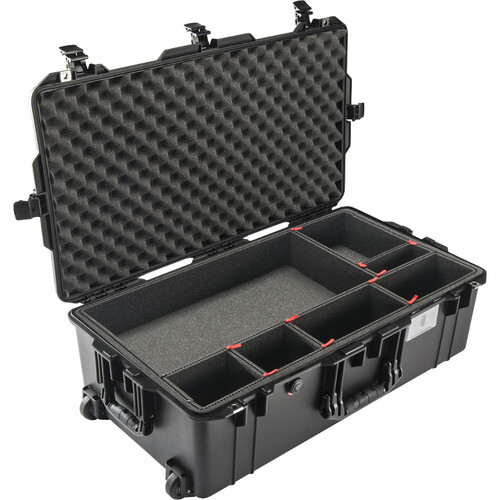
You need to protect and transport your gear. Depending on your logistics you have to estimate if you're going to need hard or soft cases. For sure you have to have a carry-on sized case for your most valuable gear like cameras and lenses. If you plan to fly with your tools by planes, you better consider hard cases which can cost you between $150 and $500 a piece. They are heavy too and you have to have either quite an expensive gear or really well paid gigs if you transport all of your stuff on planes. Oftentimes it's cheaper to rent light stands, lights, and tripods instead of carrying them with you. If you are traveling a lot, sturdy cases is what you have to invest in. They are not cheap, but you won't regret the purchase. Oh, and make sure those cases have high quality wheels. That's very important for your back.
Cables and Cords
Buy and extra cable for everything. Bring several extension cords with you. If you use high-input powered lights, you may have to plug them into outlets that are on different circuits. This is why you may need more extension cords. Learn how to keep your cables and cords tangle-free. The standard "over-under" technique works fine even for small cables.
Post-Processing Gear
Post-processing is a whole different universe and I'm mentioning it just because I have to, but I won't go into details. I just want to say that small budget videos and films can be edited even on a laptop, but a powerful one. Most computers today are having a lot of RAM and fast SSD drives, but for video it's essential to also have a fast graphic card. Whether you plan to edit on a laptop or not, make sure your graphic card is the best you can buy. Of course the more of everything else (like RAM) you have, the better. Don't forget the cost of the software too.
An Example
You want to record a short interview indoors, lit by three tungsten lights, using a camera slider during the talk, and recording it on a affordable high-dynamic range cinema camera. For the audio you use a shotgun microphone on a boom and record it directly into the camera. This here is a sample list of gear you can buy to get that project done on a budget but with a high quality result:
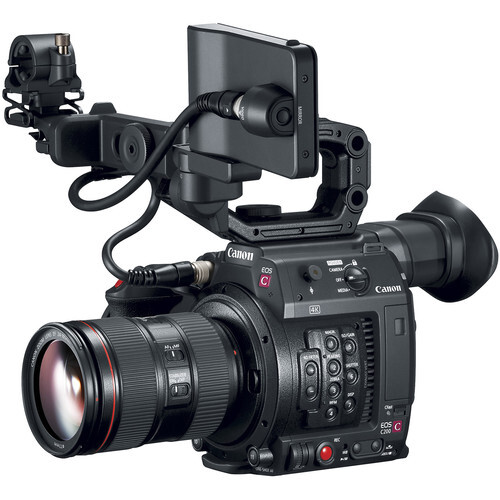
- Canon EOS C100 Mark II Cinema camera - $3,499
- Canon 50mm f/1.8 - $125
- iFootage Shark Slider Mini - $499
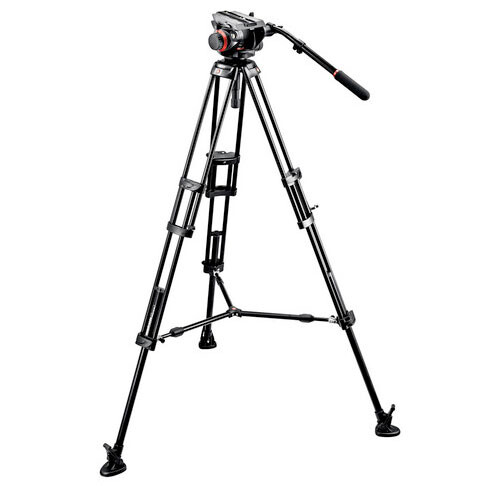
- Manfrotto MVH500A fluid head tripod - $349
- Adaptors to attach the bowl head on the slider and the slider to the tripod legs - $128
- CAME-TV 800W RED Head tungsten lights and light stands - $299
- Westcott 4x4' Scrim - $249
- 2x Impact Grip Heads - $18 each
- 2x Manfrotto Light stands - $99 each
- Sennheiser MKE 600 Shotgun microphone - $329
- Sony headphones for monitoring audio input - $13
- XLR microphone cable - $17
- Dell XPS laptop 15.6" - $1,375
- Adobe Premiere CC subscription for $20.99 a month.
The total cost is about $7,150. If you need to use a Steadicam, and external monitor-recorder, a wider lens, and a second microphone, the price easily doubles. In this calculations I assume that you have the needed knowledge of working with light and composition. If you think you lack any of those, you can invest in some of the Fstoppers tutorials including the latest Intro to Premiere.
Conclusion
There are a lot more items one might need for a video production, but here I wanted to mention the most common cases in today's films and videos. You can save on gear by using DIY solutions and there's nothing wrong with that. As long as it's sturdy, safe, and looks good, go for it.
Video is expensive both for the filmmaker and for the client. While you can shoot a well-crafted story on the cheap, you will inevitably want a good looking image and clear audio. This bumps the expenses exponentially and the only thing you can do about that is to learn how to get the most out of the gear you can afford and operate only within its limits.


Join the Fstoppers community for free
-
Post comments and join in the discussions
-
Browse the site ad-free
-
Share your work and get featured in the community
-
Compete in the photo contests for fun and prizes
12 Comments
Wow fantastic article.
Thanks. I appreciate your feedback.
I think I'll send this article to people who think shooting a half day is easy/cheap!
Exactly.
Some very important information here, never truly understood the use of 4.2.2 compression or why adding black bars feels cheap. Thanks
I'm glad it helped. Thanks for the comment.
I think your minimum interview kit is rather overdone. For example, this was shot with an XT20 and one light, no post processing thanks to Fuji film sims -
https://www.cinema5d.com/fujifilm-x-t20-review-real-world-video-samples…
Also
>> You've got a DSLR worth several thousand dollars and it shoots gorgeous pictures. It has 14 stops of dynamic range, but when it comes to video, it looks like the video from your cell phone.
Off the top of my head a Fuji XT20 has 9 stops of DR in video and an XT2 has 12. That compares to 6 for a film camera shooting Kodachrome (if you could still get it.) And Fujis are hardly unique. Video from most Sonys, Canons, and Nikons is ***not*** going to look like cell phone video. It's bloody hard to tell an XT2 from a Canon C-series.
Otoh, I'm not sure that you mentioned one of the major problems with DSLR and MILC video - rolling shutter. You also didn't mention the most useful piece of low cost video support gear - the monopod with a fluid foot and base. It can pull some very fancy camera moves off without a slider system. It's also worth mentioning that cameras can shoot slider footage digitally, at the cost of dropping to HD for those cuts.
>> Unfortunately, still cameras are not designed for long video takes, neither for extensive shooting.
An XT2 with grip will run for 30 minutes. That's a long take. And I thought a GH5 will run indefinitely in video mode?
...C-series Canons are excellent pieces of gear. But most people who have a modern DSLR or MILC don't need to rush out to buy - or even rent - one for an interview shoot!
This is not a "minimum interview kit." article. I've posted another article (before that, and linked in the beginning of the current one) where I point out that you can do a whole film on your phone. You can do an interview on your phone for sure. I'm not talking about "minimum gear" here but something designed for that purpose. Stills cameras are not designed for video. They are not balanced for video use, their sensors do not have active cooling as do the standard cinema cameras. They do not have the processing power of the cinema cameras and they don't have the battery life of those. It's not just about the visual for a few seconds or minutes. It's about having a workhorse designed for that.
If one can't afford lots of gear, they can still make a living out of lower end one, but when money comes, many people in this position tend to get something that would make their life easier. Nobody else may notice that, but the photographers or filmmakers themselves. It's like buying a new stills camera. Look at my portfolio. It's been shot with 4 different cameras. You can't find the difference. It's the same with the portfolio of everyone else. The tools are making our lifes easier. They are for us. I am such a person. I've been shooting many years with a lower-end gear because I couldn't afford more. After some time I was able to get something designed for video and I don't regret it, as you've given an example about the C-Series vs. stills cameras.
There are lots more things that I haven't mentioned like the rolling shutter as you said. I haven't mentioned the monopod, because it has a very limited use. For a small-size filmmaker a camera on a tripod and you standing aside and asking questions and the interviewed person looking at you is a common situation (if we're talking about interviews). A monopod is OK for a documentary-style shooting or a reportage. A tripod is a little bit expensive (not that much more) but more versatile. It uses up more space too, compared to the monopod.
As a summary, I agree with the things you've said that you can get the job done (in many cases) with less gear (as the previous article). If you work with the proper gear (by design) it's very expensive. That's what this article is all about.
>> This is not a "minimum interview kit." article.
Then it might as well be as well to say what it is. And why an especially huge dynamic range is required for an interview kit of all things??? Not to mention which modern DSLR cameras have cellphone quality video. Because the cameras that most people here are likely to have - d750s, 5diii and iv, Sony A7s and A6000-series, and new generation Fujis are all bloody good. There are reasons someone might want to shoot with a C-series camera instead and they need an intelligent discussion, so that people can make that choice. You haven't provided that discussion - just completely baseless FUD.
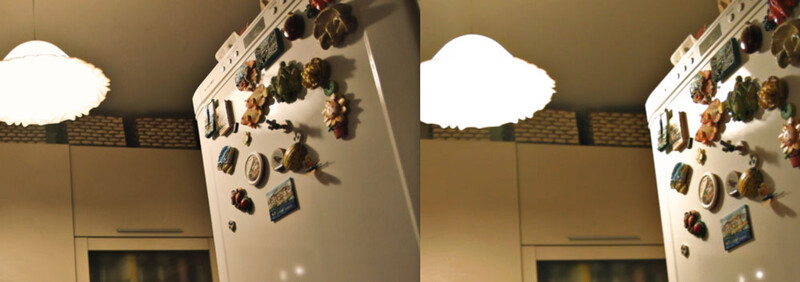
I've placed an example in the article. There are lots of examples on the internet comparing DSLRs with cinema cameras. The Sony A7S has a better dynamic range, but the Nikon and Canon DSLRs have crushes blacks and overexposed whites.
When shooting with cameras with lower dynamic range (I'm talking about video here) controlling the contrast of the scene is a must. When keeping the highlights and shadows not in the extremes, the image will look quite decent. I'm attaching an example of a not-in-focus DSLR frame vs. a cinema camera and the scene is far from being of high-contrast. If the DSLR image were in focus, one would hardly guess which is which. But if I'm shooting towards the sun, the difference is obvious. Specular highlights are the thing that usually lifts the cover of the disguised DSLR as a "video camera." Again, Sony, GH5, invest in better dynamic range in their still cameras, but the drawbacks are obvious. Sony still has to sell their video cameras. So does Canon.
Another drawback of the still cameras in video mode is the compression. Even if they shoot in some *-log format, it's still lossy and compressed way more than the similar log files in cinema camera lines. Yes, there's some extra light data in the pixels, but it's not as much as in the cinema cameras. This is visible only in tough light situations. This is the reason it's critical to have more control over the lighting when shooting with cmaeras with lower dynamic range.
And by the way, I'm shooting with a cinema camera. I'm having videos with a DSLR too. I've been shooting with a stills tripod and with a video fluid head. I've been shooting with a Steadicam and with a cheapo DSLR-stabilizer. I have been sliding a camera on a rug and I've been sliding it on a slider. I'm speaking out of personal experience. It's all about gettnig the job done after all. I like to get it done with the tools for the job, because I've been using the others and even if they work in some situations, they are not as suitable as the others. I still use a DSLR as an additional camera sometimes, but I am aware of its dynamic range limitations and I use it very carefully.
It's not about being elitists here, but realists.
>> There are lots of examples on the internet comparing DSLRs with cinema cameras. The Sony A7S has a better dynamic range, but the Nikon and Canon DSLRs have crushes blacks and overexposed whites.
This is not a competently written statement. Every camera will crush black and overexpose whites if taken outside its range. That's what being taken out of its range means.
That does NOT mean either a DSLR shoots cellphone level video or that a C300 is a smart investment for, of all things, an interview shoot.
You're distributing FUD. Please stop it. The C300 is a great camera and a good choice for a lot of shoots - but NOT because DSLRs shoot cellphone level video! Still less because cameras that "only" have double the dynamic range of Kodachrome aren't good enough for an interview shoot...
If you shoot lots of backlit scenes or scenes with lots of specular highlights, daylit windows, night environments with lights or reflections in the frame, the image of DSLRs or low dynamic range cameras disintegrates. This is also partially true when shooting in stills mode. That's why we help it with some lighting and yet, it's a difficult situation to shoot for any camera, but the dynamics of the lights and shadows look great. The article is not about shooting interviews, but shows a simple example of shooting one and doesn't say what kind of an interview it shoots.
I did a short film recently, where there were interviews in the open and all shots were backlit by the sun. With a DSLR the clouds were blown-out, but with a higher dynamic range camera everything was fine and with a little help of a reflector I was able to get the job done (not to mention that it was high up in the mountains where it was difficult to carry extra lights). If I had to use a DSLR, I wouldn't have shot against the sun, but in the shade or with a diffusion material. A nice image can be pulled in any situation where you have options. If you don't have options but the project requires a better dynamic range camera, you have to have it.
And it's not about interviews here. Filmmaking is much more than interviews and interviews themselves can be crafted in a very cinematic manner that frequently involves high contrast scenes.
As you've mentioned, even with a cinema camera you can't expect a perfect image, because the sensor has its limits. This is why shooting has to be conformed to the gear being used. It's not uncommon to shoot movies with different cinema cameras that perform better in certain lighting conditions.