
ACDSee Photo Studio Ultimate 2019 has a tool called Light EQ™, and it's superb for making many changes quickly and easily.
There are people who edit their landscapes with extreme finesse and precision in the way one might retouch a beauty portrait. I admire that, but as someone who just enjoys landscape photography and doesn't have any real goal with it, it's not for me. So when I tried out ACDSee's Light EQ tool, I wasn't entirely convinced it'd be up my street.
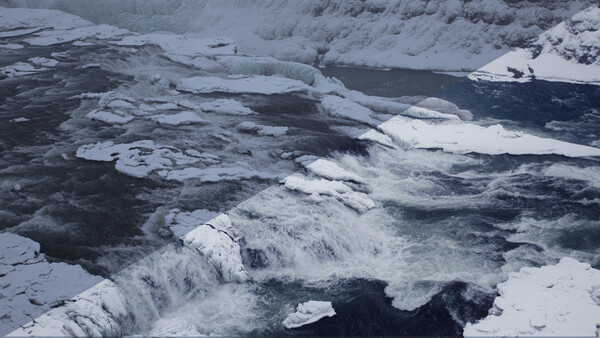
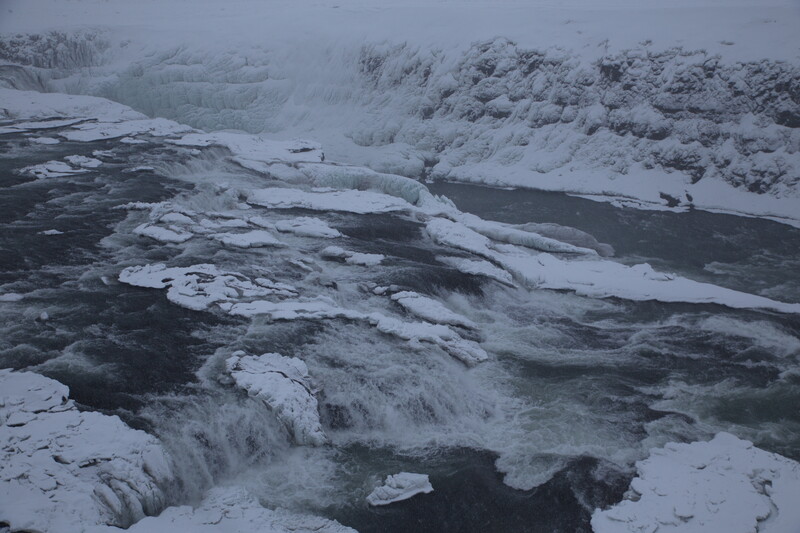
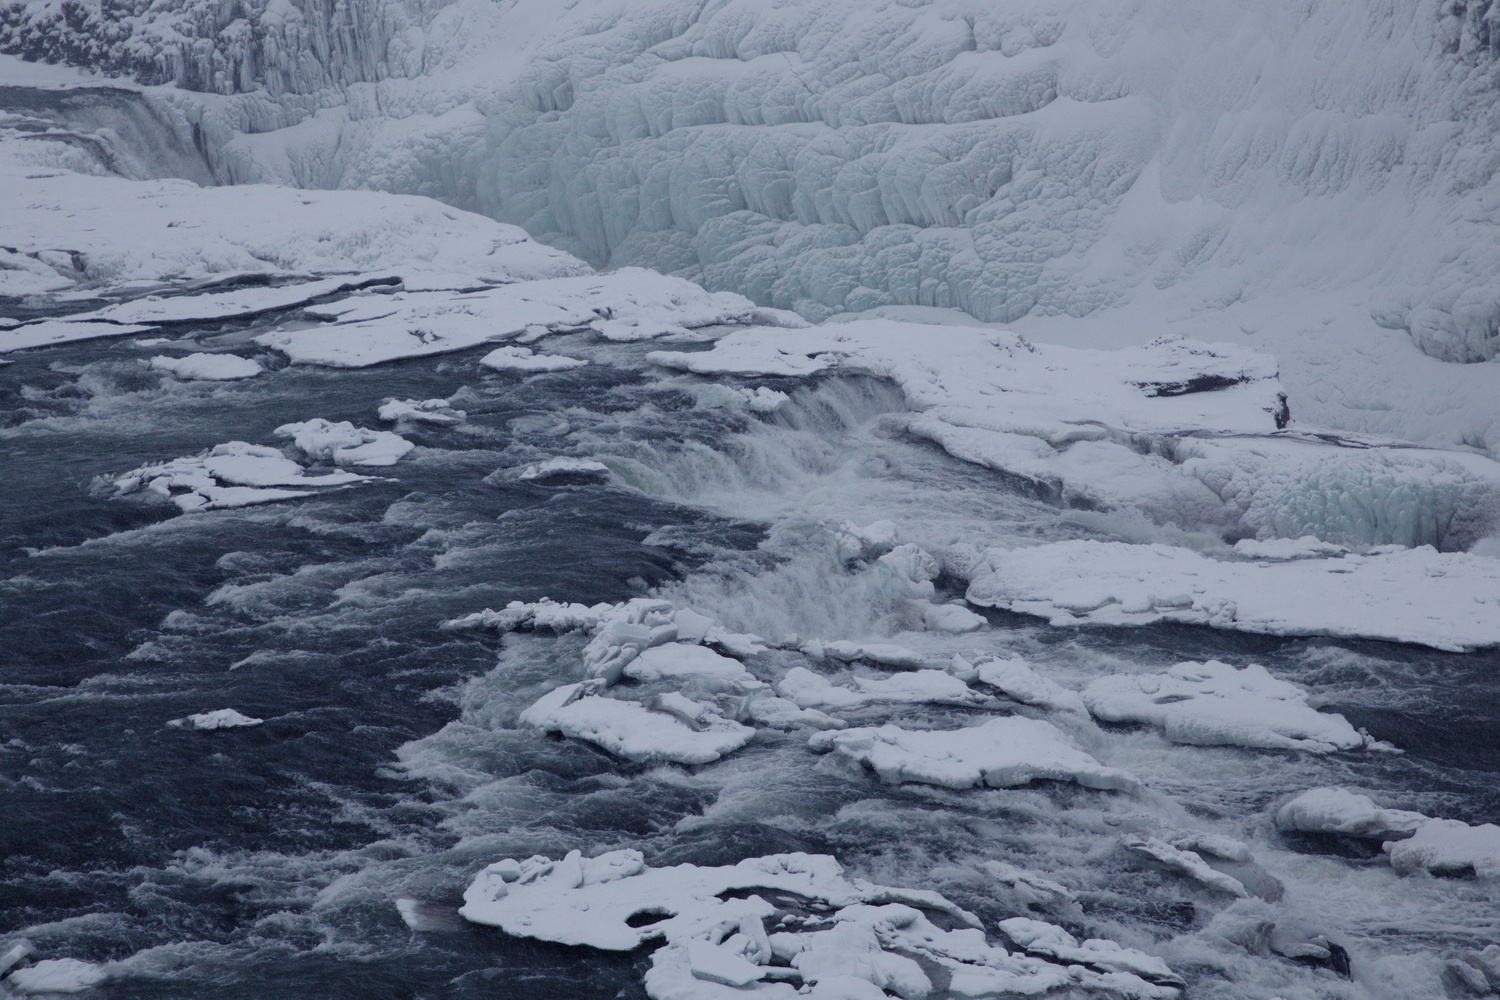
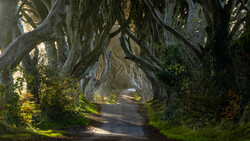
On my trip to Iceland earlier this year, I wasn't looking to recreate the images I'd seen many times, partially because I don't like the well-trodden path and partially because my landscape abilities aren't of the caliber needed to achieve what I'd like. Instead, I revel in creating small series of images that I can print all together. So, I was probably the only photographer on the island who was pleased when a massive snowstorm hit Iceland. I hopped in my Jeep and trekked through the treacherous conditions to Goðafoss, arguably the most extreme waterfall in the country.
My problem with the images was that it was so dark from the heavy and low clouds that without doing a long exposure and the image being entirely blurry due to the snow and water thrashing around, I had to underexpose. Then, because of the lack of natural and direct light, the image was very flat in the camera. I knew in my head I could coax the image (which was closer to what my eye saw) with dodging and burning among other tools, but Light EQ had a lot to offer.
What is Light EQ?
It's a tool in ACDSee's Photo Studio Ultimate 2019 that — as its name suggests — allows you to play with the light in an image. The best way to describe the functionality is this: it amalgamates curves, levels, contrast, dodging, and burning all into one tool. The depth of this tool is pretty much as shallow or as cavernous as you want to make it. My goal with my small set of images could be achieved somewhere in-between those two.
1) Load Up Light EQ
After opening the ACDSee software, locate the image you want to work on, then jump over to Edit. Click Light EQ on the left panel and you'll be presented with the following UI.
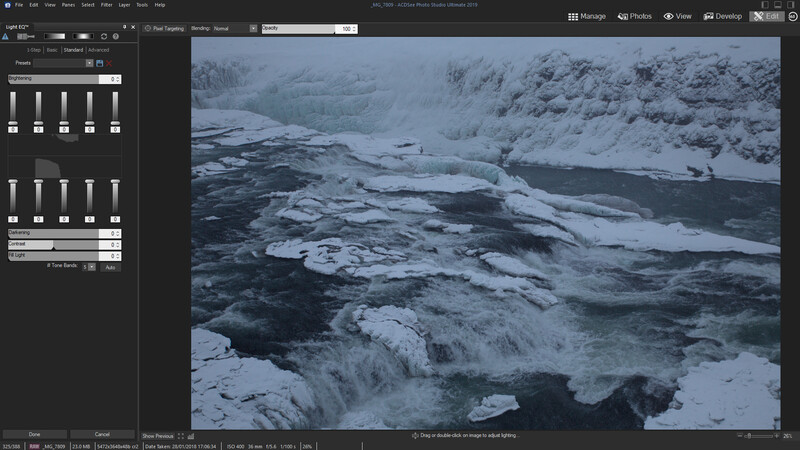
2) Hit Auto to Get a Reference Point
The "Auto" button on most post-processing software is very heavy-handed. However, when leveraged as part of reaching an end goal, rather than hoping it is the end goal, it can be useful. I always like to see what Auto gives me, as the software's primary aim is for a balanced, well-exposed image. I can use this to see what a properly exposed version of my image would look like. I'm not going to use it, as it obliterates all sense of mood or atmosphere, but it means I can work back from the "correct" exposure rather than working forward from the heavily underexposed one, which can end up tricking your eyes.
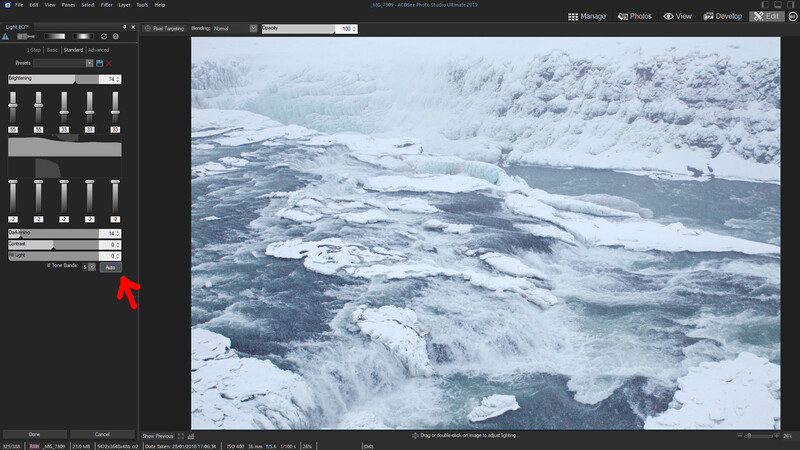
3) Begin Adjusting the Different Tones Independently
There are two ways to start adjusting your image here: you can either play with the sliders on the left or you can click on any area in your image and drag your cursor to make localized changes.
In the left-hand panel is "# Tone Bands," which I have at five. This dropdown menu allows you to select how many categories your shadows, midtones, and highlights are broken in to. From experimenting, five was enough to cover most images, but if you have a complex image with a vast selection of exposures — perhaps a blended exposure or HDR image — you may want to increase this.
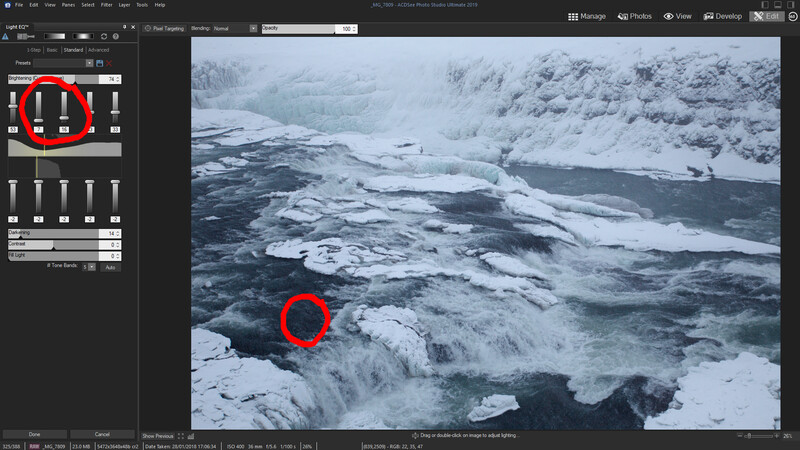
4) Fine-Tuning the Levels
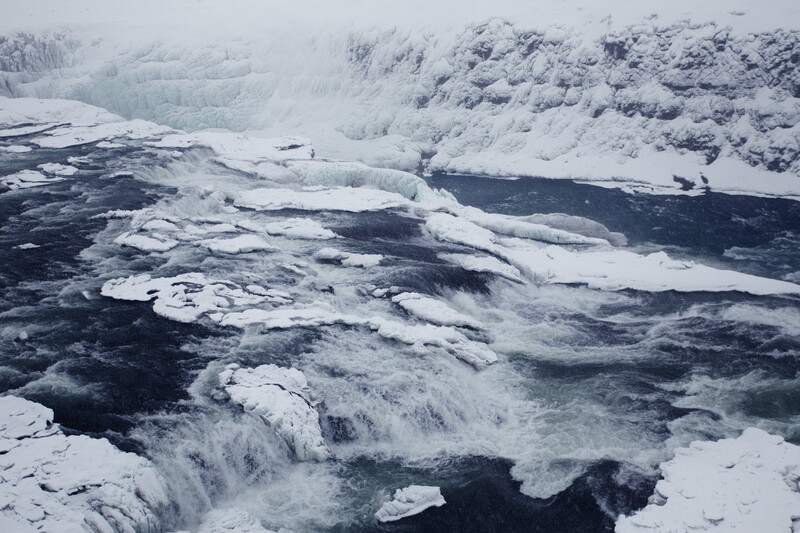
While this got me closer to where I wanted to be, I made some adjustments to the contrast and some of the five sliders that affect the range of shadows in this image.
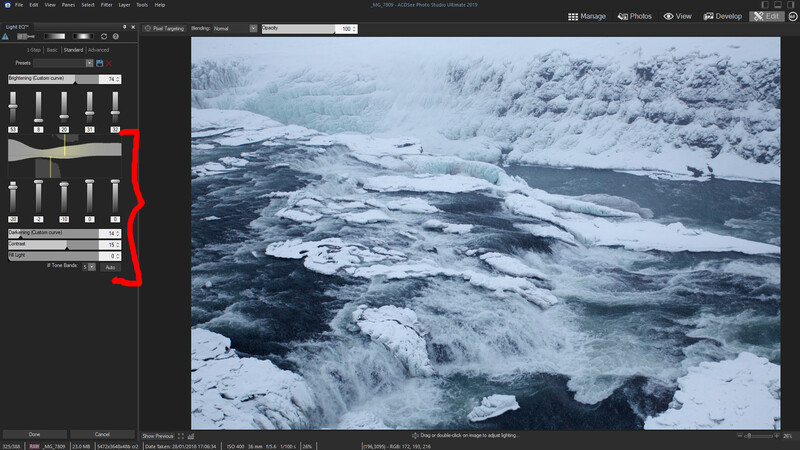
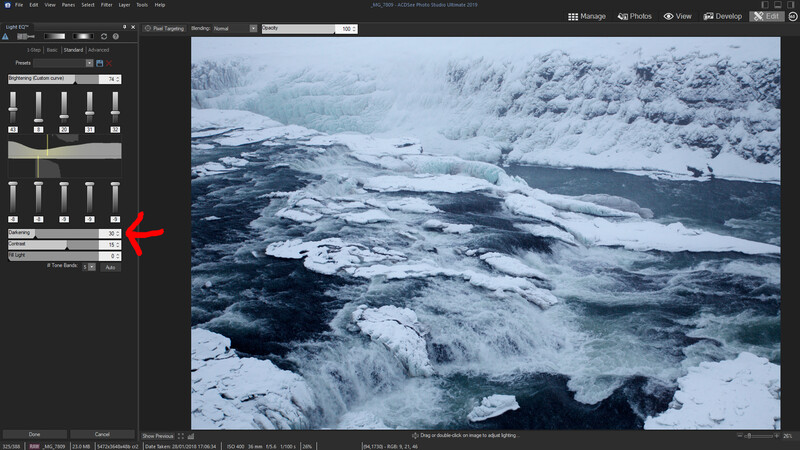
5) Bringing Out Those Darks
With the contrast closer to where I want it, I bring out the overall darks while keeping the midtones and highlights the same.
6) Localized Alterations
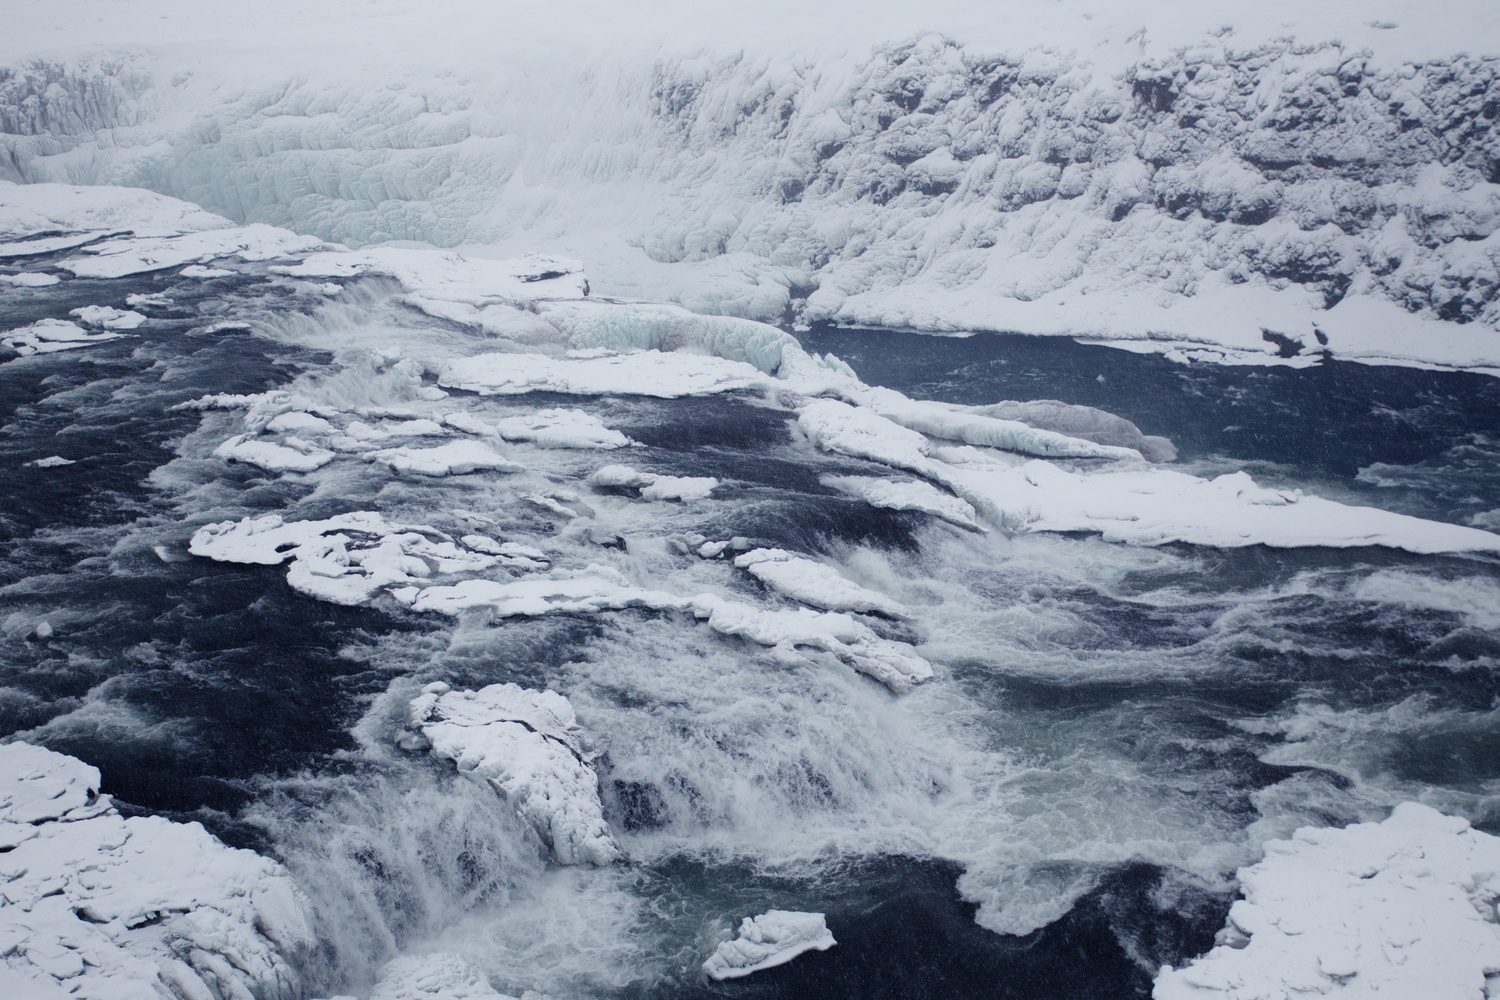
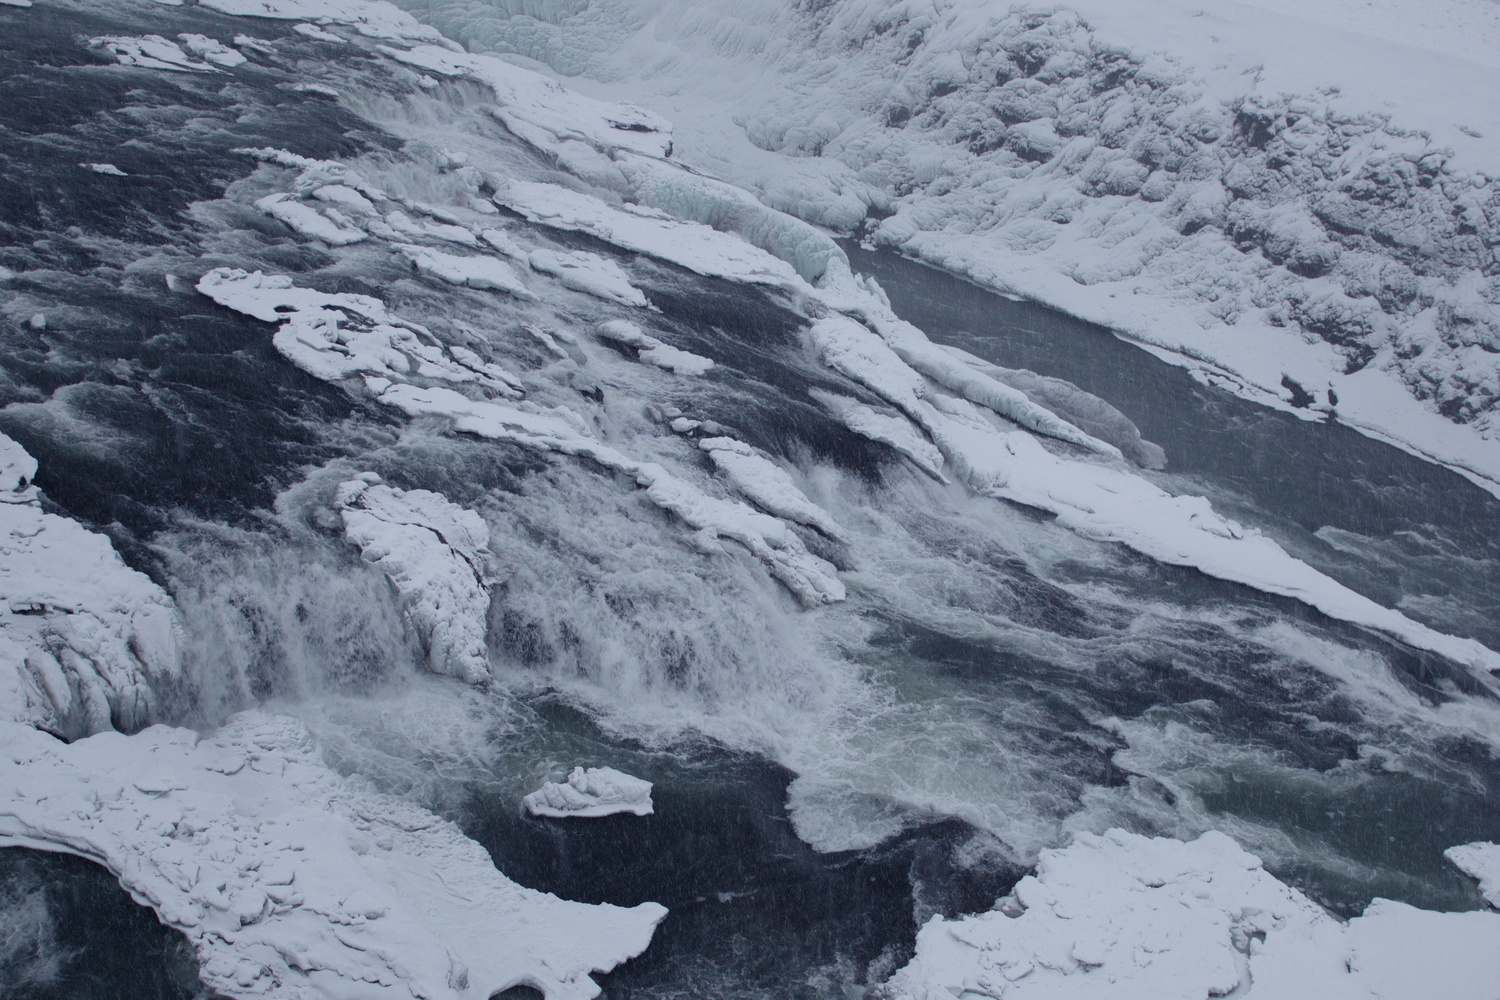
One part of the current image bothers me: the farthest part of the river. Small clouds of snow and mist were swirling around the area, and it made for a hazy section, which unbalances the frame. Fortunately, with Light EQ, you can make exceptionally precise changes to localized areas.
In the top left of the panel, select the paint brush and alter the settings. I prefer small nib width, heavy feathering (how much the brush fades on the outer edges), and light-to-average pressure. Then, an important option is the dropdown menu "Smart Brushing." This changes how the brush interacts with the image, from simply painting over it with no regard for what's below to various options for letting the software do more of the legwork. I select Brightness as there's a lot of contrast in the area I'm painting, and I want to only include the shadows.
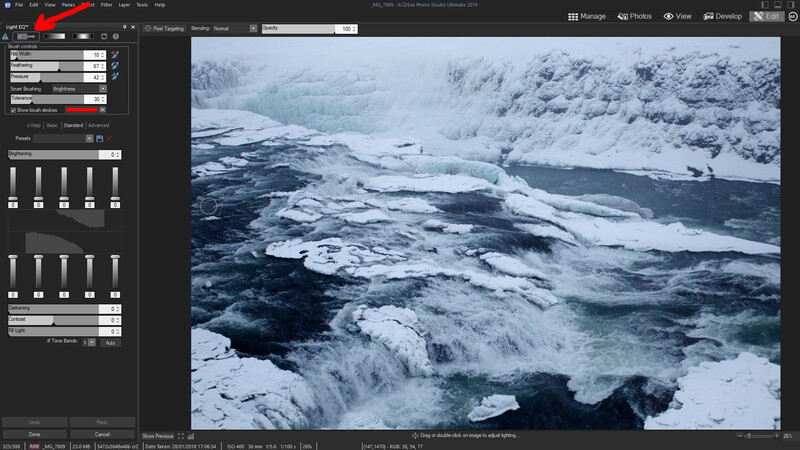
7) Toggle "Show Brush Strokes" to Check the Mask
Before I begin the adjustments, I make sure the mask is applying where I want it to by toggling the Show Brush Strokes option and checking where the brush is applied.

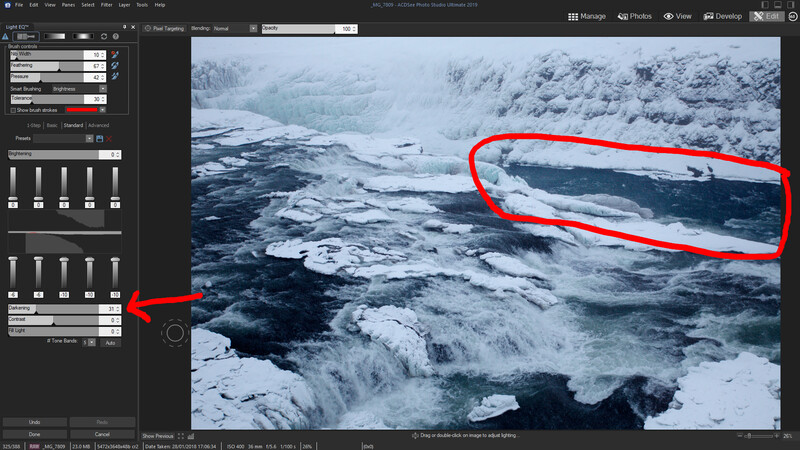
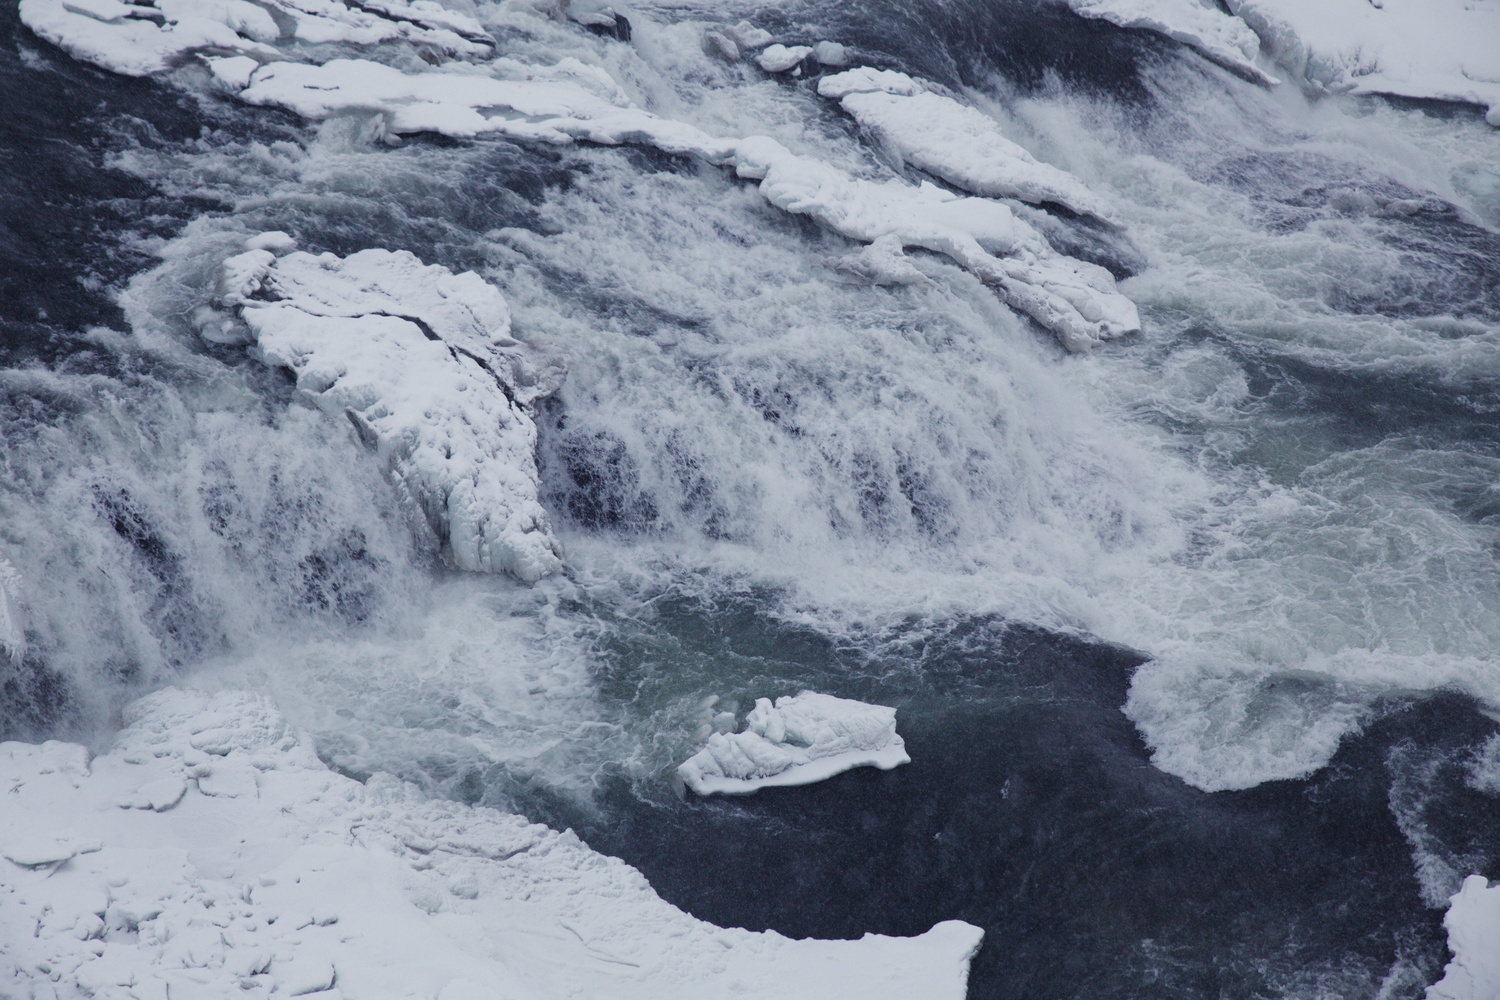
8) Adjust the Masked Area
Now, you can make the necessary changes to that specific part of the photo. I alter the Darkening slider. I could have achieved something similar with Contrast, but that would have also raised my highlights, which would have resulted in the area looking out of place.
9) Check Your Results
Now, the most fun part: see how far you've come. You can either click "Show Previous" below your image in the bottom left or Done and then compare to the original. This is a great way to identify any inconsistencies or evaluate whether you've pushed the final creation too far or not far enough.
10) Final Touches
To keep the editing process as streamlined and concise as possible, I simply add one of ACDSee's built-in color LUTs (Tinsel at 35 percent opacity) and export. I didn't save my settings as a preset and instead replicated what I did manually to see how long it would take. The next image took about two minutes from start to finish.
Conclusion
Light EQ is a powerful tool that houses a lot of familiar tools. While what you can do is certainly achievable in other software, the benefit of having them all in one location and easily manipulated can really streamline edits that would otherwise be more longwinded and fiddly. The obvious depth to the functionality is also appealing to those who want to master it and achieve more radical and impressive edits. I next intend to use Light EQ for commercial portraiture; something closer to the business side of my photography.
Get yourself a copy of ACDSee Photo Studio Ultimate 2019 here.


Join the Fstoppers community for free
-
Post comments and join in the discussions
-
Browse the site ad-free
-
Share your work and get featured in the community
-
Compete in the photo contests for fun and prizes
1 Comment