Photoshop's depth range mask just got a quiet but significant upgrade, and most people missed it entirely. Adobe added it to the current shipping version of Camera Raw with almost no announcement, and it changes how you can make localized adjustments based on distance from the camera.
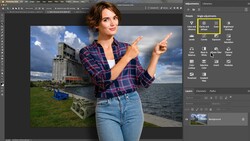
Coming to you from Anthony Morganti, this practical video walks through exactly what changed and why it's worth your attention. The old depth range mask existed in both Photoshop and Lightroom, but it was almost always grayed out unless your image was shot on a multi-lens smartphone in portrait mode, since that's the hardware that generates embedded depth data. Cameras like the Nikon Z8 never produced that data, which left the feature useless for most raw files. The updated version builds a depth map on its own, from any image, raw or not, with a single click.
Morganti shows how clicking anywhere in the image triggers Camera Raw to generate a depth map, where white represents what's closest to the camera and black represents what's farthest away. From there, you use a center range box to target a specific depth zone, and the sliders on either side control the falloff toward the foreground and background. Shift that center box left and you're applying adjustments closer to the camera; shift it right and you're pushing the effect further back into the scene. You can also widen or narrow the targeted zone and combine the depth range mask with other mask types, like a brush, to fine-tune exactly what gets edited.
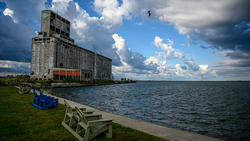
What makes this genuinely useful is the combination of depth-based selection with Camera Raw's full adjustment panel. Morganti demonstrates adjusting exposure, contrast, clarity, texture, and color saturation all within a depth-targeted mask, stacking multiple depth range masks in a single image to treat the foreground, midground, and background independently. He's also candid that for many situations, subject, sky, or landscape masks will be more precise tools. But there are real cases where isolating by depth is the most natural way to approach an edit, particularly when you want to apply adjustments across an entire plane of a scene rather than tracing specific objects. The fact that it now works on JPEGs through the Camera Raw filter in Photoshop, not just raw files, makes it accessible in far more workflows than before.
Check out the video above for the full rundown from Morganti, including the live demonstrations on multiple images and how to apply this to non-raw files through the Camera Raw filter.
Join the Fstoppers community for free
-
Post comments and join in the discussions
-
Browse the site ad-free
-
Share your work and get featured in the community
-
Compete in the photo contests for fun and prizes
1 Comment
It's a fantastic feature, I've been using extensively. A real gift for both landscape photographers and portrait shooters.
If only Adobe fully focused focused on adding such useful features instead of generative ai. Hopefully it is the start of a positive new direction.