
So a few weeks ago I found sometime to shoot a personal project, a summer inspired beauty shoot. The idea behind the shoot was to focus on summer and to play with bright and vibrant colors. Prior to the shoot a spent days experimenting with new techniques and different ways of introducing color into my shoot. In this article I want to share a couple of techniques I used to create colorful effects in camera and also how I recreated one of those effects in Photoshop.
So, really the trick to this whole shoot was Cellophane. Cellophane is a semi-transparent plastic like material that comes in many different vibrant colors. It can be used for art projects or even to stuff your Easter baskets. But, the semi-transparent aspect of Cellophane makes it perfect for light to travel through making a quick and in-expensive color gel.
I collect rolls in different colors, I prefer the rolls because you can get them in 15inches and 30inches in length which is perfect for cover the front of small or medium softbox allowing you to get a soft wrapping light with the added color effect. You can find cellophane at many art stores but you can also order them from more pedestrian sources like Walmart.
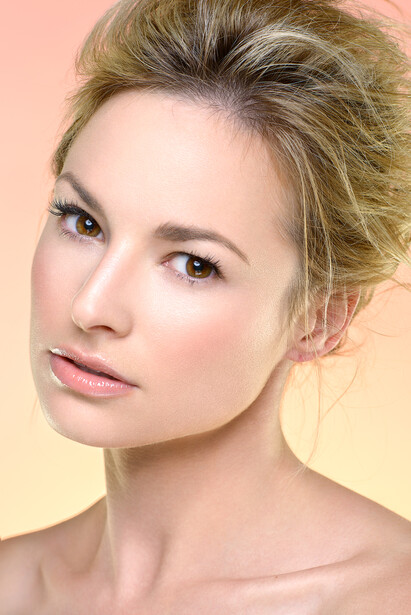
For this shoot I used a small roll of pink backdrop paper, but I added one strip box on the floor shooting up onto the backdrop with yellow cellophane over the top of it. If the color created by the cellophane isn't strong enough, you can always try doubling up the cellophane.
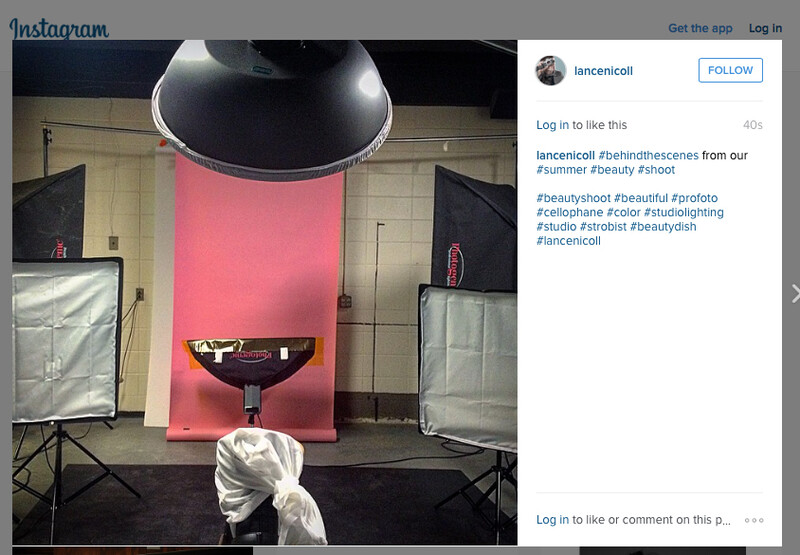
In this picture from my Instagram, you can see the entire setup, I usually like to post a BTS of the lighting setups from my personal shoots. In this post, you can see the yellow cellophane across the top of the strip light on the backdrop. This particular roll of paper is the Savage 53 inch roll of "Tulip"
You will also notice that the strip light is not the only light on the backdrop paper. I have two softboxes lighting the background as I would normally do, it is important to realize that even though you are lighting the bottom half of the background paper with the colored strip-light, you still need to light the entire backdrop, so that you get rich colors towards the top of the background as well.
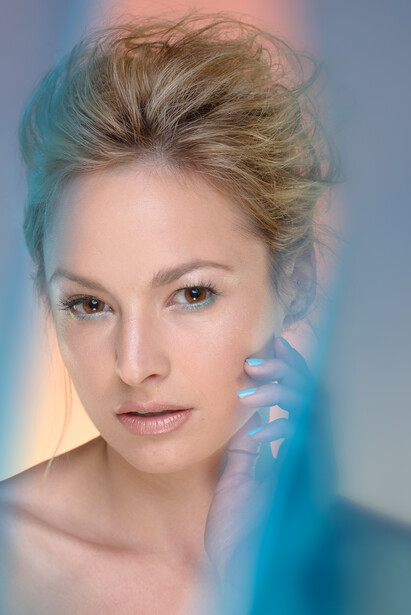
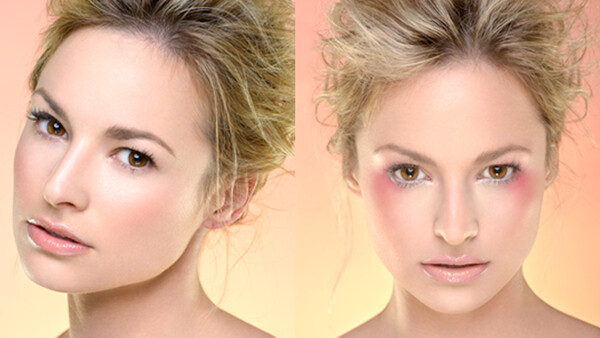
The image above is not retouched yet, but I wanted to share so you guys could see that you can use your cellophane paper for more than just lighting techniques. By dandling pieces of the cellophane in front of the camera, I was able to create cool and interesting in-camera effects. Everything on the right of the frame was created with the cellophane. After getting the image into Photoshop, I decided I wanted to see if I could re-create the same effect in post, so the effect on the left side of the image was actually created in Photoshop. You can use the before and after slide above to see which portion was in camera and which portion was done in post.
Cellophane is not the only way of creating these type of effect. Portrait photographers have been creating colored lighting effects for years and there are professional quality tools that manufactures like Rosco Color and other make. I would recommend checking out this B&H link to see the Rosco Color Filter Kit. The 12x12 squares are perfect for smaller reflectors and you are able to colors you would never be able to find in your local art store's cellophane supply.


6 Comments
Thank you !
Thanks Mokhtar!
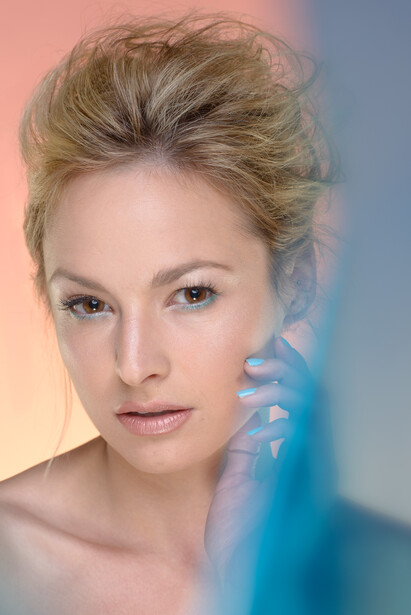
I love that color gradient behind her head. Nice work!
Thanks Jason!
One thing to notice, comparing cellophane to gels, is that cellophane probably doesn't work well infront of a hot modeling light. Nice and cheap alternativ, but not a replacement.
Joacim, you are spot on - I actually should have mentioned that in the article if you put it over your reflector or sometimes I clip it inside the softbox - you can't turn the modeling on or it will melt !