When we capture a 3D environment in 2D, the perceived depth can be lost due to the colors in the scene. In this short tutorial, I'll show you one way of bringing back the depth in your image.
Does color information play a role in the perception of depth? In short, yes. The color information recorded and in particular, the luminance of that information plays a very important role in the depth of your image, and that's what we are going to utilize with this tutorial. Now, that may seem straightforward, as the intensity of the reflected light reacts differently to every surface. But say, for example, you are shooting in woodlands with vibrant greens. How are you going to differentiate the depth for editing? Simply, look at it in black and white to see the overall luminance values better to provide a good starting point for your edits.
Bringing the depth back to your 2D image can involve many different methods, contrast, exposure, color balance, dodging and burning, etc., and we all use these to our advantage to get the desired results. In this tutorial, I'm going to look at dodging and burning with a black and white overlay in Photoshop to get the finished results.
Now, you may already do this or you may use plugins to achieve the finished image. With this tutorial, I'm going to strip it right back to basics for those new to post-processing and hopefully provide a starting block to think about depth within an image.
The Breakdown
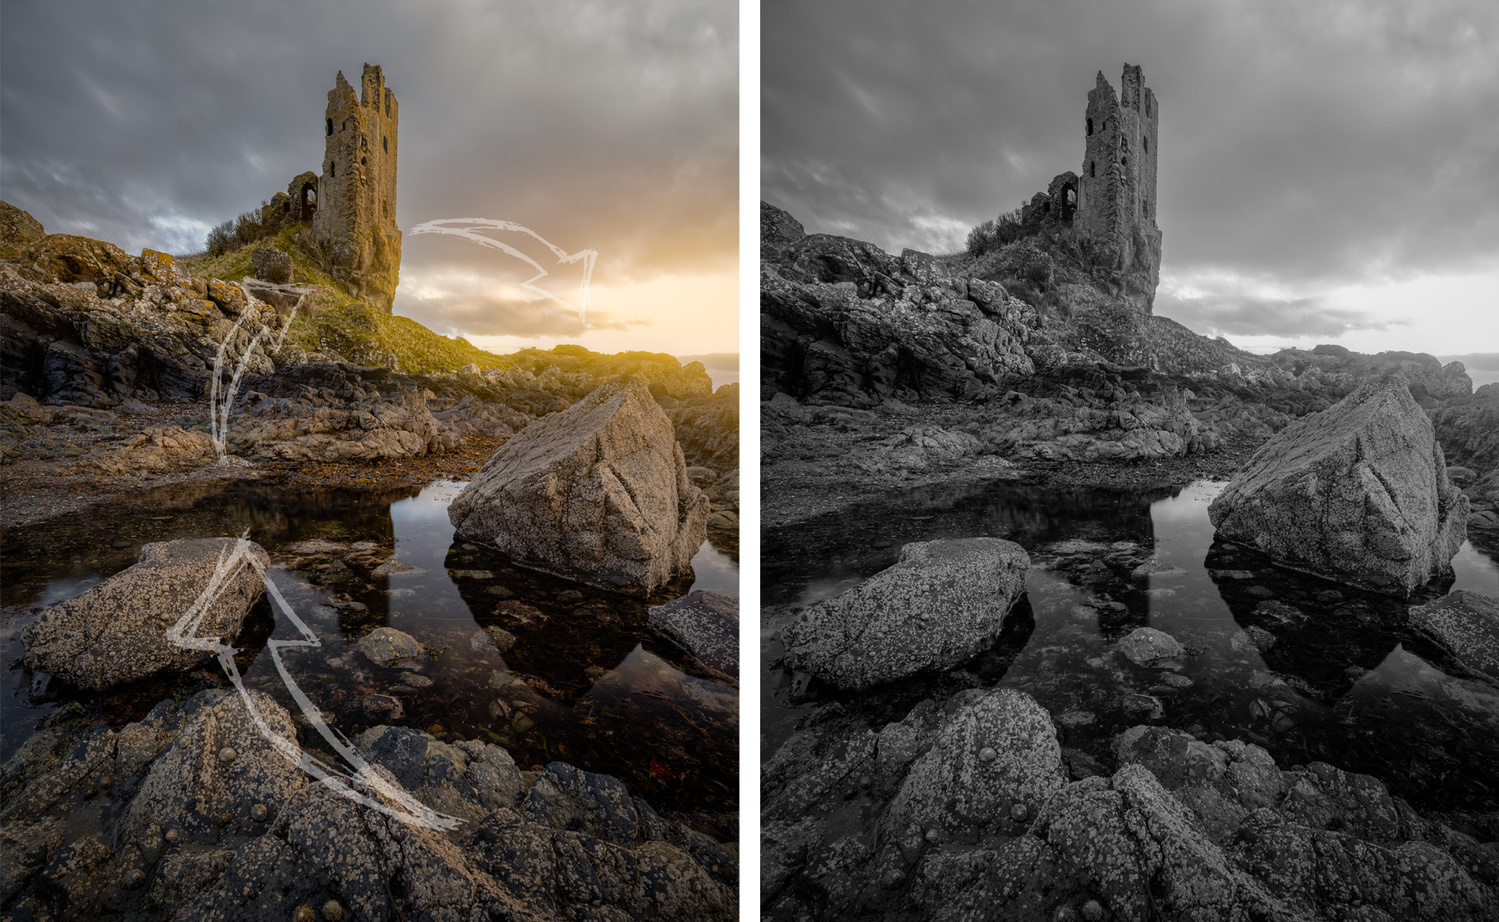
The image above, which I've used before in a previous article, I considered finished. Compositionally, it was ok. Nice leading path through the image. Nice light captured. Looking back though, no depth. Sure, I had dodged and burned areas to bring out the depth, but to be honest, it still didn't represent the scene as I saw it and was still quite flat. So, I had to try to recreate that depth with some more dodging and burning. This is where the black and white overlay comes in.
Black and White Adjustment Layer
If you are relatively new to Photoshop, adjustment layers are a way of non-destructively adding edits to your images. They are placed above the layers, and whatever adjustments are used will affect the underlying layers with that effect. You can clip them to the underlying layers and groups via a clipping mask, but we are just going to leave it as is just now with no edits to any of the sliders and no clipping masks for this tutorial.
With your image opened in Photoshop, first select the black and white adjustment layer indicated above left. As you can see from the image right, the adjustment layer adds the effect, in this case, black and white, and also creates a mask. The underlying layer is still intact in color.
Perceiving Depth
Now that the adjustment layer is added, we need to step back and look at the image overall without the color and look at the luminance of the image. This will help us decide where best to dodge and burn (in this case further) to create the sense of depth that the image is lacking. 
The image on the left shows the breakdown of foreground, midground, and background, while the image on the right indicates the areas that are considered for dodging and burning, with red indicating the burning and white the dodging.
There are many different methods for dodging and burning, but as I mentioned earlier, we're going to strip this back to basics and use adjustable curves to get the desired results.
Creating the Curves
The curves are created using the same procedure as the black and white adjustment layer.
First, select your background image. We need to put the curves underneath the black and white adjustment layer. Then, go to the adjustments panel and create a curves adjustment layer. Rename this layer "Burn" by double-clicking on the text in the layer. Create a second curves adjustment layer and rename this one "Dodge." Next, double-click on the curves icon on the burn layer and at the midpoint, draw the curve downwards to a point where you think the on-screen contrast is workable. Do the same again for the dodge layer, except this time, draw the midpoint upwards, again to an agreeable level overall. Next, select the mask of the dodge layer and invert it. On a PC, click Ctrl + I, on a Mac, Alt/Option + I. This will hide the adjustments you have made and allow you to begin the dodging and burning process to create your depth. Remember, black conceals, white reveals.
Dodging and Burning
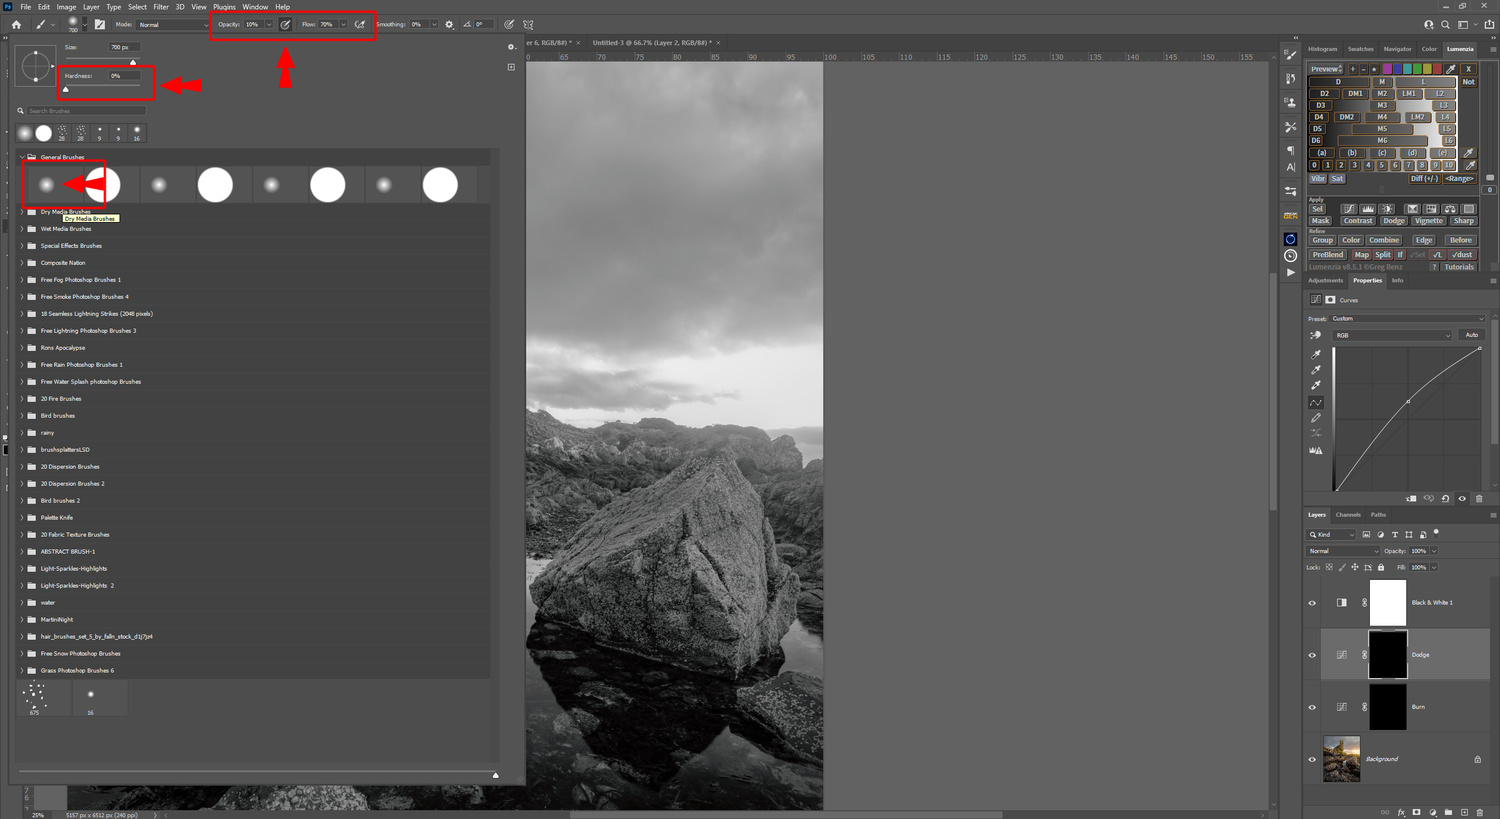
The dodging and burning of your image can now begin. I use a Wacom PTK-640 (no longer available) for my editing. I find that editing with a tablet feels so much more natural and benefits the process greatly, especially coupled with pressure control in Photoshop. Your brush settings will change per image, but typically, to get you started, they should be somewhere in the region of:
Brush Selection: Soft Round
Mode: Normal
Opacity: 10%
Flow: 40-70%
Hardness: 0%
These settings, although not definitive, should allow you to work through the process quite subtly to get results. Remember, don't be heavy-handed here, as we are just working with what we have in terms of tonality to create depth.
Usually, I'll start with the burn layer so that I can manipulate the shadows to allow for better contrast when dodging the highlights. Also, remember that as these layers are curves adjustment layers, the curves can be adjusted once all the dodging and burning is complete, again allowing for further tweaking.
The brush size is kept quite small for the details and enlarged as required (in this case, the areas of the sky I darkened). If it's a hiding mask (black), the brush should be set to white and vice versa depending on what you are doing. Masks are non-destructive, so again, it's a great way to manipulate your images without committing to a destructive edit. Highlighted above in the masks are the areas, indicated by lighter areas, that I dodged and burned to help create more depth in the image. The black and white adjustment layer just allowed me to see the luminance of the image without color, meaning I could work with what I had in the image to perceive further depth and not to start creating new areas of light and shade. Once you are happy with your image, delete the black and white adjustment layer and further adjust the curves if you so wish. Turn the opacity of these layers down if required, and then, save your finished edit.
Below, you can see the before and after.
Conclusion
This is a simple technique, and for a lot of readers, this has dialed it back to basics. But what you have to remember is we've all got to start somewhere, and any knowledge is valuable. We could have edited this image using many other methods, including dodging and burning using the colors in the image to create the depth. However, I quite enjoy dialing it back to work with the black and white adjustment layer and using the luminance of the image for my reference. Perhaps if you are new to dodging and burning and creating the depth within your images, this method may prove to be a good starting point before moving on to other techniques.


I always enjoy your instructional stuff Gary. Another good one. I always THINK I am seeing the luminosity well when I am processing. I probably am not doing it as well as I think I am so I will definitely try this. Thanks.
Thanks for reading Ed, glad you enjoyed this one. Definitely worth a try to see if it makes a difference.
Excellent article Gary. It's good to see something instructive, instead of boilerplate puff for Youtube videos.
Glad you enjoyed it David, thanks for reading.
First of all I love that image!
Second, I like using such helper layers that let you focus on certain aspects of the image. Thanks for the article.
But since color has a huge impact on depth in the image if used right, I usually keep it active when doing dodge and burn to my images. Especially if you keep your curve layers in normal mode and dont set it to luminosity.
Many thanks Michael, and thanks for reading. Totally agree with the color having a huge impact and often I'll switch on and off the BW layer just to check nothing in the images has been destroyed. Always reclaimable of course due to the layers.
More often than not I find myself using Lumenzia to dodge and burn these days.
Fantastic article! I'm having a little trouble getting the "burn" to work. Do I need to invert that layer as well?