If you thought you couldn't use or rescue blurry, pixelated photos, think again. This tutorial will not only show you how to rescue and sharpen blurry photos, but also how to increase their size to prepare them for printing.
There's nothing worse than scrolling through your photos after a shoot and seeing one that has beautiful light and awesome composition, only to zoom in and see that it's slightly out of focus. More often than not you'll wince and cuss under your breath and regrettably consign it to the scrapheap, thinking that only tack-sharp photos in camera were worth using. But what if there was a way you could rescue those slightly soft photos and turn them into sharp, stunning keepers ready for print? There is.
Known as Artificial Intelligence Assisted Upscaling, this hidden Photoshop feature (only available in CC and above) both increases sharpness and clarity and makes images less pixelated. And it's much more effective than using Sharpen Edges, for example. This short, simple walkthrough video by Blue Lightning TV Photoshop shows you how to do it. It also introduces you to the High Pass Filter, which is brilliant for subtly enhancing details in your photos.
I tried this technique out with some macro photos I cropped right down. In the past, I thought cropping in so close would render the photo essentially unusable except for perhaps an upload to Instagram. But I have since been able to use and print some photos because of this technique.
When you can rescue photos and turn relatively soft shots into tack sharp keepers, your possibilities become endless. Do you have any other techniques similar to this? Or other practical applications where this might be useful? I'd love to hear about them in the comments below.


Join the Fstoppers community for free
-
Post comments and join in the discussions
-
Browse the site ad-free
-
Share your work and get featured in the community
-
Compete in the photo contests for fun and prizes
13 Comments
As someone who ditched CC and uses CS6, I'll be interested to see people's befores and afters using this.
I can do a follow up article and post a few B/A if you like. Definitely works well. Mainly good for shots that are slightly out of focus. For something completely blurry, not much you can do there
Thanks Iain. I would find such an article interesting.
That was a long video more suited to beginners in terms of its style, but it had some good nuggets of information. I just sent a publication an uprezzed photo that did not leverage the benefits of Preserve Details 2.0, so I'm glad to know this.
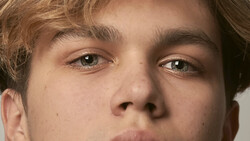
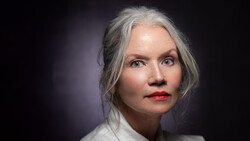
I had a few photos of my daughter that were ever so slightly soft, especially round the focal points of the eyes. I used the points from this video on those photos and they made a marked difference.
I think this technique would be most helpful for such photos that are almost really good, but slightly soft in places where you don’t want them to be slightly soft. Really good for portraiture where you don’t need the whole frame in focus anyway and you can really zoom in on the elements you need to sharpen.
That being said, I deliberately took a few test shots down the beach the other day that were out if focus then went home and tried this. It defintely sharpened them.
And increasing size is also a really good trick to have in your bag
I had always used Bicubic Smoother and then tweaked to taste, often using High Pass as I did for this client. But when I do High Pass, I pick my radius but then also desaturate that layer; run another NR through it; add some sharpening; and only then blend via Overlay. If that's not enough punch since I'm pretty conservative with my HP sharpening, I blend via Linear Light and adjust the opacity downwards to taste. Am I overdoing it vs. just using the technique in the video??
I don’t think you can ever ‘overdo’ anything in the digital sphere. The beauty is that you can just test and tweak and play til you find what’s best for your needs and preferences.
For quick and easy, I pretty mych use the technique described here or slight variations thereof. For more complext noise removal, I use software such as Topaz or Noise Ninja
Thanks ...That may be useful in the future.
I hope it helps!
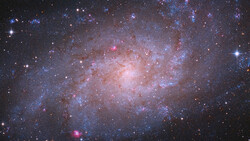
I watched the video and it is specifically meant for graphics. I followed along with an astrophotography image and it didnt work. I did find a very useful video on utube using a high pass filter and blend mode.
Did you watch the whole video? The first half is a walkthrough for graphics and the second half is a walkthrough for a portrait shot. Just scroll through until you see the blonde model come into view then watch from there
Although not always useful, using the high frequency in a frequency sep as a high pass mask creates interesting sharpness, albeit it can shift color and can skyrocket contrast, dependent on the image.
Strange, I don't have an option in Technology Previews to enable Preserve Details 2.0.