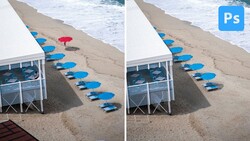
The clone stamp tool in Photoshop can quietly save hours of cleanup work on problem areas in your images while keeping results under your control. It also lets photographers avoid AI artifacts and credit limits when all you really want is a clean wall, a fixed texture, or a distraction removed.
Coming to you from Aaron Nace of Phlearn, this practical video walks you through a clean, layer-based way to use the clone stamp so edits stay flexible and reversible. You start by creating a new layer instead of touching the background, which keeps the original image safe while you test ideas. From there, you set the sampling option to “current and below” so the tool reads the pixels underneath your clone layer without forcing everything onto one stack. Nace also turns on “show overlay” in the Clone Source panel so you see a live preview of what you are about to paint, which makes lining up edges much easier. That combination alone gives you a simple workflow you can reuse on portraits, architecture, products, or anything that needs cleanup.
Once the basics are in place, Nace shows how to sample with Alt or Option, then paint along the edges of a wall to erase cracks while keeping the texture believable. You see how working on a separate layer means you can toggle the result on and off and compare before and after without committing. A useful trick here is to clone on a fresh layer when you are not sure about alignment, then switch to the Move tool and slide that cloned patch into position instead of repainting everything. When a job gets more complex, you can merge several successful clone layers with Control or Command E and stay organized while still keeping a nondestructive mindset. This approach keeps the process calm, even when the area you are fixing looks busy or messy.
The video also spends time on the small decisions that make cloning look natural instead of stamped. Nace reminds you to keep sampling from different spots so you do not repeat a pattern and create obvious duplicates, especially on flat areas like plaster or sky. He softens the brush hardness for gradual textures so edges blend instead of showing a hard circle, something that helps a lot when you are repairing walls, skin, or fabric. You also see how to purposely overpaint past an edge, then add a layer mask and brush black to hide the extra, which gives you more confidence to paint freely without worrying about staying perfectly inside the lines. There is even a quick look at the Clone Source flip options and why Nace usually prefers to clone on a normal layer, then transform that layer with Control or Command T if he needs a flipped or rotated patch.
Throughout the tutorial, Nace is clear about why clone stamp still matters in 2025 when generative fill is only a click away. Clone stamp does not spend any generative credits, so you can use it freely on client jobs or large batches where AI would rack up usage. It also avoids any chance of your image being tagged as AI-assisted when all you did was clean up a few cracks or distractions. If you lean on Photoshop every day, this is a reliable, low-drama tool you can trust when AI feels like too much for a simple fix. There are more nuanced tips in the video, including how Nace handles tricky edges and organizes layers for bigger retouching jobs, that you will want to see in real-time. Check out the video above for the full rundown from Nace.


Join the Fstoppers community for free
-
Post comments and join in the discussions
-
Browse the site ad-free
-
Share your work and get featured in the community
-
Compete in the photo contests for fun and prizes
No comments yet