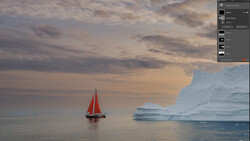
Achieving the perfect color balance and contrast in your photos is crucial for creating impactful and visually appealing images. While many photographers rely on basic adjustments or presets, there's a powerful tool hidden within Photoshop that can revolutionize your color correction workflow.
Coming to you from Andrea Livieri, this insightful video dives into the often-overlooked "Auto" feature within the Curves adjustment layer. By holding down the Option key (Alt on PC) while clicking "Auto," you unlock four distinct algorithms, each offering a unique approach to color and contrast correction. Livieri expertly breaks down the nuances of each algorithm, demonstrating how they interpret the image and adjust tones to achieve different effects.
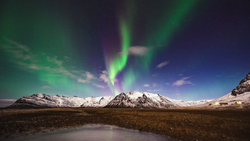
This technique is particularly valuable for tackling challenging lighting scenarios, such as hazy landscapes or images with strong color casts. Livieri showcases how the different algorithms can effectively cut through haze, neutralize unwanted colors, and enhance contrast, all with a single click. He also shares valuable tips for fine-tuning the results using Levels adjustments and adjusting layer opacity for a more customized look.
Beyond the technical aspects, Livieri emphasizes the importance of understanding how color and contrast influence the mood and story of your photographs. By carefully selecting the appropriate algorithm and making subtle adjustments, you can ensure your images accurately reflect the scene and evoke the desired emotions in your viewers. Check out the video above for the full rundown from Livieri.


Join the Fstoppers community for free
-
Post comments and join in the discussions
-
Browse the site ad-free
-
Share your work and get featured in the community
-
Compete in the photo contests for fun and prizes
4 Comments
Color correction has always been a challenging aspect of post-processing, but after watching this video, I feel more confident using the Auto feature within Curves in Photoshop.
That is pretty dang useful.
Would love to see a Lightroom version of this, even though yes the color balances whatever we wanted to be. It'd be great to have us starting point that's accurate and then take it from there especially with how difficult it can be to handle reds with the latest camera raw version.
Color correction, Color balance is not rocket science... do not attempt to make it so... in PS, set your eye-droppers to establish a neutral Black set to R=7, G=7, B=7 these numbers will give you a printable neutral Black, SAVE... open a new image click the Black eye-dropper, select and area/point you want to be black with detail, then click... in 90% of images you will have balanced color... warm evening light and cool morning light both share the same neutral Black... If you have not explored, try Lab Color Mode, as it is the easiest, fastest way to see any color bias... enjoy...