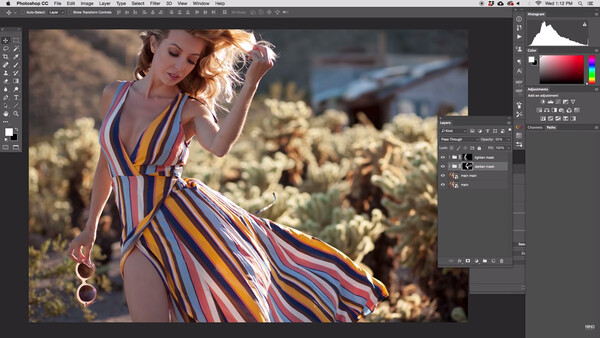
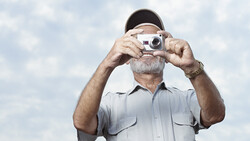
Maybe you're one who prefers a strong HDR process, perhaps you'd rather stick to simply adjusting the highlights and shadows sliders in Lightroom, or just maybe you want a little bit more control over your image. Well, fortunately for you, and thanks to Nino Batista, here is a fantastic tutorial for harnessing such control.
Controlling your highlights and shadows, expanding the dynamic range within an image, is more than just artistic taste and style preferences. Really, when you get right down to it, it's about taking complete control of your digital medium. The same was, and still is, done with film photography simply by adjusting development times and the use of different techniques in the darkroom.
So why not use the tools at your fingertips to make the most of your work in a digital sphere? Even at the beginning of this video, Batista comments that your preferences may skew one way or another as far as how your highlights and shadows look. The intent, however, is not to alter your perspective on artistic choice but rather to expand the range of options available to you. This video is a perfect example of how there are definitely more ways than one to accomplish the end goal. I have been using Photoshop for well over 15 years now and consider myself to be quite familiar with the program, but I still learned some valuable things from watching Nino's process here. I'd highly recommend giving it a watch and testing out these techniques for yourself.

Join the Fstoppers community for free
-
Post comments and join in the discussions
-
Browse the site ad-free
-
Share your work and get featured in the community
-
Compete in the photo contests for fun and prizes
14 Comments
Good idea but I could be biased since I do this a lot, although w/o Lumizone.
Expanding DR? DR is fixed the moment you capture the image.
DR is often misunderstood, and comprehended as the amount of detail you are able to see in a photo. This often leads to people saying that recovering highlights, and lifting up those blacks "increases" dynamic range. They are wrong. It only increases PERCEIVED dynamic range.
Right, I was also thinking this was a misuse of terminology. Darkening the highlights and lightening the shadows actually decreases the dynamic range, which you can see in the histogram as the tonal range narrows.
"High dynamic range" in photography is really a misnomer, or at least completely different from "high dynamic range" in display technology. HDR in photography seems to refer to the compression of dynamic range so that the total tonal range of an image is displayed within the limits of non-HDR displays. Meanwhile, HDR in display technology refers to the ability to actually display a wider tonal range.
In theory, when HDR displays are standard and more commonplace, photographers won't have to darken the highlights or lighten the shadows as much as they do today on non-HDR displays, because the shadow detail and highlight detail will be clearly visible without such extreme compression of the dynamic range. For example, LG's OLED TVs with HDR can display up to 21 stops of dynamic range, which is far more than most cameras are capable of capturing (around 14 stops).
Tonemapping is the word you are looking for. When you substitute it with HDR it indeed becomes a misnomer.
Am I the only one thinking, that you can accomplish pretty much the same in, like, 8 seconds in Lightroom, using a highlight brush and a shadows brush? Or if you want more control, use the (new) luminance masking for your brush.
You can also do this using blend modes very quickly so you can be sloppy with your brush
My thoughts exactly.
This is good to recover , but how many out there count on recovery more than doig it the right way in camera?
That's fine if the lighting is good, but what do you do with a shot that has heavy shadows in one spot and bright highlights in another? Expose for the shadows and the bright spot is blown out, expose for the highlights and shadows become too dark to pull out.
This is classic when shooting indoor real estate with a window(s) that has abundant Sunlight. Best answer; take several shots at differing shutter speeds and blend them in something like Photomatix Pro 6 using the natural/real estate option.
I hear you David, but real estate is a specific case in photography, not everyone does.
My point was with natural light and a model...of more conventionnal scenarios
This is so awkward and bad looking method that I can't believe it's actually featured on Fstoppers.
it's better to use a camera with high dynamic range like nikon or sony. then set the best metering mode and exposure compensation and using light gears. the luminosity mask is good for landscape photography. and capture one is best for processing (that's magic). but this tutorial is good for luminosity mask and u can use channels for masking and don't need to any plugin.
Wow... If my trip is going to be from A to Z. I don't need to visit all point in between to reach the end.
There is a whole lot of places I didn't need to see or visit here.