Often when going through a set of images via Lightroom, we use a preset we like, export the images, and then tone back some of the color or "effect" from the preset, once in Photoshop. There has always been a need for a way to easily dial back a preset and now there is.
What Opal Is
Opal is an opacity plugin for Lightroom that fills a void, it allows us to tone down a preset or effect that has been applied. By changing the opacity at this level, we save time in Photoshop later as well as achieve a better consistency between a larger set of images which could be particularly useful for those that deliver a lot of images, such as that of a wedding or event photographer.
Opal can be used as the most basic level as a simple opacity change for the amount of effect a certain preset has on your image, or you can enable advanced options which will allow you to customize what is being toned back.

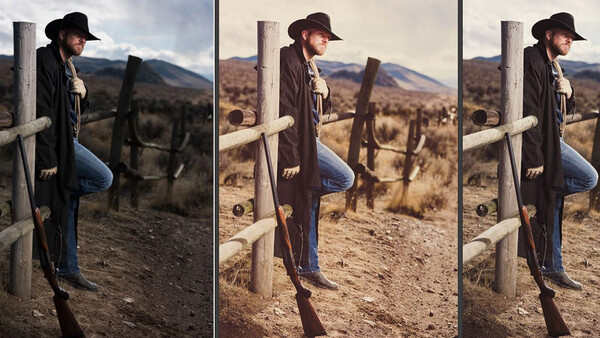
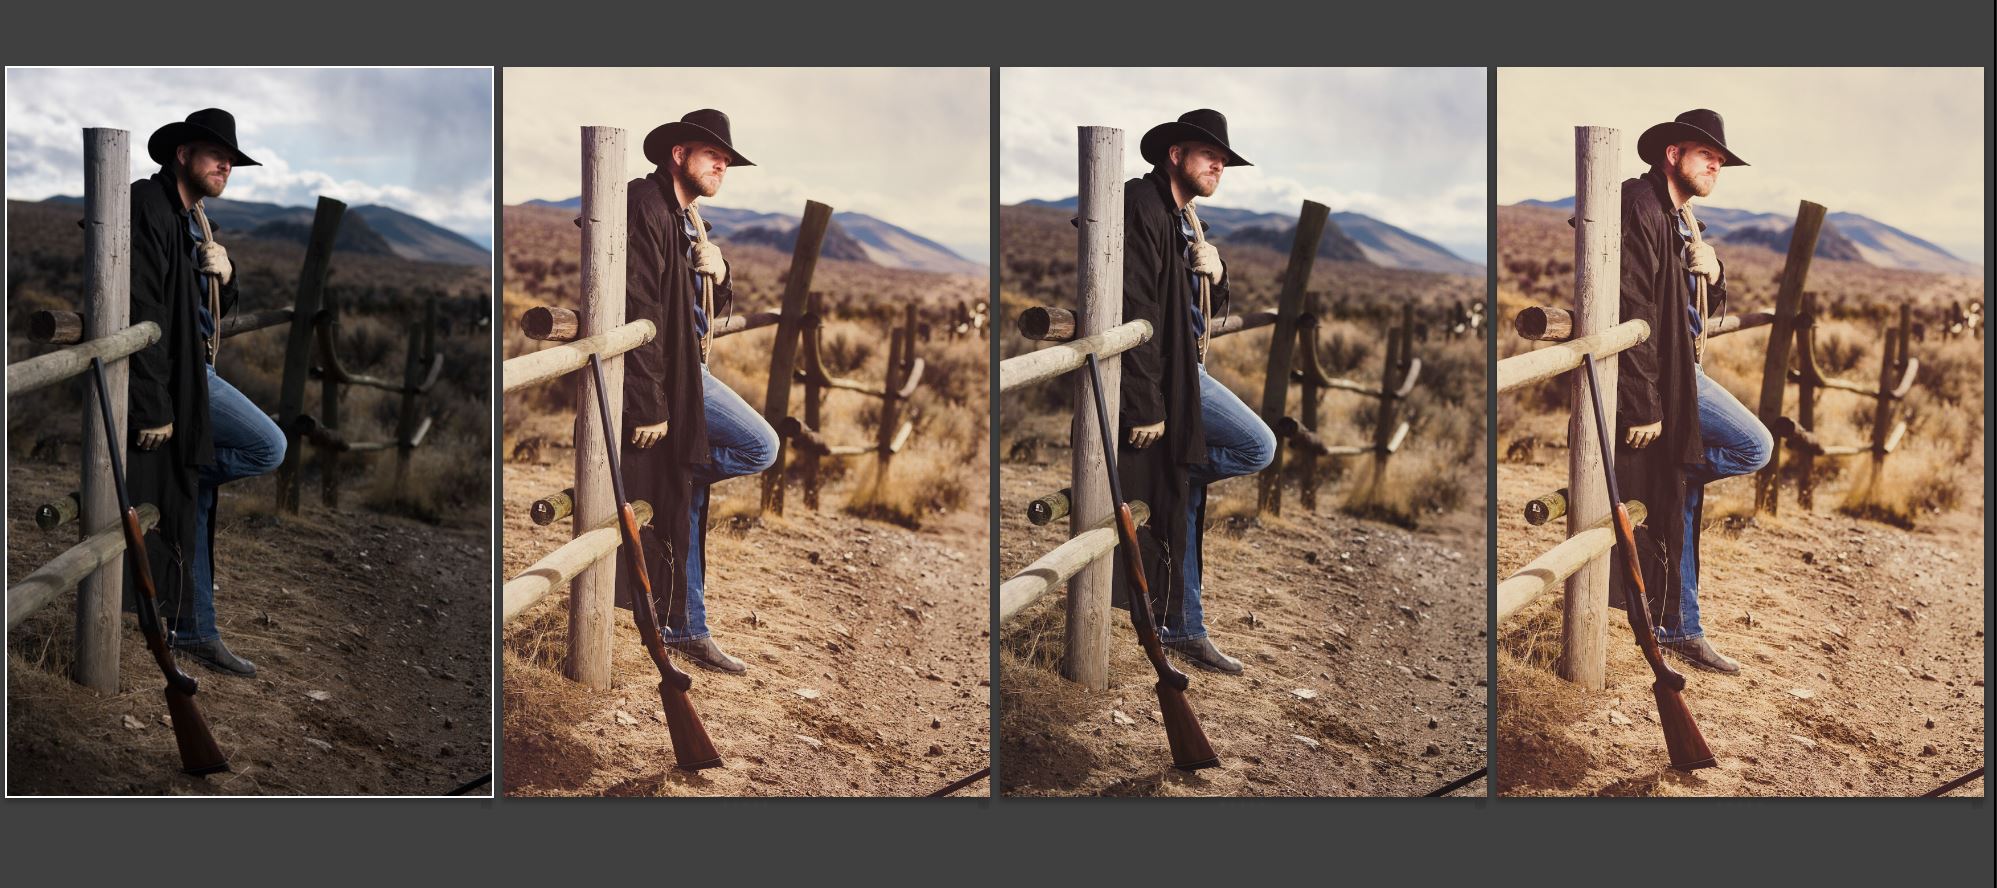
Perhaps my favorite feature of Opal is the ability to dial a preset above 100% strength.
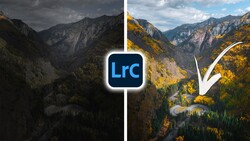
In my example shown here, the original image, 100% opacity, 50% and 150% gives you extra control if your favorite preset may not be quite noticeable enough for your taste. Obviously, you would want to use this carefully to not overdo it.
How It Works
Under the hood, Opal programmatically adjusts the sliders that have been altered via your preset. This feels like the same general idea if you added a layer in Photoshop with your effect and then played with Photoshop's layer opacity, if Photoshop had the ability to go past 100%.
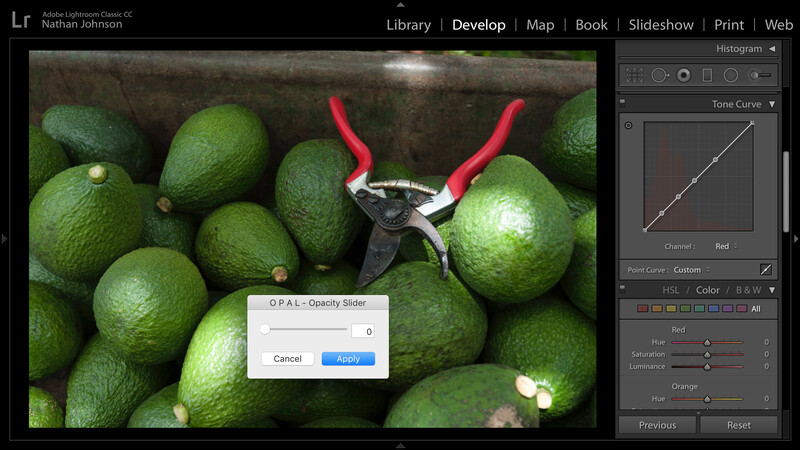
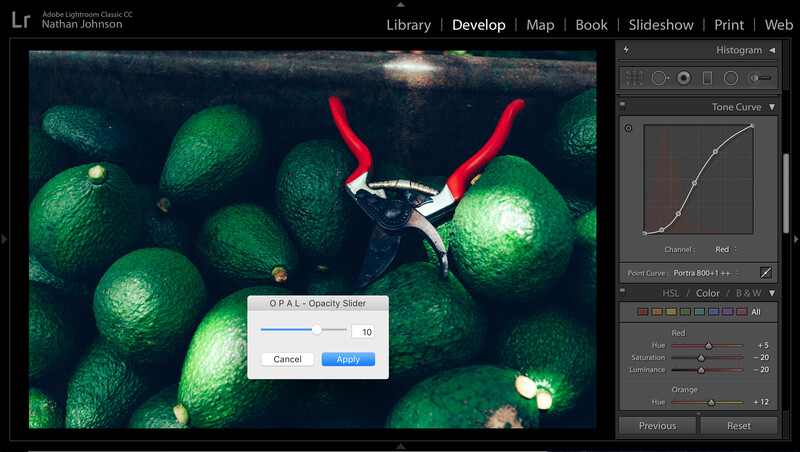
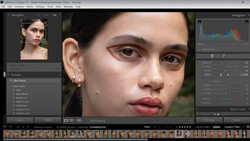
Here's an example of what the slider does, showing the Tone Curve and Color sliders for a particular image with a preset applied.
How To Use Opal
You can activate Opal on Mac by pressing the up arrow (↑) key (Windows version doesn't allow this) — or you can access via the file menu/plugins. In my workflow, I would not be activating Opal a bunch of times for each photo, I would activate it once and then sync the new settings to each series of images.
Dragging the slider lets you visually see the changes you are making, then press Apply.
What I Liked
Having the ability to adjust this opacity so easily is a tremendous time saver, which in the past I'd be finding a preset and then adjusting what I like and saving a new preset for that "opacity" and then applying it. The drawback to that process is that a new session, might need a different opacity of a preset and I'd go through the whole process again. This plugin saves all that time and extra presets.
As mentioned, the ability to dial up a preset stronger is also valuable in certain cases.
What Could Be Improved
The steps of opacity are 0-15. With 10 Being 100%, 1 being 10%, and 15 being 150%. It's not a big deal, but adding the zero might be useful for folks, so that 100 is 100%. That's really nitpicking, but I feel it would be clearer.
Summary
Overall, I definitely think Lightroom users will gain a tremendous amount of control and speed at the same time, and at a price of $15, it's certainly money well spent. You'll likely cover your investment in your first session.
You can get Opal on the official website.


Join the Fstoppers community for free
-
Post comments and join in the discussions
-
Browse the site ad-free
-
Share your work and get featured in the community
-
Compete in the photo contests for fun and prizes
11 Comments
Pretty amazing tool. You can get it now for $10 with the discount code
Where do you find the discount code?
"launchparty" is the code
I would not be a "mood breaker", but there is already a plugin like that, and it's free (who wants, can make a donation): http: //www.capturemonkey.com/thefader/
Yeah, but there are some pretty major flaws with the way the fader is designed (more on that below) that make it not as useful for photographers as Opal. And it's not really free (even if you get the "free" version, you're paying for it with your time as it annoyingly increases load time each startup).
*Workflow* - The fader takes *forever* to use... you have to go zero out all your settings, then go through file menu to open, then select preset folder, then select presets to apply... it takes forever. With Opal, you can apply any presets you want first, then call up Opal with just one key. So much faster and makes more sense in workflow.
*Preset Compatibility* - The fader is NOT actually compatible with the way most presets are designed these days. If you use VSCO, for instance, the fader doesn't apply the camera profile. If you use a modular preset system (like DVLP), that won't work on the fader... if you use a preset that has a custom white balance (like Classic K12), that won't work either on the fader... all of those situations work perfectly on Opal.
*Image Quality* - The fader uses linear interpolation for everything, which does fine when you're reducing a preset strength, but creates some wacky results when making a preset more intense. Opal does a much better job of interpreting what settings to adjust a preset to at higher strength.
These are just a few of the reasons that photographers may consider getting Opal – especially if they have trouble using The Fader.
Great and efficient plugin. Been using it since last week and helps a lot!
This really is something Lightroom should have out of the box. And I suspect the next version will have it. Capture one has this feature and it works fantastically.
Well, for us LR6 users this will come handy, since Adobe won't update it anymore. :)
Very true. I ditched Lightroom since I shoot Sony, and capture one has a Sony only version for $70. Was a no brainer for me to switch over.
Well said! Right now, this is the only thing that prevents me buying it!
I think I will try it