
DaVinci Resolve has introduced its latest product, the Micro Control Panel, designed to help you speed up your post-production workflow for film and video.
I’d like to start this review by mentioning two things. One, I am a DaVinci Resolve Studio user. Once I began using the product for my coloring needs a few years ago, I very quickly found myself migrating the vast majority of my post-production duties to the platform, from the original edit to final delivery. So, I am prone to enjoy their products.
My second admission: I am one of the “olds” and get confused easily. So, despite the fact that I own a number of post-production add-on tools, such as the Speed Editor and not one but two of those Wacom tablets, I almost always default to my tried-and-true keyboard and mouse when slogging my way through the day. So, when I see new products like the DaVinci Resolve Micro Color Panel, my first question is whether I, as a confirmed Luddite, would actually use the product in my workflow.
Luckily for me, I got the opportunity to try out the new Micro Color Panel for a few weeks and put it to the test. So, what was my verdict? Well, you’ll have to read on to get the full explanation. But, long story short, it’s pretty darn cool.

So, question one: What is it that this device allows me to do that I can’t do with my keyboard and mouse? Well, nothing really. I can totally operate Resolve in my usual way. The objective of something like a Micro Color Panel is to make that process smoother and more efficient. It puts the most commonly used tools into a more intuitive format.
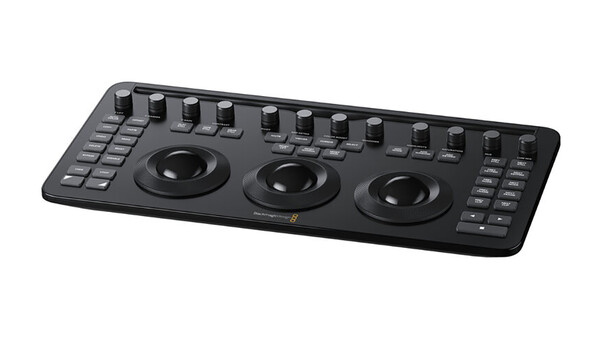
As a simple example of what I mean, color grading 101 involves tinkering with your lift, gamma, and gain in order to manipulate your exposure. The usual method with my mouse is to drag the sliders on my software interface in order to get each variant to where I want it. And that totally works. The panel, however, gives you two quick and tangible alternatives to accomplish the same thing faster. Taking up most of the surface area, you will see three large rotatable balls locked into place with three corresponding outer wheels. When you are in the color panel, by default, those inner balls can be moved around to control your color within your shadows, midtones, and highlights. The outer wheels can be rotated clockwise or counterclockwise to bring up or push down shadows, midtones, and highlights. All in one, without needing to move the mouse around, you have an essentially more tangible way to control your base factors. By adding the Offset button to the mix, you get even more functionality, which I’ll get to in a moment.
If that’s not enough, the top row of the panel gives you access to 12 parameters:
- Y Lift
- Y Gamma
- Y Gain
- Contrast
- Pivot
- Mid Detail
- Color Boost
- Shadows
- Highlights
- Saturation
- Hue
- Lum Mix
Now, again, it is totally possible to adjust all of those values without the Micro Panel. But, for some reason, I found the simple dial system (just rotate clockwise or counterclockwise) made getting the right exposure levels and color separation a breeze.
Other basic functions, like adding nodes, keyframes, and windows, are now also only a press of a button away. You can compare your current grade to reference stills, as well as grab additional stills with dedicated buttons. Basic navigation can mostly be done all from the Micro Color Panel without needing to remove your fingers from the system.
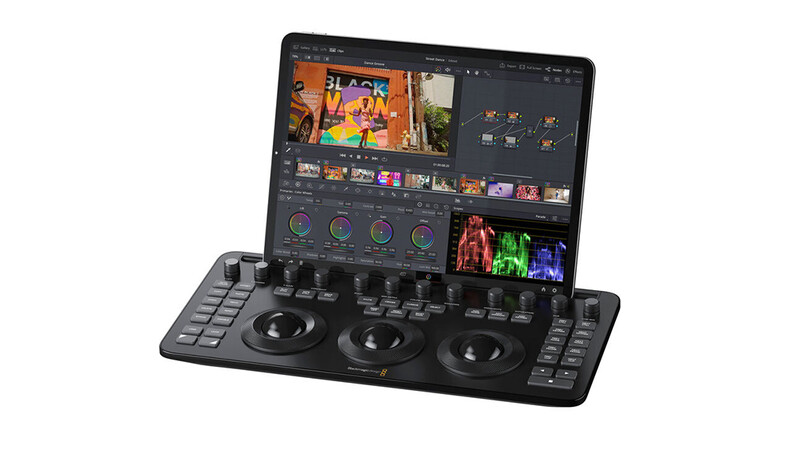
With portability in mind, the panel doesn’t take up a great deal of space. Just doing a non-scientific comparison, I’d say it’s about the relative size of the keyboard on my MacBook Pro in terms of length and width. Further supporting Blackmagic Design’s efforts in recent years to integrate mobile devices, the Micro Control Panel, which can either be connected via USB-C or Bluetooth, even has a slot in it to mount an iPad in an upright position, making the whole system like a mini coloring laptop in operation.
As if the mass of easily accessible functions weren’t enough, the majority of buttons have secondary or tertiary functions when used in conjunction with the Offset button or one of the Up or Down shift keys.
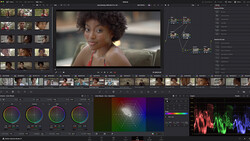
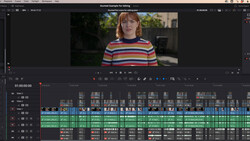
To test out the system, I pulled up a director’s cut of a campaign I had shot for an athletic apparel company several years ago. I went back to the original raw footage and started my grade from scratch using 100% the Micro Color Panel to make my adjustments. Grades are subjective, but I felt I easily matched or even exceeded my original grade with the added ease of control.
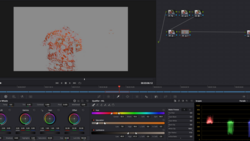
Using the panel requires DaVinci Resolve 19 or higher, either the free or paid Studio version. I bring this up because it gives me a chance to mention my favorite part of my re-edit process, which isn’t even directly related to the panel at all: the ColorSlice window. For those of you with older versions, the new tool allows you to micro-target specific “color slices” without the sometimes laborious process of taking the time to add windows or make more granular selections. For instance, instead of needing to make an effort to select skin tones, you now just have a skin tone adjustment baked into the tool. Because skin tones are often the most important part of your grade, this ability to automatically adjust it in your workflow can save a great deal of time. For example, as I was pushing my grade in different directions, this new function allowed me to easily maintain proper skin tones, even when going intentionally more drastic with other areas of my frame. This new skin tone adjustment is just one option in the ColorSlice pane, with six others. But I can see, going forward, this is a tool I suspect I will use almost every time I sit down to do a color grade.

Even for an occasionally technology-averse person like me, I can see major benefits in working with a tool like the DaVinci Resolve Micro Color Panel. While there is a bit of a learning curve (I certainly haven’t memorized all the secondary functions of all the buttons yet, but suspect I will over time), the ease of basic everyday functions is definitely enhanced with the panel.
Pros
- Speed
- Efficiency
- Added control
- Portability
- Tangibility
Cons
- A bit of a learning curve
Whether or not this product will be right for you is a matter of personal taste, but I suspect that if you are someone who does a great deal of color grading, adding this panel to your system and learning the functions would add great value to your editing experience. You can purchase it here: Micro Color Panel.

Join the Fstoppers community for free
-
Post comments and join in the discussions
-
Browse the site ad-free
-
Share your work and get featured in the community
-
Compete in the photo contests for fun and prizes
No comments yet