These days, it’s becoming easier and more affordable to photograph our night sky. The introduction of smart telescopes has opened the door for keen amateurs and hobbyists to get started in astrophotography at a fraction of the cost of a high-end professional setup. The ZWO Seestar S30 Pro is making the growing smart telescope space even better.
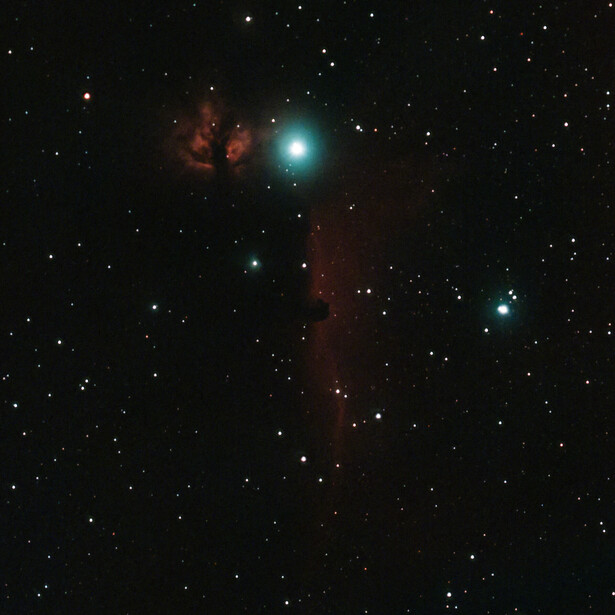
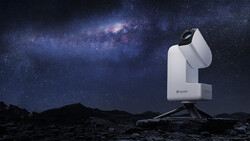
I recently had the opportunity to review the ZWO Seestar S30 Pro, a highly capable smart telescope that can capture 4K imagery and mosaics up to 8K. This tiny, 210 mm × 140 mm × 80 mm device is fitted with a telephoto (4.6° FOV) and a wide angle lens (63° FOV), allowing you to capture and stitch wide angle images of the Milky Way, shoot daytime scenery, and shoot the night sky, then composite the foreground with a single touch of a button. Aside from that, you can also plan and schedule a specific shoot, shoot star trails, track moving objects (such as planes), and photograph the Sun (with the included solar filter). Not bad for a small telescope that’ll set you back $599!
Here's a quick summary of the specs:
- Sensors: IMX585 (1/1.2″) and a wide angle IMX586 sensor (1/2″)
- Optics: 160mm telephoto lens (520mm equivalent), 6mm wide angle lens (35mm equivalent), 4-element apochromatic lens
- Filters: Dark Field Filter; UV/IR Cut Filter; Light Pollution Filter (optimized for OIII and Hα)
- Storage: 128 GB internal storage
- Shooting Modes: Alt-Az; Equatorial
- Connectivity: NFC for connecting the telescope to the mobile app; USB-C for charging or connecting to your computer to download files
- Power: 6,000 mAh internal battery (up to 6 hours runtime); USB-C power delivery
Getting Started
The Seestar S30 Pro was delivered to my door, packaged in a soft carry case that included the Seestar S30 Pro, a small tripod, a USB-C cable, a quick-start guide, and safety instructions. ZWO was also kind enough to send a fluid tripod head so I could mount the telescope on a tripod and use the equatorial mount mode to capture longer exposures (up to 60 seconds).
It’s typical, though: I was waiting with bated breath here in the U.K. to get started on the telescope, and as soon as it was set up and ready to start shooting, the sky went from clear to overcast in a matter of minutes and remained that way for weeks, only giving me a few hours on some nights to capture the night sky.
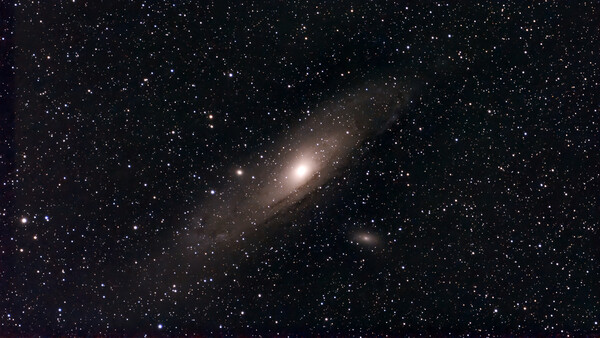
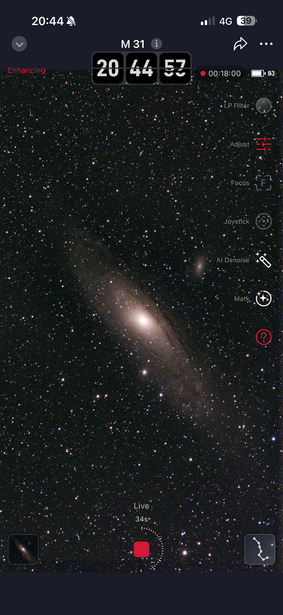
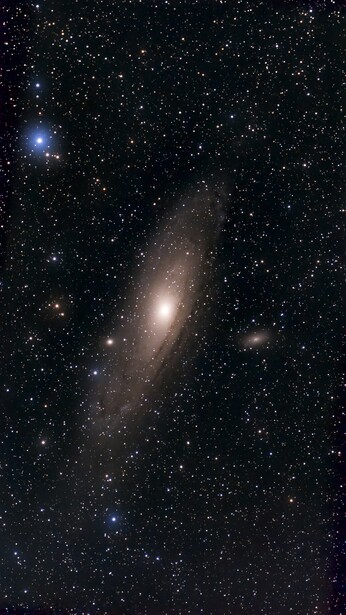
All ranting about the terrible U.K. weather aside, when there was finally a clear night, I switched on the telescope, calibrated it (which took around two minutes), and started up the app. I decided to aim the telescope at the M.31 Andromeda Galaxy as a start. The setup was incredibly easy. I switched on the telescope, paired my mobile phone via NFC, and had the app up and running in a minute or two after creating a profile. Using the built-in catalog of night-sky objects, I selected M.31, and the telescope immediately buzzed to life and moved toward Andromeda. Within seconds, it was taking 10-second stacked images in Alt-Az mode, and I could see the galaxy come to life on my phone as the Seestar automatically stacked them for me. Of course, I also had the option to use an equatorial mount if I wanted to increase the exposure time to 60 seconds, which, in theory, should yield clearer results. It also included a DBE (Dynamic Background Extraction) that removes noise and sharpens small details.
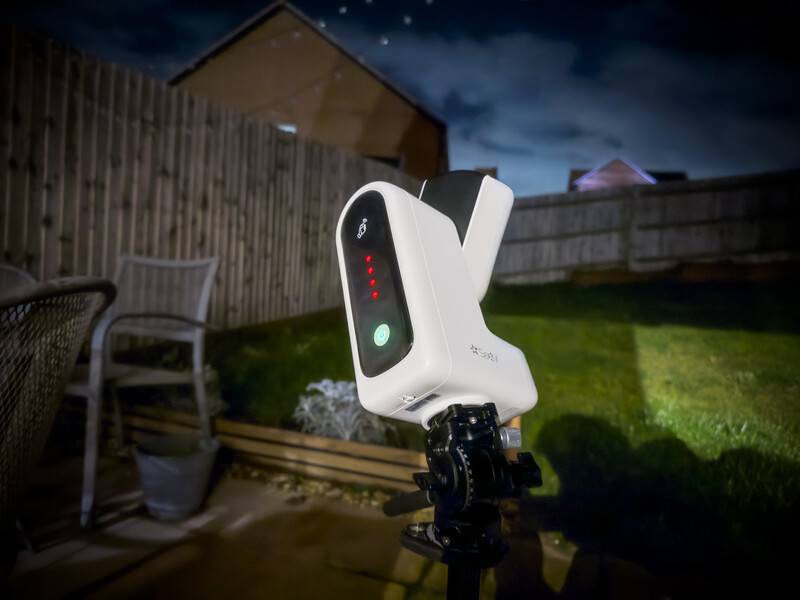
With the added benefit of Wi-Fi and Bluetooth connectivity, I was able to leave the telescope running, return to the safety and warmth of my living room, and watch some TV. In contrast, the telescope did its thing outside in the freezing cold. The built-in anti-dew control meant I didn’t have to worry about the lens fogging up while it was busy taking photos.
Exposure Times
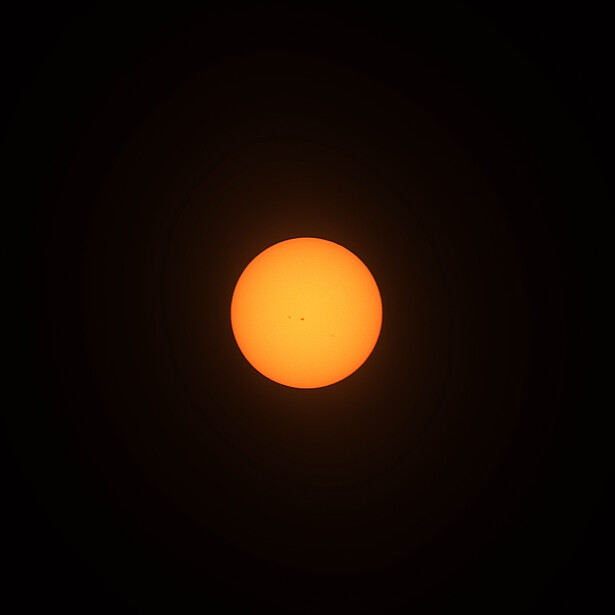
With the Seestar S30 Pro, as with any telescope, photographing the night sky requires some time and patience. While setting it up takes a few moments of your time, photographing objects in the night sky takes a few hours. My initial test with Andromeda took around 3–4 hours to get clear results. Sometimes the stacking will fail, for example, when a cloud moves in front of the region you’re photographing. But luckily, the Seestar will keep photographing, and stacking will continue once the clouds have moved away. When pointing the Seestar at distant nebulae, for example, it often requires activating the Deep Sky filters, which also increases the exposure time. However, photographing bright objects such as the Moon or the Sun would only require a few minutes because of their brightness. The latter requires a specialized magnetic solar filter to be fitted in front of the lens before pointing it toward the Sun.
Processing Your Images
Part of what makes the Seestar S30 Pro such an easy-to-use telescope is the fact that it stacks and processes all the images for you. All the images you’ve taken are labeled and categorized in the app, making it easy to see what you were photographing. You can also download them to your phone to share on social media. For more advanced processing, you can connect the Seestar to your computer via the USB-C cable and download either JPEG or FITS files, which are required for advanced stacking and color correction. As a landscape photographer who only dabbles in astrophotography, advanced stacking and color correction are a whole new can of worms I haven’t had the chance to open yet. Maybe one day, I will! If you want a structured refresher on landscape editing fundamentals, Photographing the World: Landscape Photography and Post-Processing is a solid walkthrough.
Photographing Planets
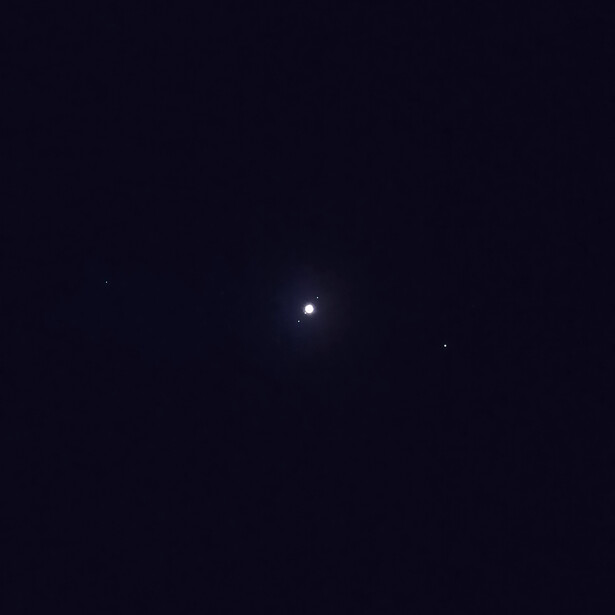
It’s important to note that while these types of telescopes are great at photographing distant galaxies, stars, and nebulae, they’re less effective at photographing planets in our solar system. Planets such as Jupiter appear as a small dot on the screen, and you can vaguely make out its moons. However, because the Moon is so close to Earth, it is ideal for photographing and stacking images for the best results.
Who Is the Seestar S30 Pro For?
Thanks to modern technology, photographing the sky has become easier and more affordable for anyone. This kit is for anyone wishing to get their foot in the door with astrophotography without forking out thousands for a professional astrophotography setup. Smart telescopes come nowhere close to a high-end, professional astrophotography kit. You’ll get higher-quality images by using a high-end telescope and a mirrorless camera, but that’s serious money. For those looking to dabble and take photos good enough to post to Instagram, this is it. Furthermore, it offers portability, something that can be a bit of a headache when dealing with professional setups. I can easily pack the Seestar S30 Pro in my kit bag, head out to a Dark Sky site on vacation, and get incredible results. In fact, I might just do that for my next trip to Wales or Scotland if the weather ever cooperates.
What I Like About The Seestar S30 Pro
- The Seestar S30 Pro is well-built and performs exceptionally well for a product you’d expect at this price point.
- 4K image quality is good enough for web and social use.
- The mobile app is well-designed and intuitive. You can lose connection to the telescope if you’re out of Wi-Fi or Bluetooth range, and it will keep taking and stacking photos.
- The built-in app assistant does a good job of guiding you on how to take better photos and which settings to use.
- The anti-dew control works really well at regulating lens temperature. I’ve had the telescope out in freezing conditions, and it powered through without any issues.
- The size and weight make it ideal to take on vacation with you, set up, and shoot well into the night.
- Well-designed carry case with enough space for filters, the telescope, and tripod legs.
What I Feel Could Make It Better
There really isn’t much to complain about when it comes to the Seestar S30 Pro. It’s lightweight, durable, and does what it needs to do incredibly well. However, the only things that really annoyed me were the Wi-Fi and Bluetooth ranges of 10 m and 5 m, respectively. It was just out of range when I left the telescope to go inside my house, so I had to get up and stand by the back window to get an updated image from the app. Luckily, disconnecting the app from the telescope doesn’t stop the images from being taken and stacked. Moving closer to the telescope re-establishes the connection and updates the app with the latest frame captured.
I would’ve loved to connect to the Seestar via my laptop using a desktop version of the mobile app if one had been available. This way, I can download the images directly to an external drive and start editing while it’s busy. It would also be great to control the telescope this way, rather than relying solely on a mobile device. However, I get it: mobile phones are more portable. And in an effort toward ultimate portability, this certainly wins!
Conclusion
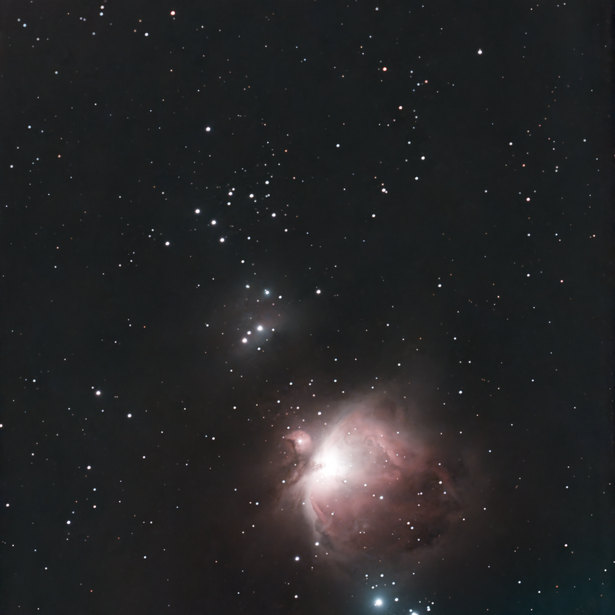
I've got to admit, this was the most fun I've had with a new piece of tech in a long time. I sat on the couch with my kids, geeking out as the image got clearer with every stack. It reminded me a bit of being back in the darkroom for the first time, seeing an image I shot appear on paper. That same magic is in the ZWO Seestar S30 Pro when you're photographing the Orion Nebula: it appears black at first, and a few seconds later, you start seeing an image appear.
I love that I can take this telescope with me wherever I go, set it up in minutes, and get great results. There’s no wasted time getting to know the app or setting it up. If you’re new to astrophotography or an experienced astrophotographer looking for a lightweight setup, this is highly recommended. The only thing that will set you back, especially if you’re also in the U.K., is the cloudy weather!
Join the Fstoppers community for free
-
Post comments and join in the discussions
-
Browse the site ad-free
-
Share your work and get featured in the community
-
Compete in the photo contests for fun and prizes
No comments yet