
As the number of people interested in wildlife photography continues to grow, and the capabilities of modern equipment expand the boundaries of what is possible, many of us are seeking new ways to produce work that is fresh. This has meant exploring new techniques and searching for untapped frontiers in wildlife photography. This trend has led to a rapid increase the number of people interested in using camera traps.
In this article, I'll explain what camera traps are and how they can help you photograph animals in new ways. I will also teach you how you can set-up your own high-quality DSLR camera trap and give some advice on how you can avoid some common pitfalls.
What Is a Camera Trap?
A camera trap is a stationary camera that is left unattended for any length of time from one or two hours to several months. A sensor detects when an animals passes in front of the camera and automatically triggers it.
Trail cameras are small self-contained camera traps that are commonly used by researchers to monitor wildlife populations. They have revolutionized the way that researchers collect data, but the image quality from these cameras is extremely poor (particularly at night) and so they are of limited use to photographers.
In recent years, the technology to set-up a high-quality DSLR camera trap has become easier to use, cheaper, and more accessible. This has led to a rapid increase in the number of photographers (both amateur and professional) using camera traps to push the boundaries of wildlife photography.
Camera traps have gained popularity because they offer a number of unique advantages:
- A camera trap can be left out for a long time, increasing the chances of photographing very shy or rare animals.
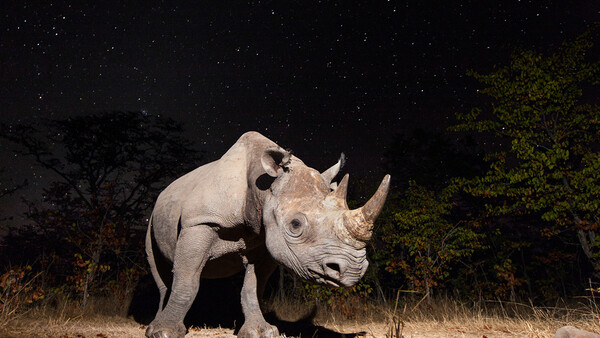
- You can set-up dramatic or subtle lighting to take stunning images of animals at night.
- You can have one or more camera traps working for you while you sleep or go off and take “normal” photographs, which allows you to greatly increase your output.
Gear
So what do you need to set-up your first high-quality camera trap? Well this is the perfect opportunity to dig out that old DSLR that you don’t use anymore. An entry-level DSLR with a kit lens is a great starting point.
Next, you need a way of detecting when an animal is in front of the camera. There are two types of sensor commonly used for this: beam-breaks and PIR motion sensors.
PIR motion sensors are the sensors that are used in burglar alarms or on your automatic patio lights. A PIR sensors has a number of benefits:
- A single small unit that is easy to travel with.
- Low power consumption so you don’t need to use large batteries.
- Simple to set up and easy to use.
Beam break sensors, also known as active IR sensors, require a beam emitter and a detector which fires the camera when the beam is interrupted. They are generally more challenging to use because you need to precisely align the two devices and the beam emitter consumes a lot of power. However, a beam break system has some advantages:
- Faster response time makes it more appropriate for fast moving subjects such as birds in flight.
- The narrow beam gives more precise control over the position of the animal when the camera is triggered.
Most of the time, I prefer using a PIR sensor because it is much easier and quicker to set up. They are also less obtrusive so animals are less likely to be put off by then.
I wasn’t able to find a user-friendly PIR sensor when I started working with DSLR camera traps, so I developed my own. You can find out more about my sensors here.
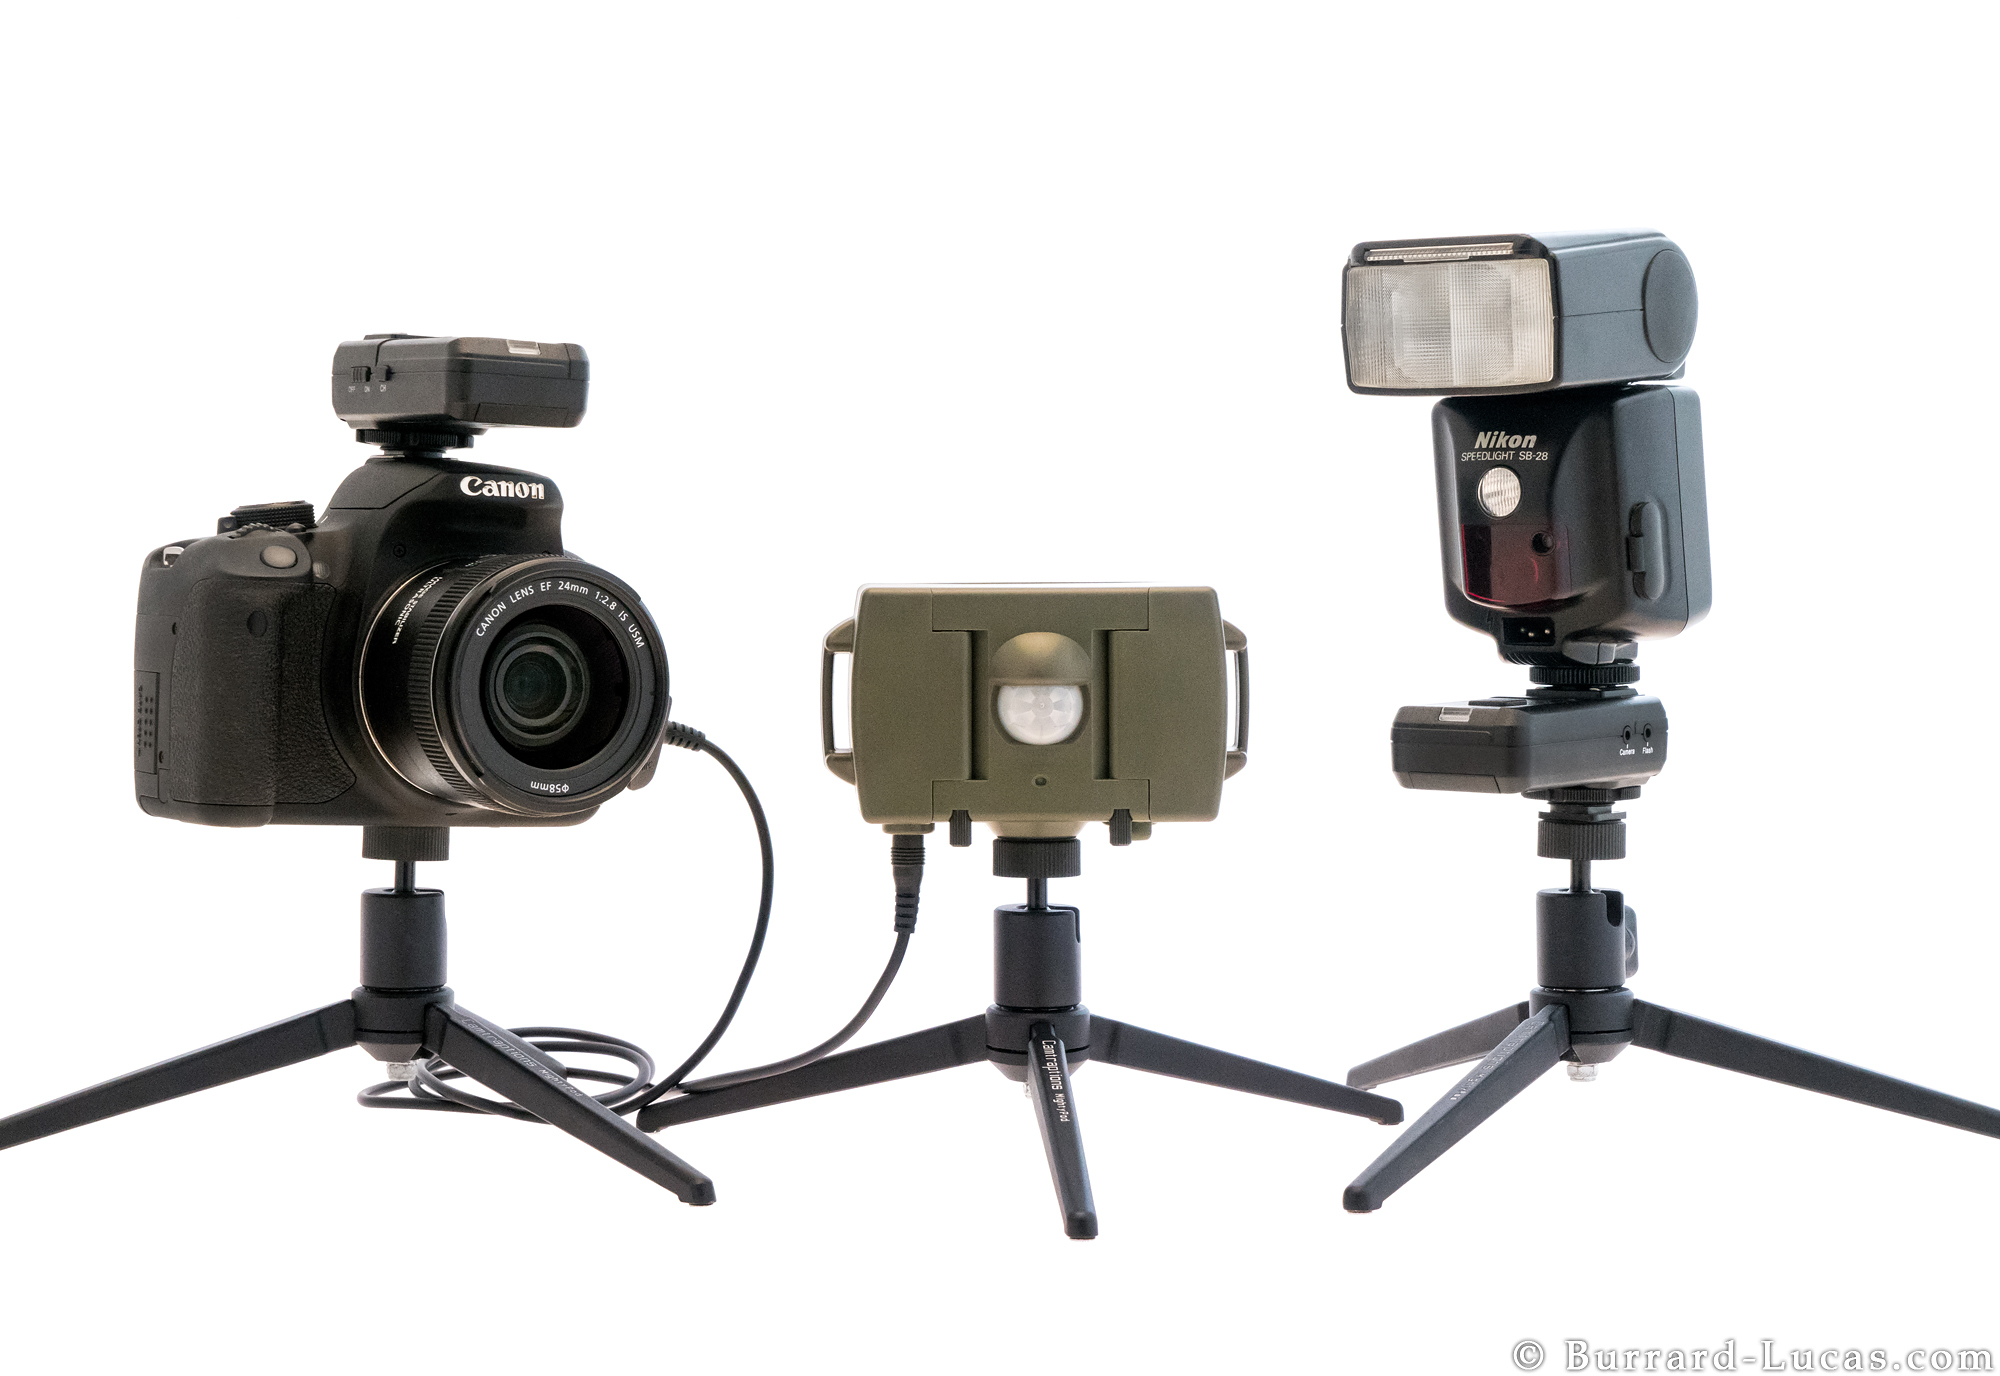
Once you have found a suitable sensor, you need to illuminate your shot. The simplest way to do this is to use a single flash connected to your camera with a standard off-camera flash cord. It is important to get your flash away from the camera because this reduces red-eye and gives you more natural-looking shadows.
If you want to experiment with more advanced lighting then you can use two or more flashes to fill in shadows and to illuminate different parts of the scene. When using multiple flashes, you will need to set their power-output manually. It is easiest to connect the flashes to the camera using wireless flash triggers.
As your lighting gets more complex, you can add snoots and diffusers to shape the light. However, I recommend starting simple as you may find that things like flash boxes spook the animals.
Lastly, you need to think about protecting your equipment from animals and the elements. If you’re happy to do a bit of DIY then you can modify a waterproof Pelican case to protect your camera. Simply cut a hole for the lens and use silicon sealant to attach a window and length of pipe over the lens. For the window you can use a cheap lens filter. Here’s a good tutorial:
If you don’t want to build a housing yourself then you can get a strong metal camera housing from Camtraptions. To waterproof my flashes I usually just use clear plastic food bags secured with tape.
Powering Your Camera Trap
Camera traps need to be left for as long as possible to maximize results. This means you need to select equipment and settings that conserve battery life.
Firstly you need to set your camera to power-off after around a minute or 30 seconds. The camera will then wake and take a photo when it receives a signal from the sensor.
Flashes can be more difficult! Most flashes take a few seconds to charge when they wake and therefore they may not fire when you camera takes the first photo. To get around this, you might have to disable the flash’s power-save mode. The downside of this is that the flash will often drain its batteries over the course of a single night. If you don’t want to change your flash batteries every 12 hours then you have two options:
- Find or build an external power source for your flash.
- Use a flash that holds its charge, even when sleeping.
Some old Nikon flashes hold their charge very well. This means they may last several weeks on one set of batteries. The most cost-effective flash of this sort is the Nikon SB–28 which you can find on eBay (do not get the DX version as it does not work as well). If you would like to use a Canon camera to fire a Nikon flash then the Camtraptions Wireless Triggers were designed with this purpose in mind.
Settings
There is quite an art to setting your camera to automatically capture well-exposed photos both day and night. To get you started, the following settings will usually work quite well:
-
Manual exposure mode
-
Shutter: 1/250s - Fast enough to freeze motion but any faster and your flashes may not sync.
-
Aperture: f/8 or f/11 - Gives you plenty of depth of field.
-
ISO: Auto - If possible, limit the maximum ISO to 800 or 1,600 so you don’t get too much noise.
-
Single shot mode (to avoid strobe-flashing nocturnal creatures).
-
Manual focus - focus on the point where the animal is likely to be detected by your sensor.
-
Set the flash output manually so that the scene is correctly exposed at night (test in darkness to check the flash exposure).
These settings work because at night, the camera will select a high ISO and you can get away with using low-powered flashes. During the day, the camera will select a lower ISO to expose the scene and the flashes will then just provide a small amount of fill-light.
Learn More
If you would like to learn more about setting up a camera trap, I have created a free camera trap beginners guide and video series.
Case Study
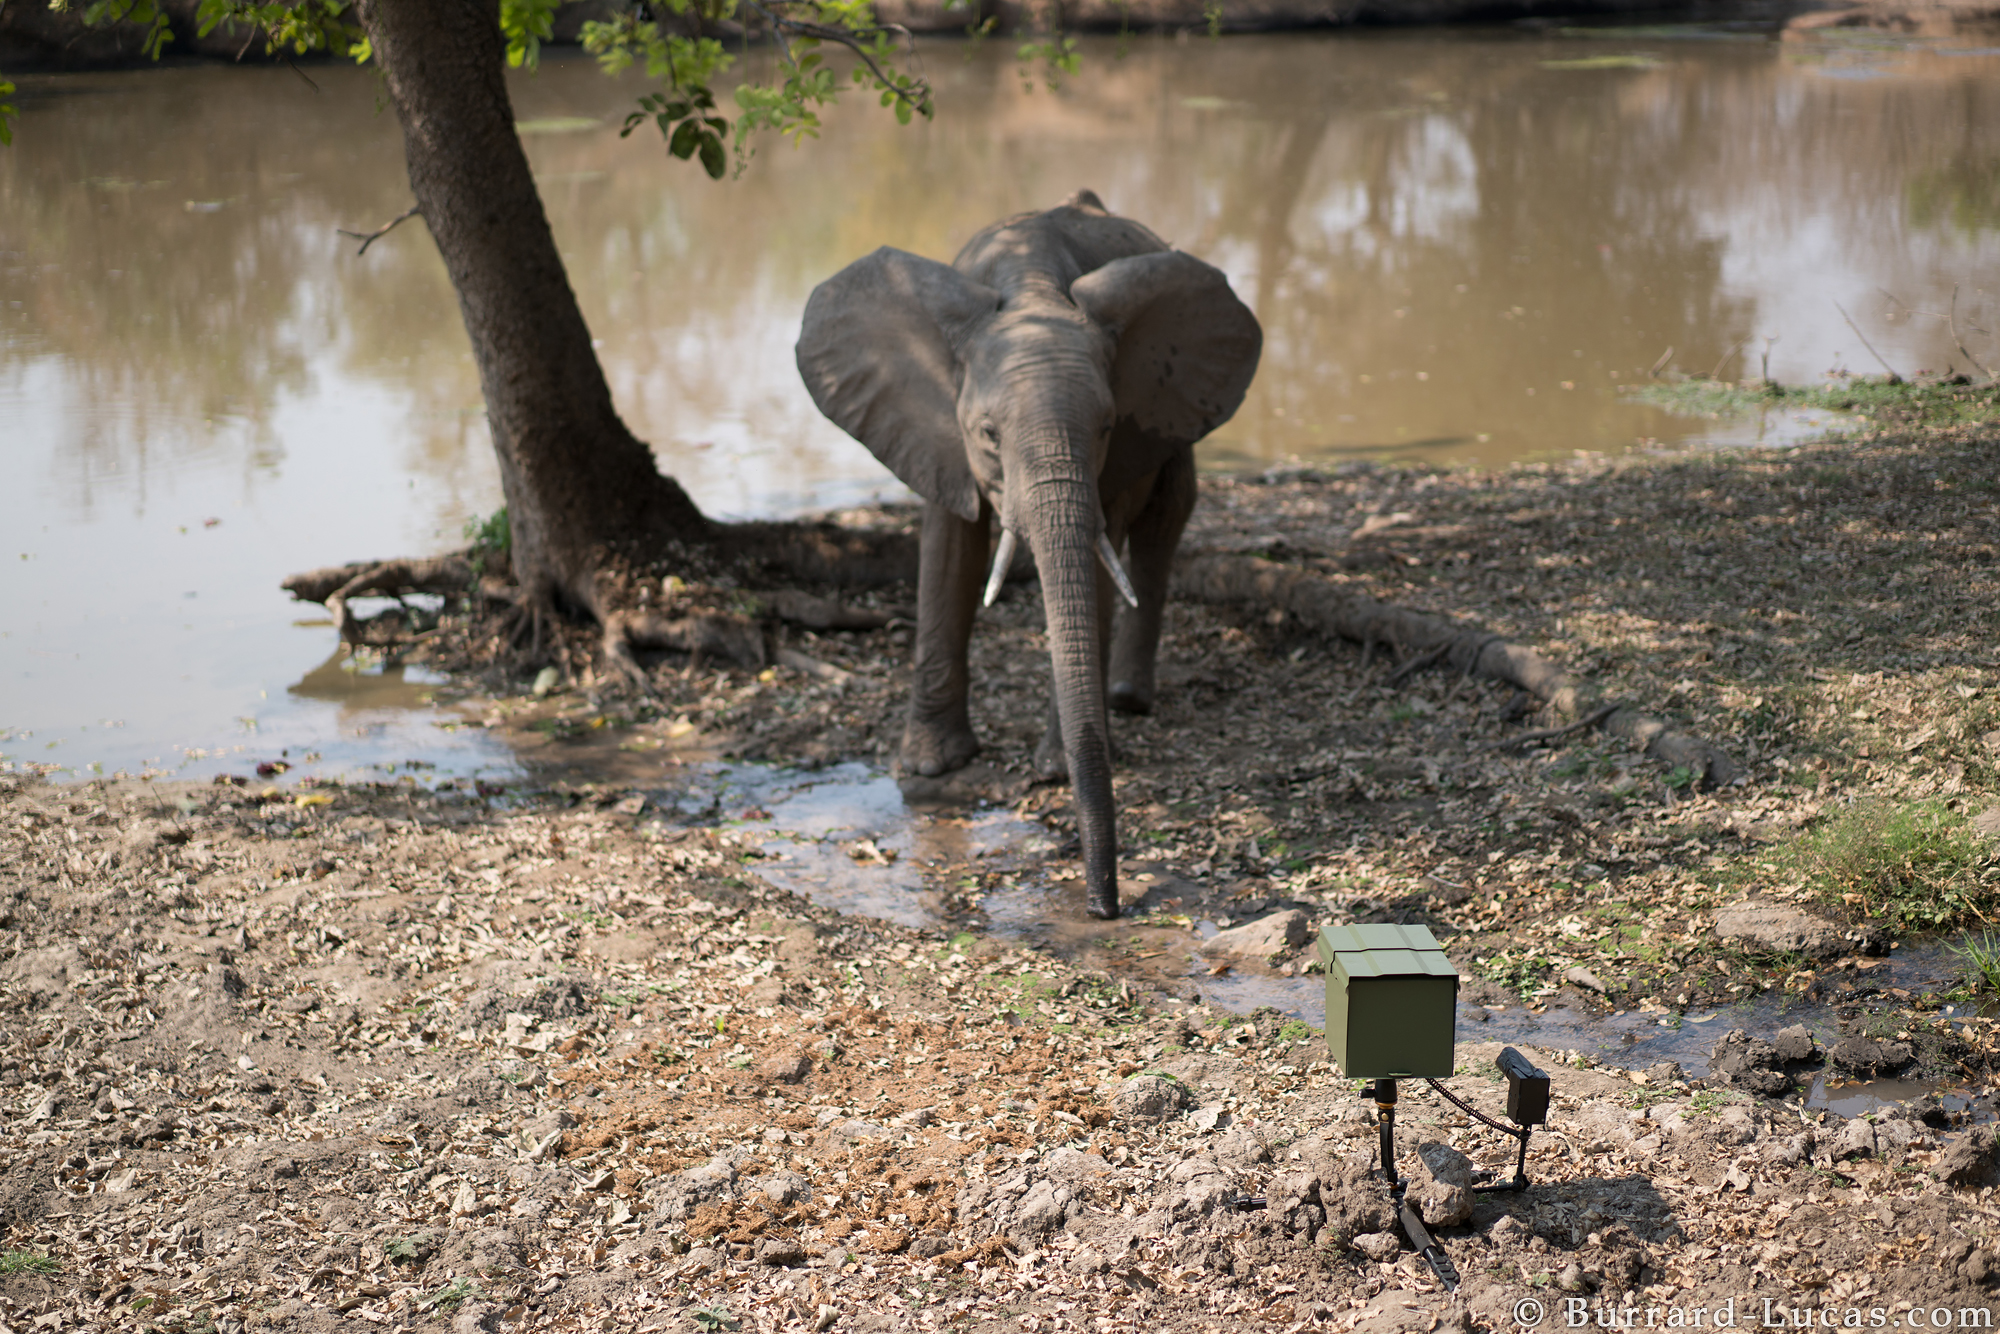
In August last year I undertook an assignment for WWF in the Zambezi Region of Namibia. Our aim was to obtain high-quality images of elusive animals, some of which had only ever been photographed on trail cameras before.
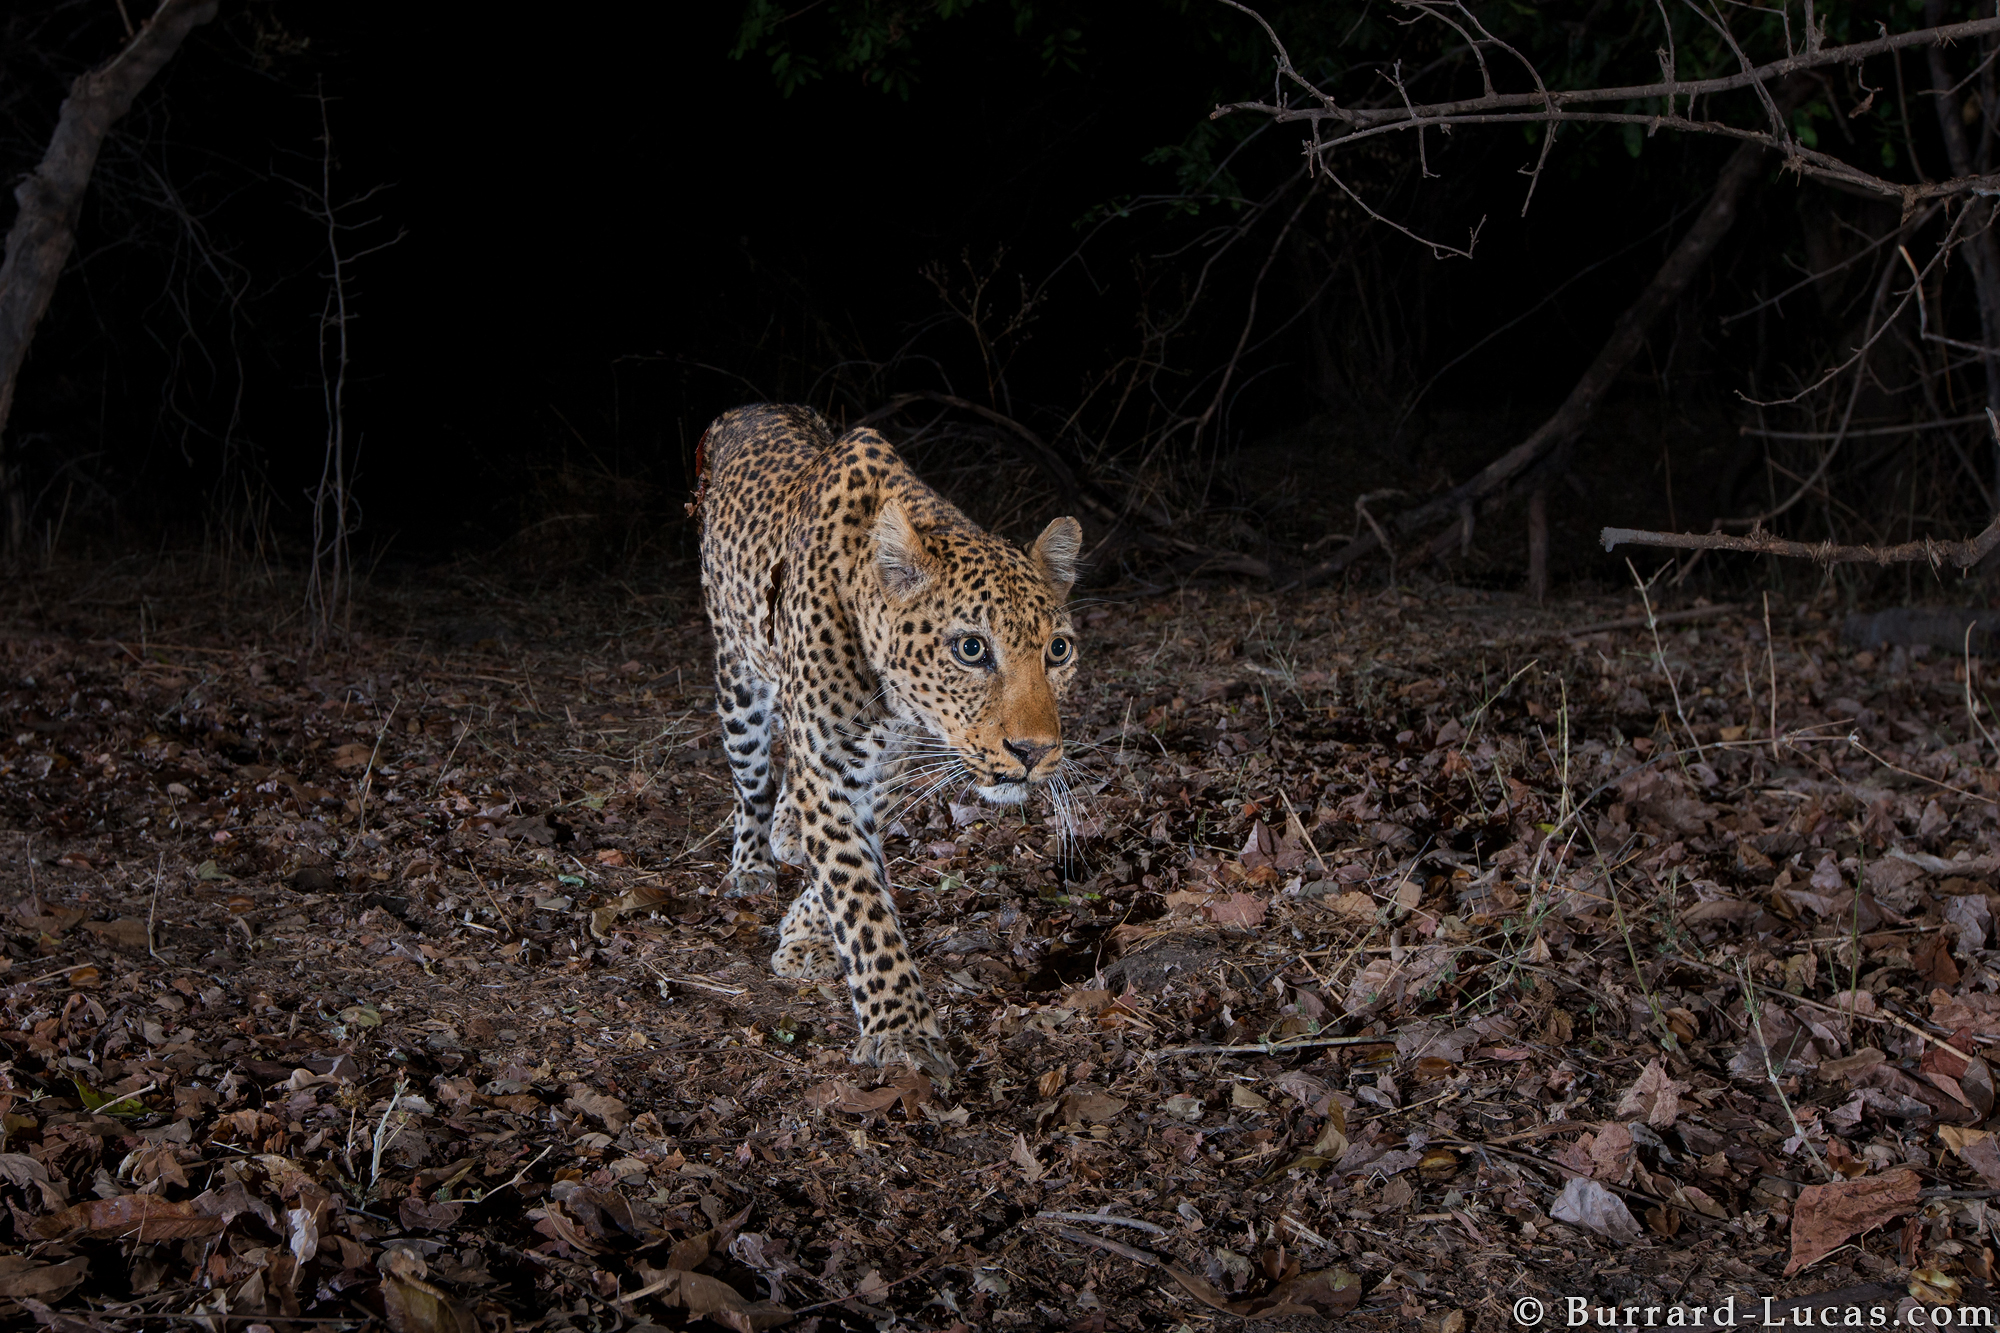
For many years, a researcher called Lise Hanssen has been studying carnivore populations in the region. Her research utilized over 100 research camera traps to build up a picture of predator populations for the first time. She was able to identify the ranges of leopards, lions, hyenas, and African wild dogs.
I teamed up with WWF and Hanssen to try and get high-quality photographs of her study subjects for the first time. However, it quickly became apparent that this was not going to be easy, as the carnivores are extremely elusive and hard to see. I spent two weeks in Namibia trying to find and photograph them but didn’t catch a glimpse of a single one!
Fortunately, we had foreseen this challenge and I had come prepared with five of my own camera trap systems.
I relied on Hanssen's research and expertise to identify several promising sites for my traps. These included locations both inside and outside the national parks. At the end of my trip, I left my cameras in place so they could continue working for a further ten weeks. Hanssen visited each trap once a fortnight to change batteries and clean the lenses.
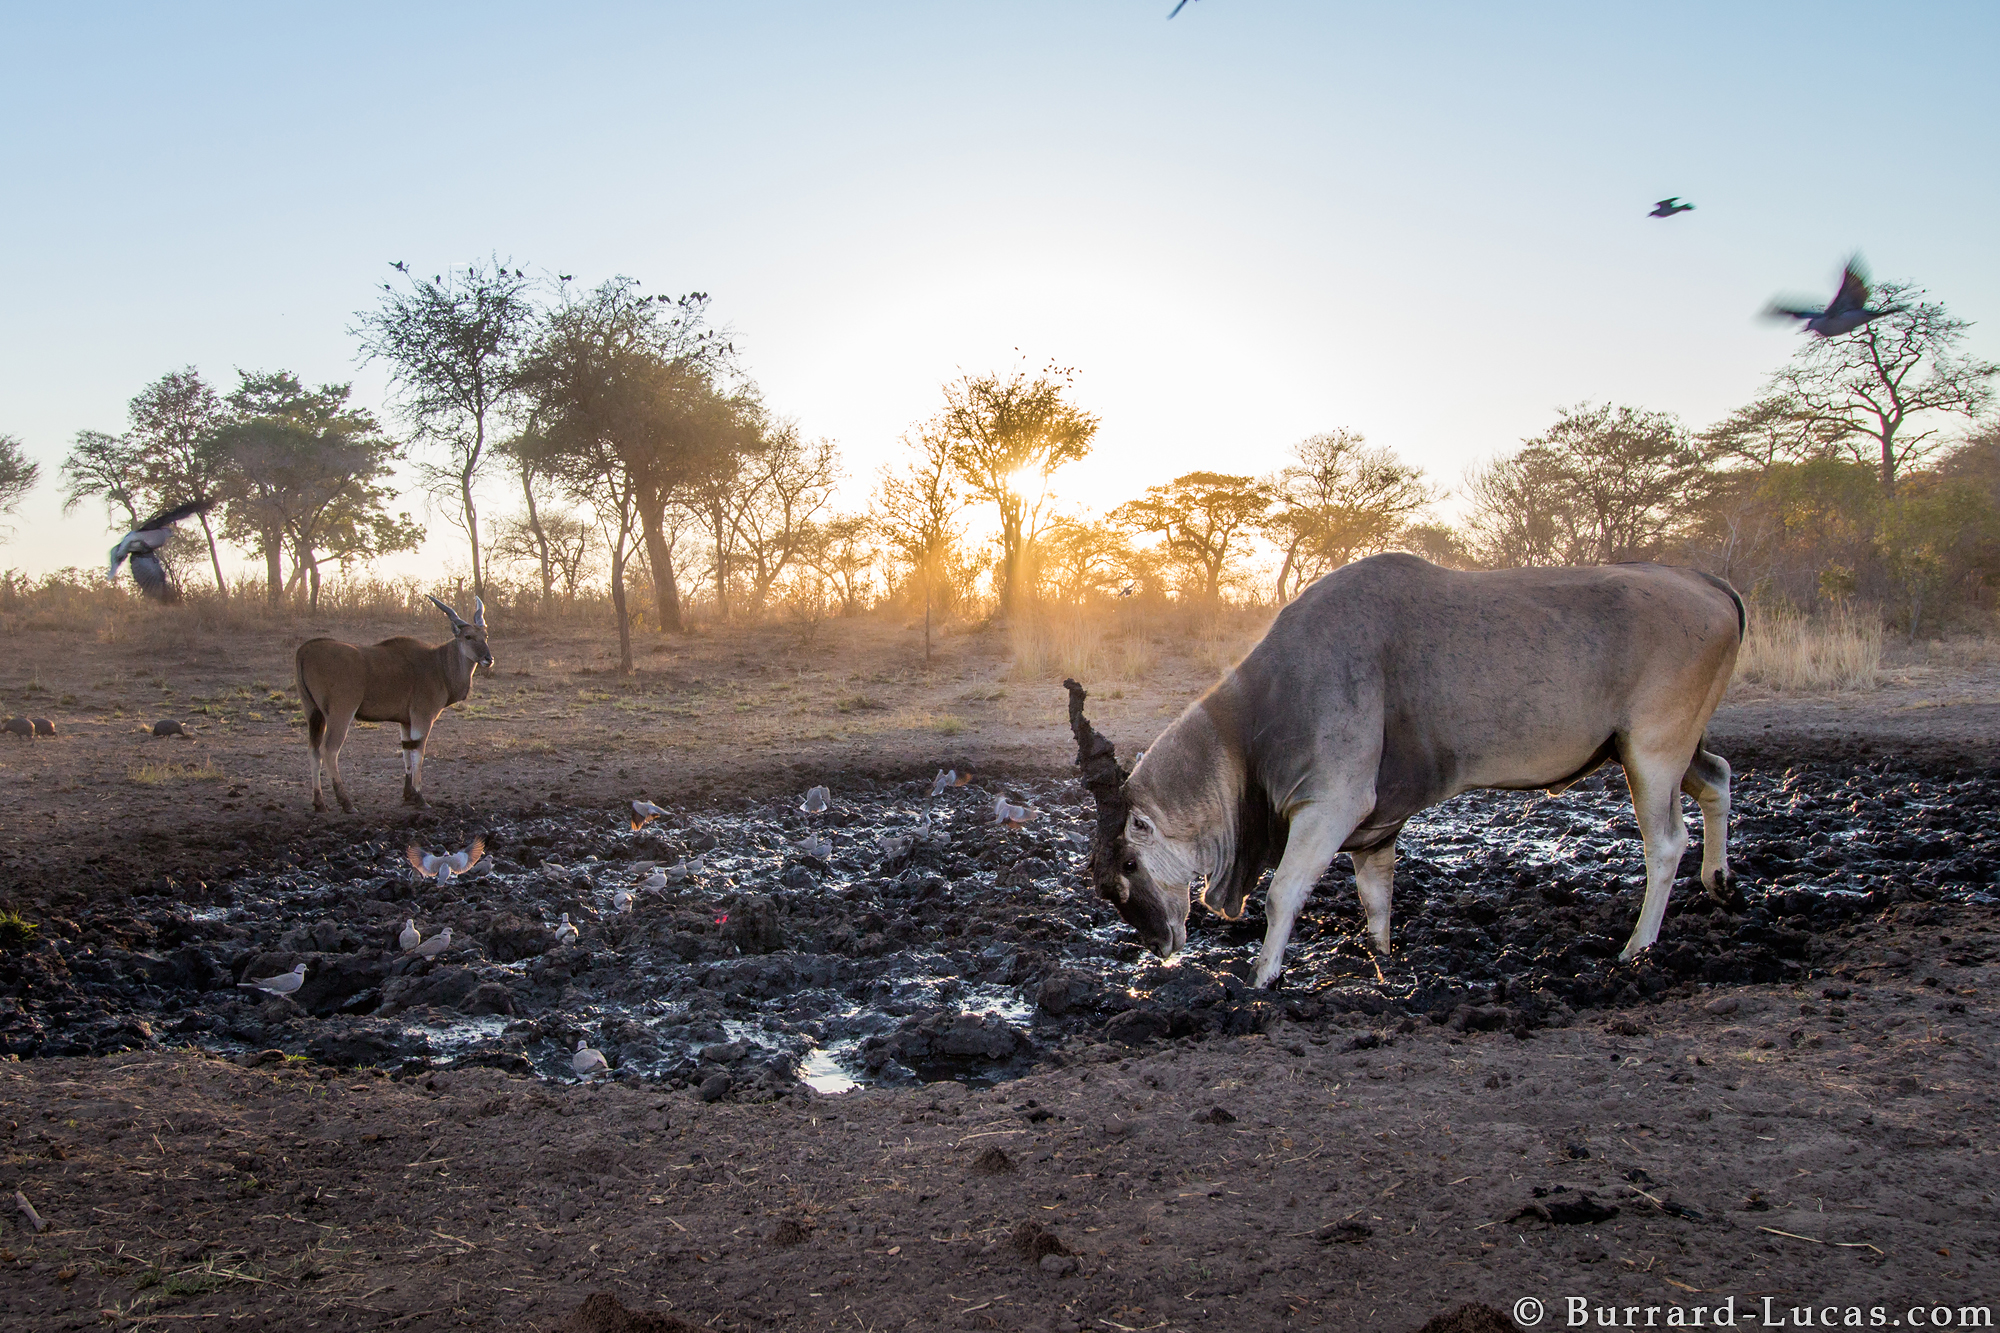
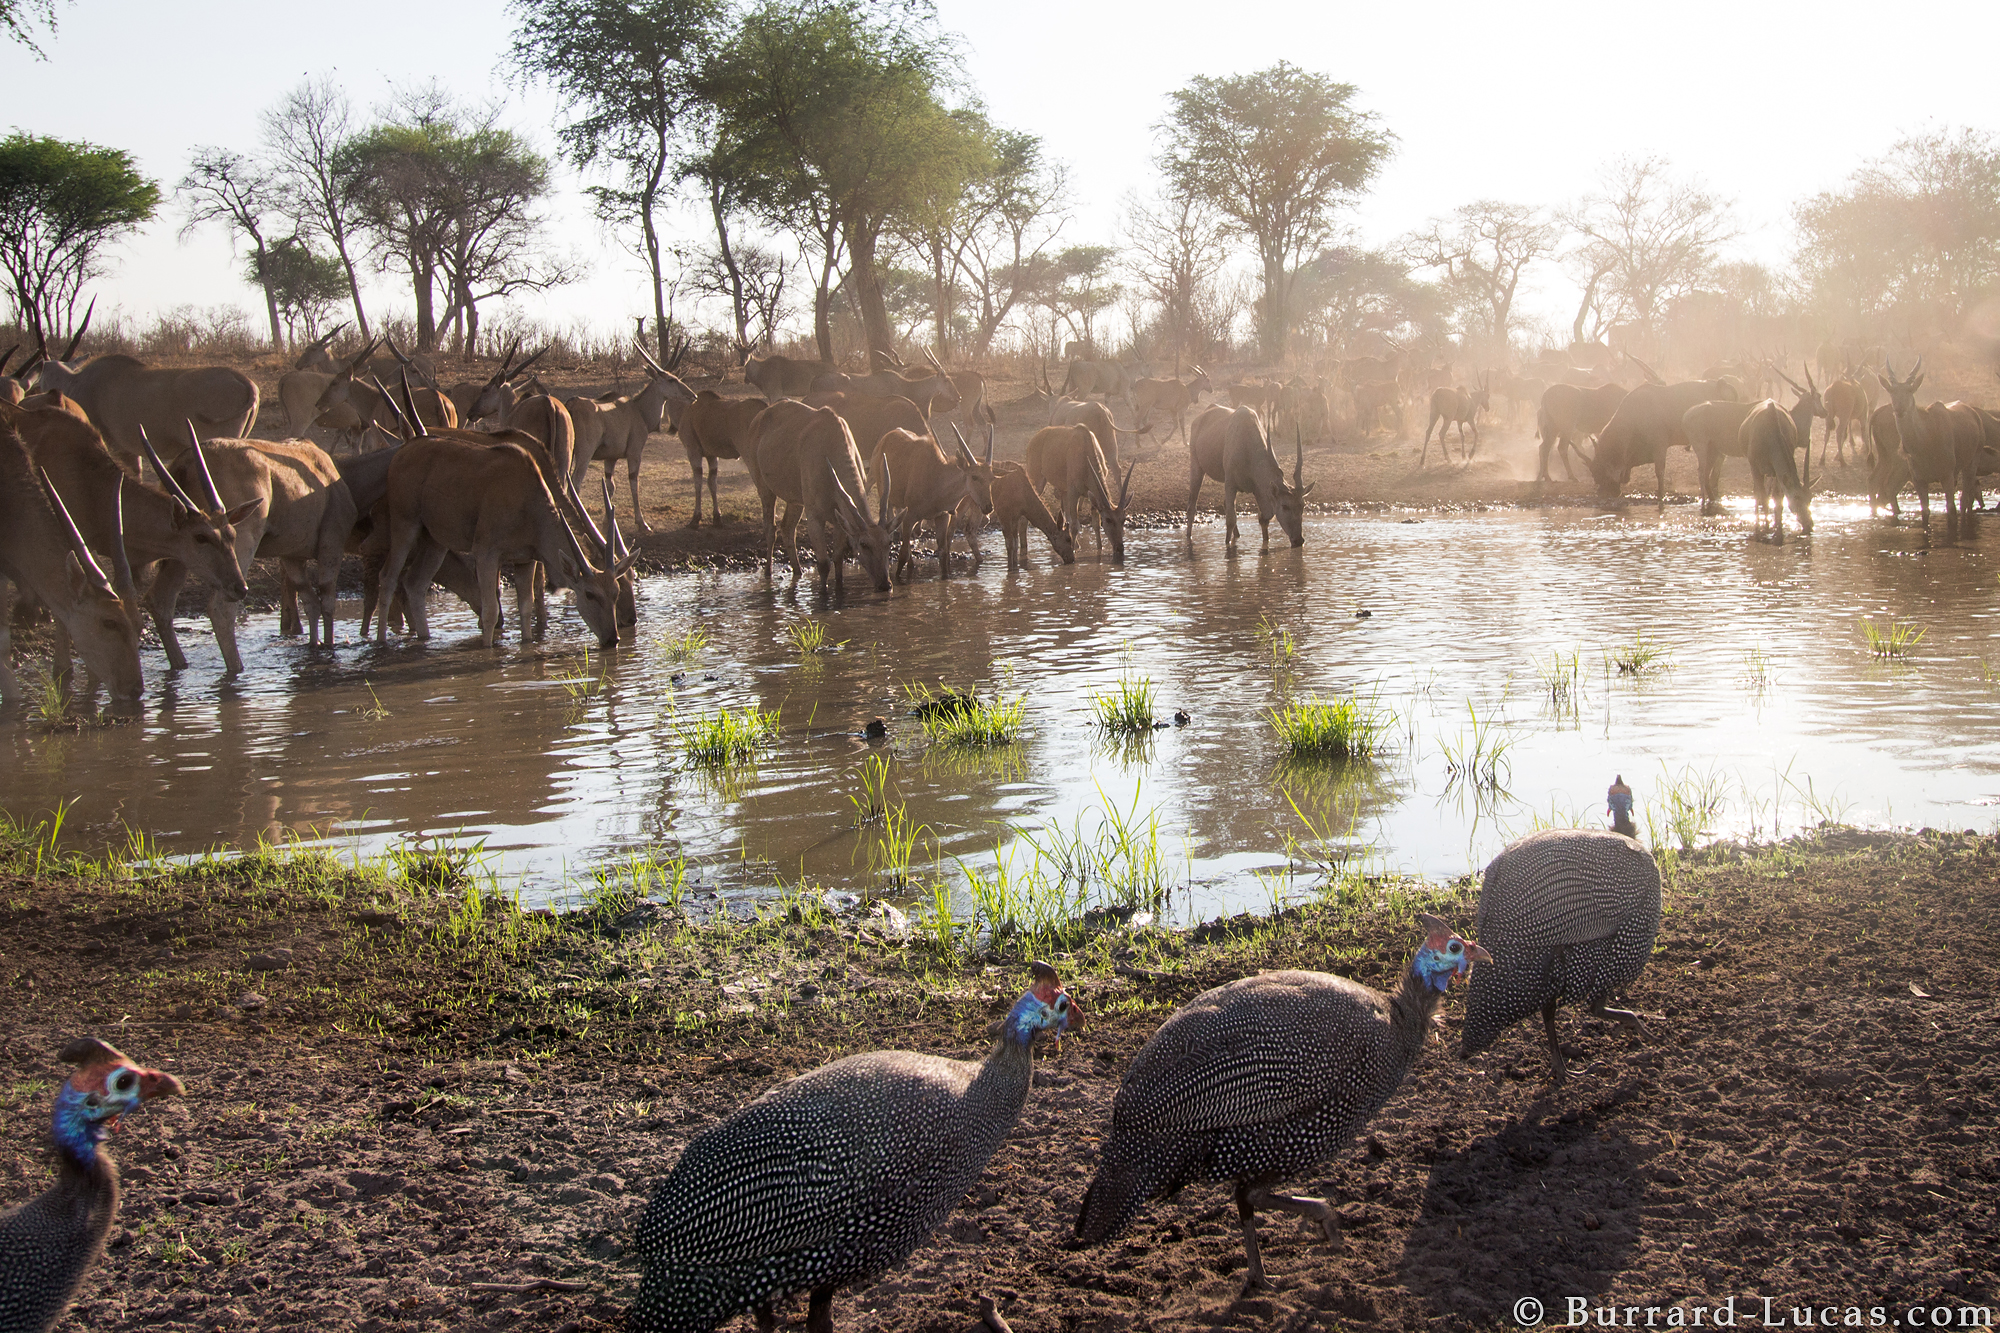
Hanssen's predictions were spot on and over the following weeks my camera traps started capturing images of the key species we were after including leopards, hyenas and African wild dogs. Of course, my traps also photographed many other creatures. One trap in particular, positioned near a waterhole, captured an incredible number of animals including elephants, giraffes, eland, wildebeest, and bush pigs. It also took thousands of photos of guinea fowls. In fact, I estimate that I had 10 images of guinea fowls for every other animal photographed. Sorting through them all took a quite a while!
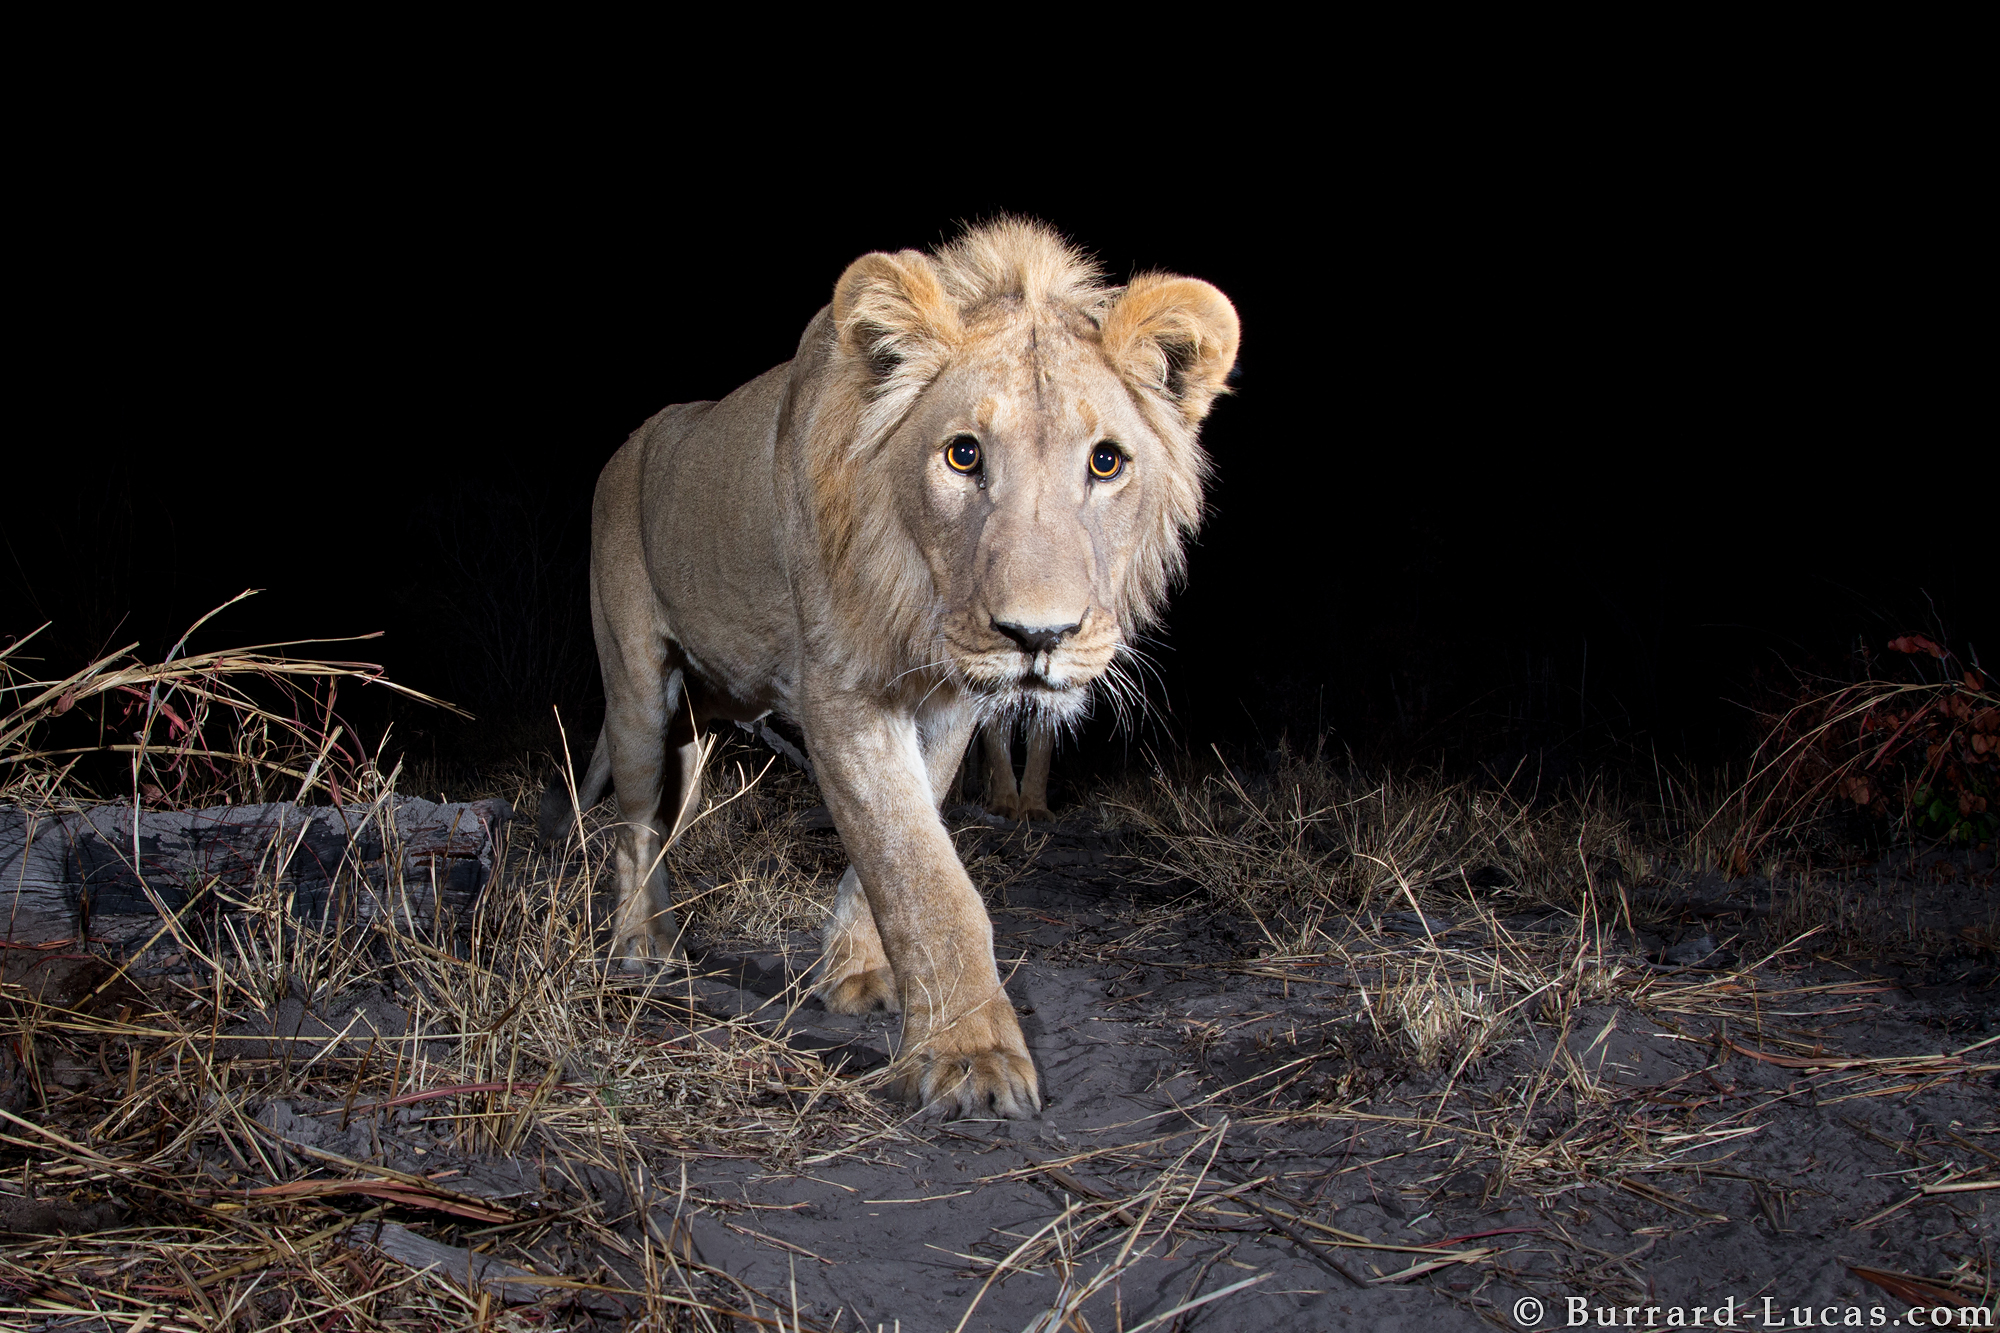
The greatest challenge of all was photographing the lions. These cats spend much of their time outside the national parks and are extremely shy. Even Hanssen has never seen them with her own eyes. I set up two camera traps on trails leading to waterholes that the lions sometimes visit. In the three months that my traps were operating, the lions passed by twice, resulting in some very rare shots of these secretive big cats.
You can watch a short video showing one of my camera trap set-ups for this project here:
https://www.youtube.com/watch?v=FzHvk9tHnlk
The images that came out of this project, combined Lise’s valuable research, are now being used by WWF to encourage and inspire increased conservation action in this important part of the Africa.
You can read more about the project on the WWF website.


Join the Fstoppers community for free
-
Post comments and join in the discussions
-
Browse the site ad-free
-
Share your work and get featured in the community
-
Compete in the photo contests for fun and prizes
1 Comment
What a cool article and great pictures! I'd love to do this in the Santa Monica (Southern California) mountains. When you go out hiking, you can hear the coyotes around you, but attempting to shoot them is impossible...