As a dog photographer, one critical post-processing skill is the ability to remove leashes from your images. It is often the single most time-consuming step of editing your dog portraits. I have tried many techniques for removing leashes, and I find this one to be the fastest while producing great results.
Due to practical, legal, and safety reasons, dogs often need to be kept on the leash for outdoor photography sessions. If I can help it, I will always first try to photograph the dog without any type of restraint, especially if the dog is obedient and is in a location where it is safe from harm. Many times, due to the surrounding environment and the demeanor of the dog itself, having them on leash is a necessity.
Effectively removing leashes from photos begins with creating portraits that will make it easy to remove the leashes during editing. I explain to the owner how to hold the leash to enable easy removal. The leash should not be so slack as to drape over the dog’s body; the only part of the leash that overlaps the dog should be where it meets the collar. The leash also shouldn’t be pulled so tight as to put any strain on the dog’s neck. This is uncomfortable for the dog, and it won’t look quite right when removed during editing.
I always encourage the owners to stand to the side, and slightly behind their dog. If they wish, they can grasp the leash a few feet from where it meets the collar and hold it directly over the dog’s neck. When composing your portrait, do your best to exclude the owner so that all you will have to worry about removing later on is the leash itself.
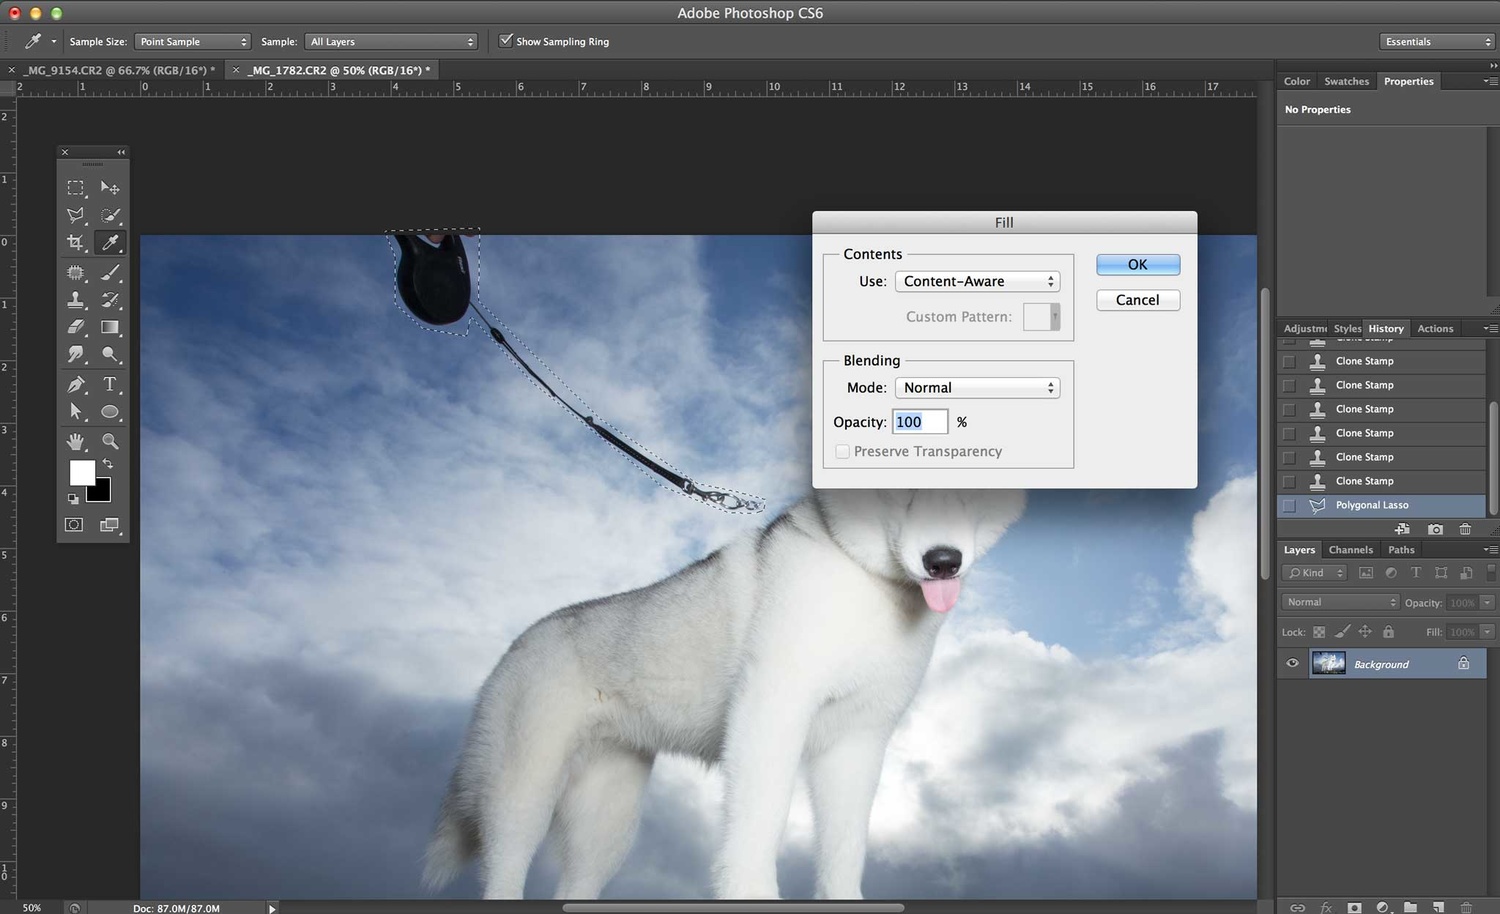
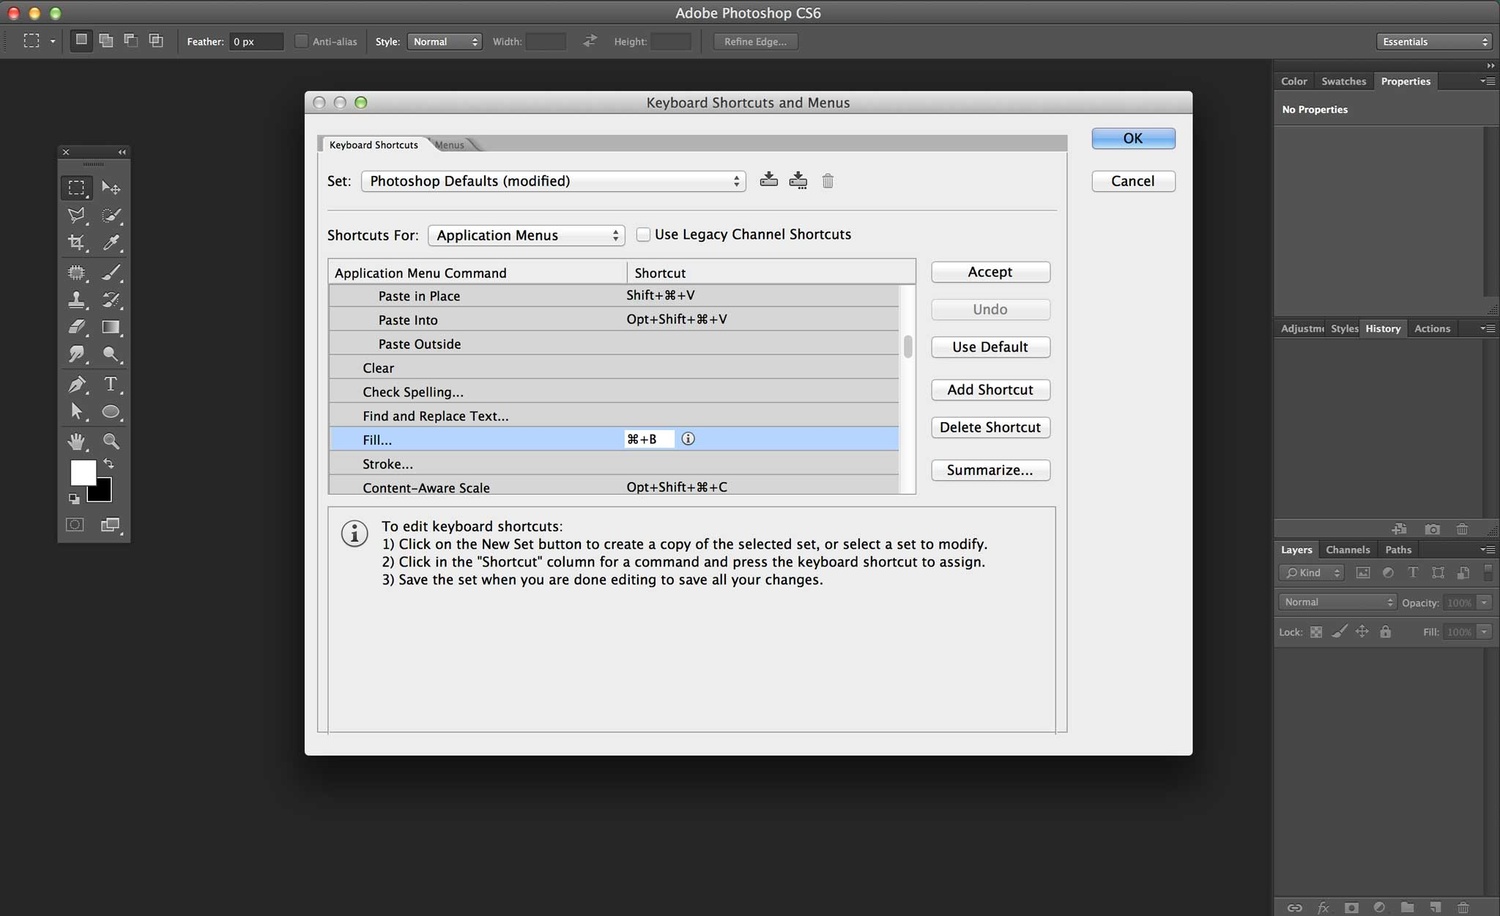
I prefer to take out leashes in two steps in Photoshop: first I use the Clone Stamp tool to edit where the leash meets the dog, and then I use Content Aware Fill to remove the remaining leash. If you’re like me and use Content Aware Fill frequently, I recommend creating a shortcut for the command. Go to Edit > Keyboard Shortcuts and choose Edit > Fill. I made this shortcut Cmd+B (Mac)/Ctrl+B (PC). Now when you use the shortcut, a window will pop up that defaults to the fill option that you chose. So to perform a Content Aware Fill operation, I simply press Cmd+B/Ctrl+B and then hit Return. It probably saves me only a few seconds each time, but they add up when editing many photos. On occasion, Content Aware Fill won’t work perfectly (you’ll end up with an extra eyeball floating in the sky). Because there is a random element to the operation, you can simply try it again to see if the results improve.
Here’s an example of how I removed a leash from this husky:

Open the image in Photoshop. Select the Clone Stamp tool and zoom in. Sample an area of fur on the edge of the dog near where the leash meets the dog. Then simply paint a small area over where the leash meets the dog.

The Clone Stamp tool is best for this step as it allows for fur to be created where the leash was attached.

Use the Lasso tool or Polygonal Lasso tool to trace around the leash. Once complete, select Edit > Fill > Content Aware to remove the rest of the leash from the photo.
If you are using the shortcut outlined above, you should be able to get the whole process of leash removal down to 15 seconds or so. I have tried a few other ways of removing leashes, including using the Patch tool and Clone Stamp tool, but I have found Content Aware Fill to most often produce the best results.


I did this a few years ago of my sister's dog. I wanted to take off the leash, collar and harness. My wife said no. :-( I edited out the leash but wasn't going to attempt the others.
What about the collar line around the neck? Still showing. Unatttactive on a thick furred dog, such as the Huskey or Malamute shown in the photograph.
Doesn't the shortcut J bring up Content Aware automatically?
J will bring up one of several healing tools, depending on what you last used, but Content Aware Fill specifically is not one of those. I think it should be!