U.K. commercial photographer Karl Taylor takes us behind the scenes on a rather exciting and unique photo shoot where the goal is to create an animal portrait of a hawk during flight. There are so many variables to this concept that even with a trained bird of prey, Taylor still ran into a little bit of trouble at the beginning of the shoot.
Taylor used a simple four light setup, with the Broncolor Para 222 as the key light, a pair of Broncolor Para 88s to camera left and right as rim lights, and a Broncolor Flooter to illuminate the background. Looking at the final image it is quite evident how the lighting equation all comes together, perfectly illuminating the hawk. The huge Para 222 created quite an impressive catchlight in the eyes while the Flooter, along with the edge lights, created a pleasing halo effect around the creature.
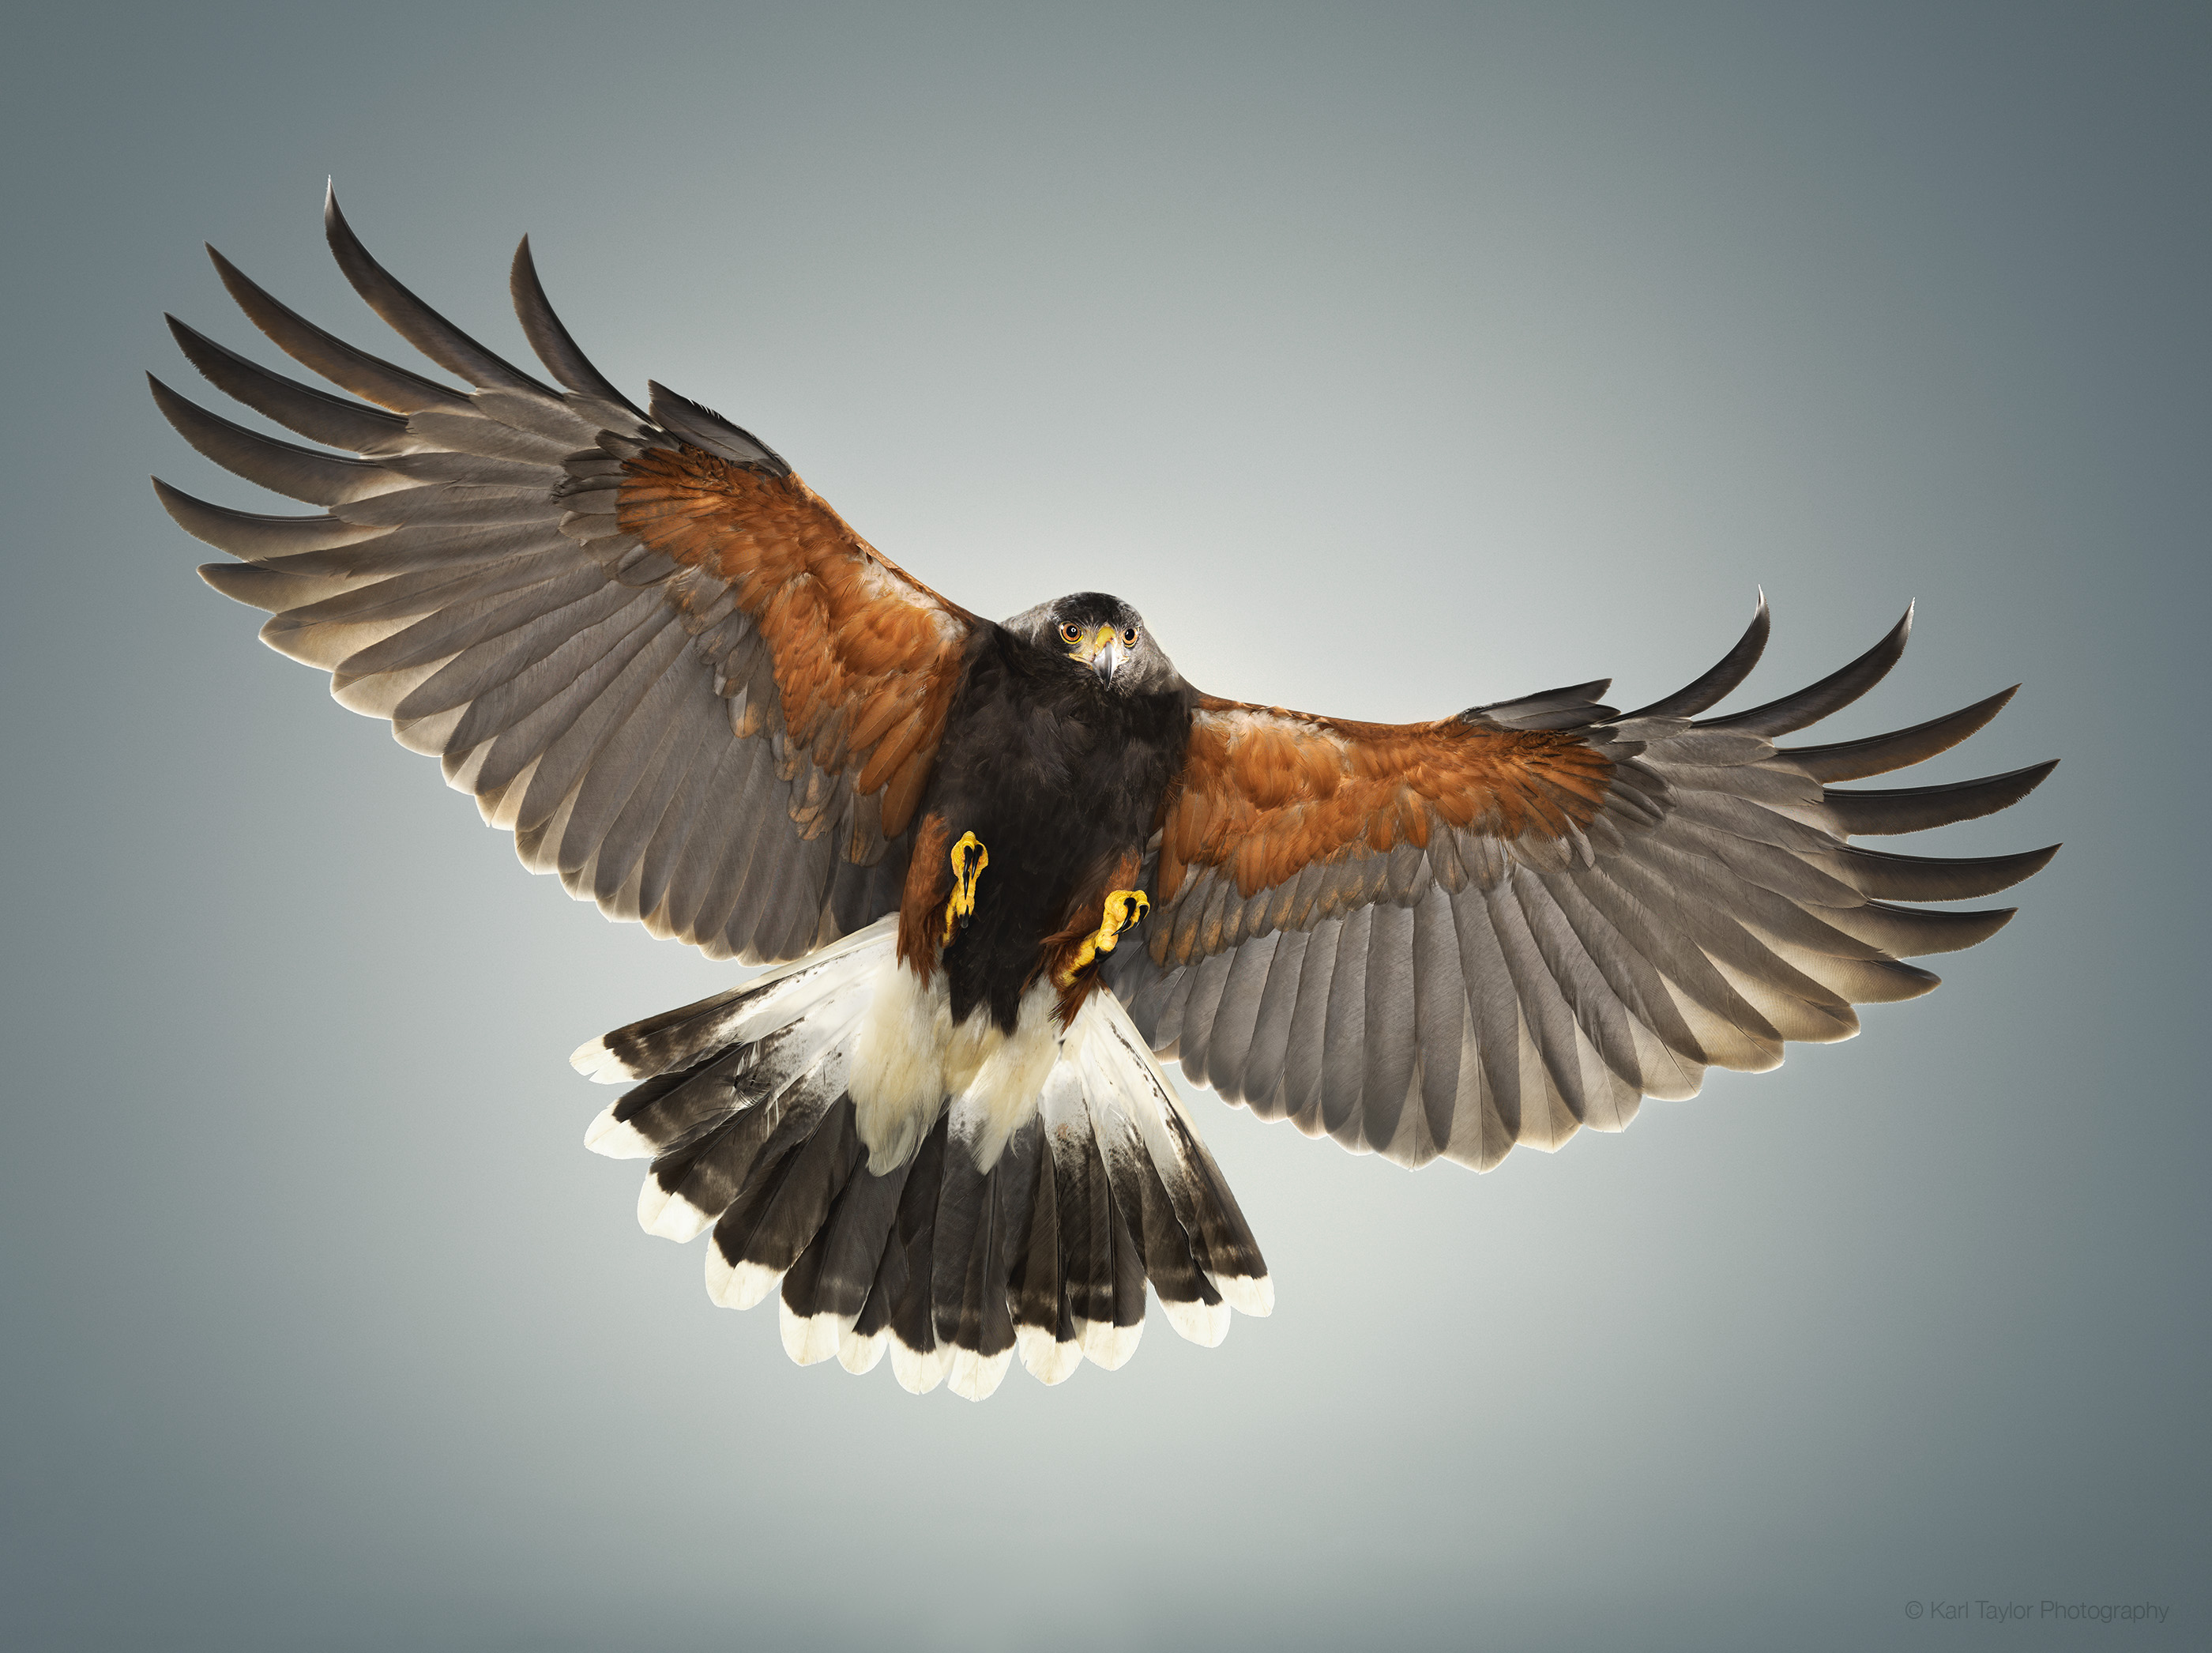
Other than lighting techniques, Taylor also shows the value in having a large studio space which is usually the optimum setup for any commercial photographer. "I’m over the moon with the resulting image and also extremely pleased that this new space allows myself and the team to work on even more creative and dynamic images going forwards," Taylor says.
The ability to have full control over the environment in such a large space obviously allowed Taylor to be able to capture and create such an amazing image. Often we see tutorials and read articles about doing more with less, however this provides great insight to the contrary!
[via Karl Taylor]
Join the Fstoppers community for free
-
Post comments and join in the discussions
-
Browse the site ad-free
-
Share your work and get featured in the community
-
Compete in the photo contests for fun and prizes
6 Comments
Lovely image and a nice BTS, I would love to have the space to shoot something like this.
On a side note, I shot this back in 2009 of my parrot using a speed light on camera bounce off a wall.
There is motion blur and dof is very shallow, not upto the standards posted above but I was rather new to it all back then.
Good job man! :) At least you tried, and your image is not far away from being 100%! :) If you keep at it, you'll get it! :)
Very good photo of hawk! Great result!
Beautiful bird, and great work to Karl Taylor! There is no doubt he is a very good photographer. With that said, even though the final image is a beautiful image of the hawk sprawled out, I find studio shots of animals like this rather bland. A lot of wildlife photographers look for a beautiful background for the animal to stand out from. This photo almost looks like a Harris Hawk flying around on a foggy day. There's nothing wrong with that, but I personally think this shot taken outside with some hills blurred in the background, or something like that would have made this image stunning! But then this would not have been a studio shot. So again, great shot! Just my opinion on shots like this.
the only part of this I take issue with is the "simple 4 light setup." nothing about 4 lights is simple and you know it!
I agree that using multiple lights does require a little discipline, however asides from the space required and the cost of the lights what I was trying to get across was that the lighting design for the shot was fairly straightforward. 1 light on the background to create the glow, 1 light directly from the front (parabolic for texture in the feathers) and 2 equal lights from the reverse for rim lighting and illumination through the feather tips. I guess with experience it becomes second nature. Through pre-visualisation I'd already designed the look of the final image in my mind and therefore new what type of lighting and where it needed to be to achieve the shot. That part is probably the more complex part as it requires the vision or experience to know what will work and why. Setting the lights to make the image look like my pre-visual was fairly simple because I just look at the light and test it and adjust until I'm happy. In this case because I only had limited attempts with the hawk, I used an assistant stood in position with their arms out as a test, on the first shot of the bird I discovered the feathers absorbed more light than the assistants clothes and therefore I had to increase the front light. However the process for me is a simple one of observation and adjustment.