
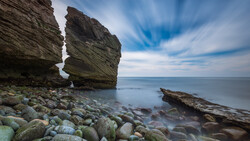
When it comes to architectural photography, tilt-shift lenses are quite possibly the best option available. The flexibility and amazing image quality make them very popular amongst architectural photographers and even some landscape photographers. Having said that, there are occasions when you may want to push these lenses to their respective limits by shifting right to the edge. Sometimes the building you're shooting may be a little too close and the lens just isn't quite wide enough. In these circumstances getting the most out of your tilt-shift lens really helps. Doing this, however, creates a vignette in the image and due to tilt-shift lenses not having correction profiles, they can be tricky to remove in post.
Polarizing filters are another piece of equipment which can be extremely useful. They can help cut glare in an image or reduce reflections where required. This can be especially powerful if you're shooting a body of water or an interior with a lot of reflective surfaces. The issue is that they can impact the exposure of your image and create uneven spots. Although this can be used for creative applications, it's not always welcome, especially when shooting an interior.
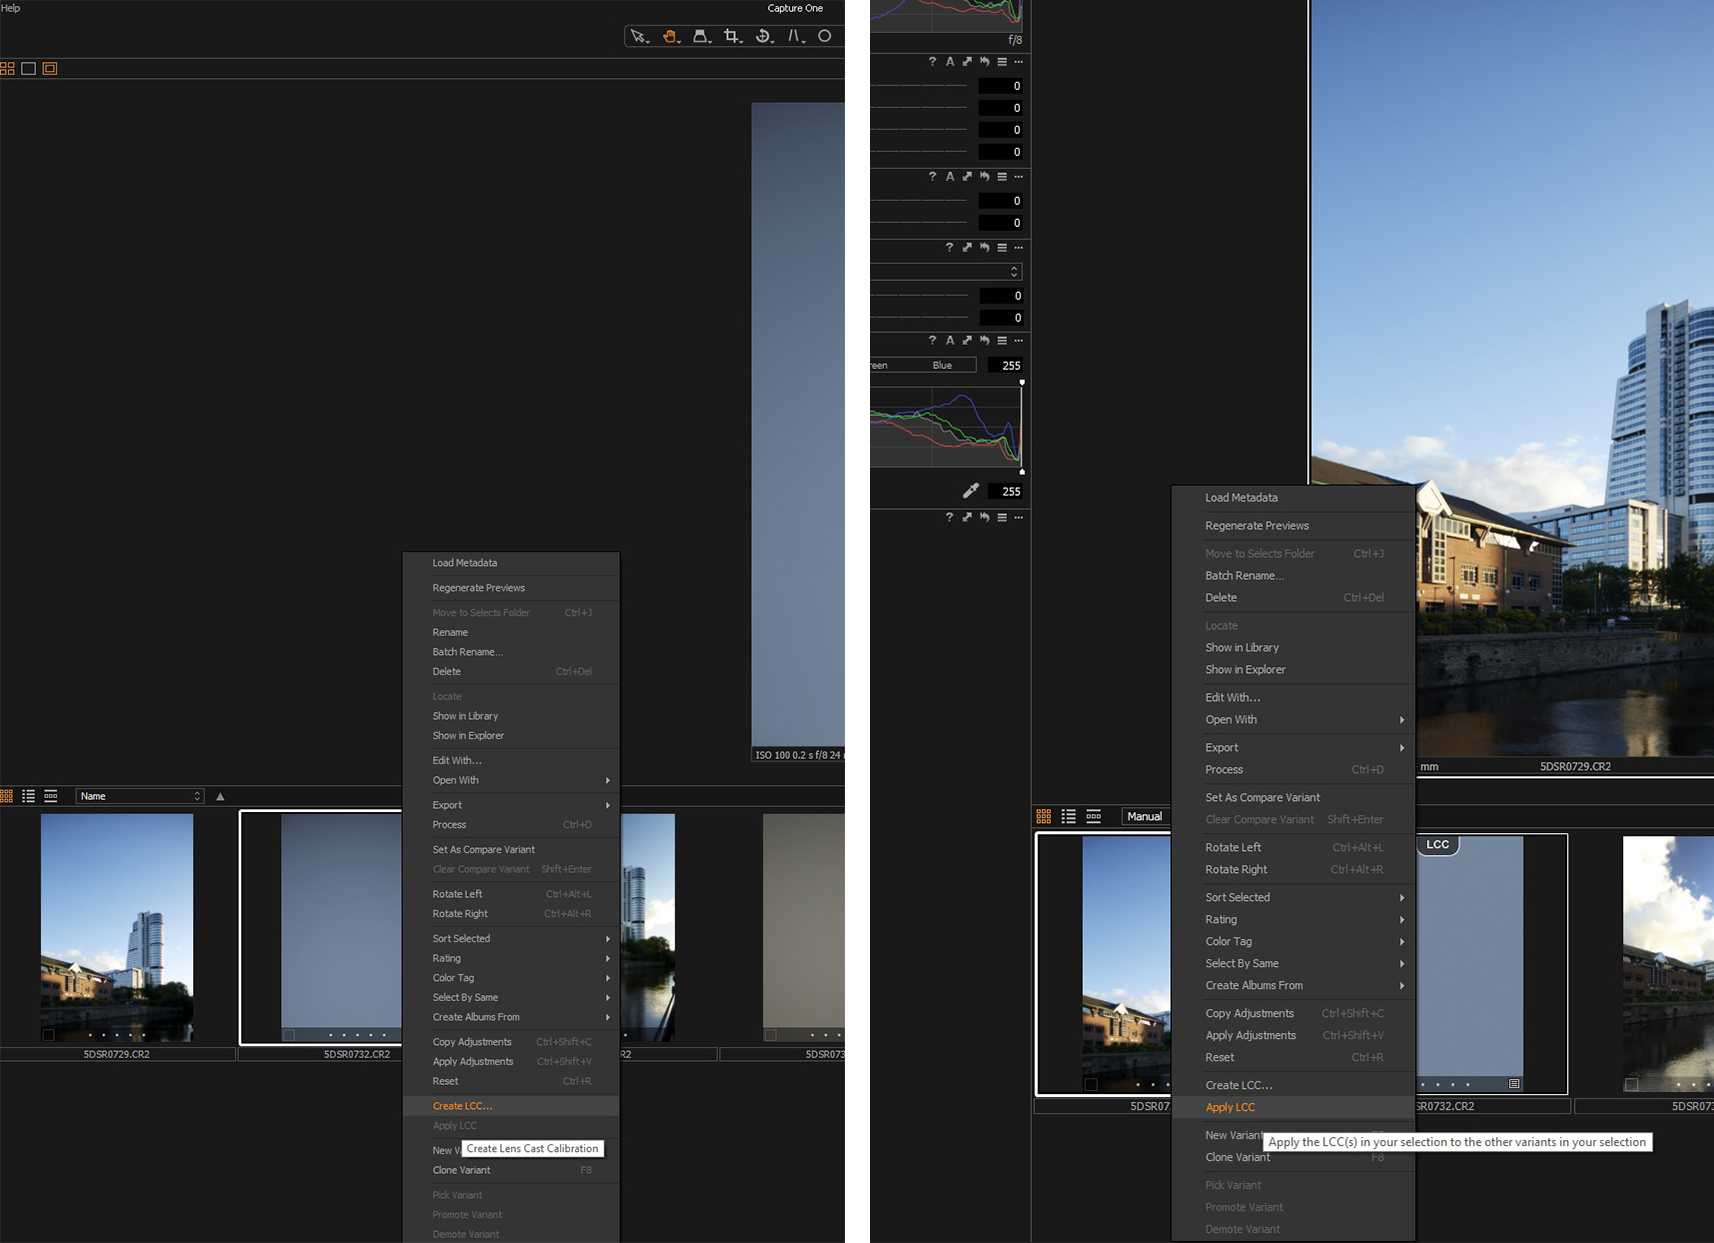
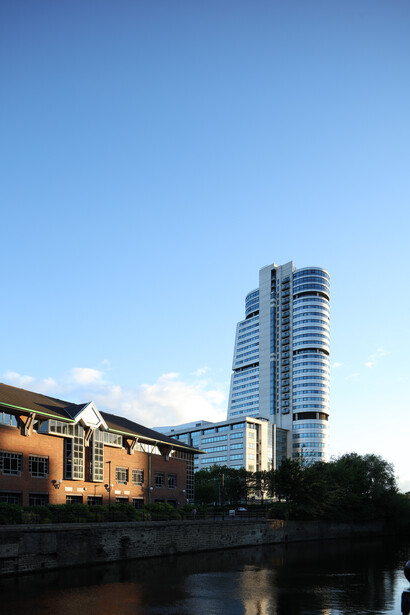
To counter these problems you can use Capture One and perform something called a Lens Cast Calibration. If you're a medium-format shooter you may already be familiar with this process.
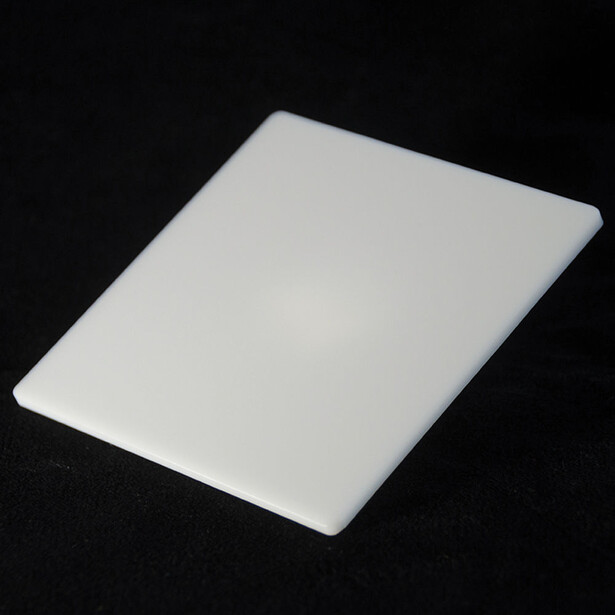
The calibration can be achieved with a specifically designed white diffuser card as shown in the image above. This will result in you having an even exposure without any dark spots in your image.
The Process
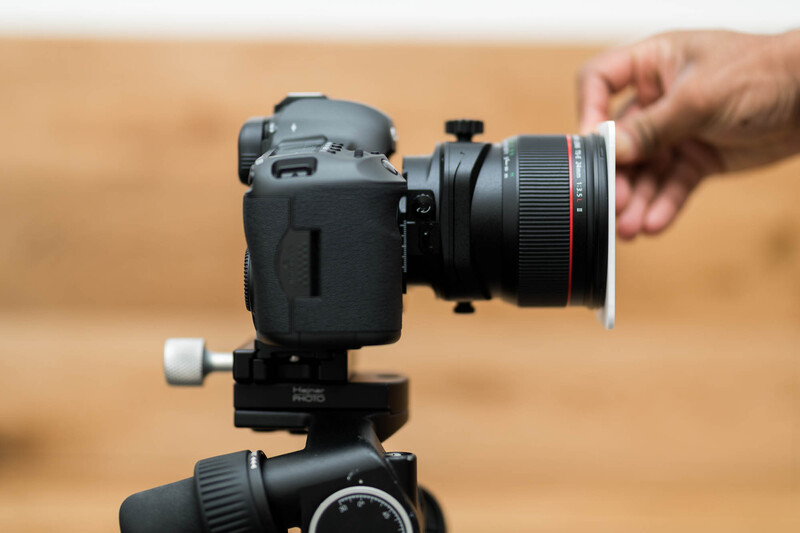
After you have taken your intended image, it's crucial that you don't change your composition, aperture, and ISO settings. Changing any one of these could negatively impact the effectiveness of this method. Simply hold the card against your lens ensuring you cover the whole of the front, as demonstrated in the image below. Then using shutter speed you will need to adjust the exposure to allow enough light through (live view could be of use in this circumstance). The aim is to end with an image that is overexposed by about one stop; this should allow you to see any problem areas with the exposure.
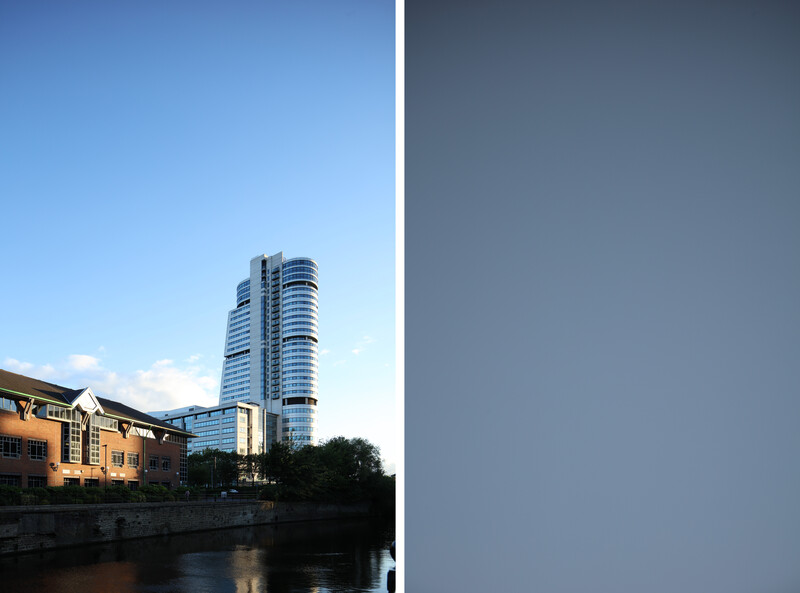
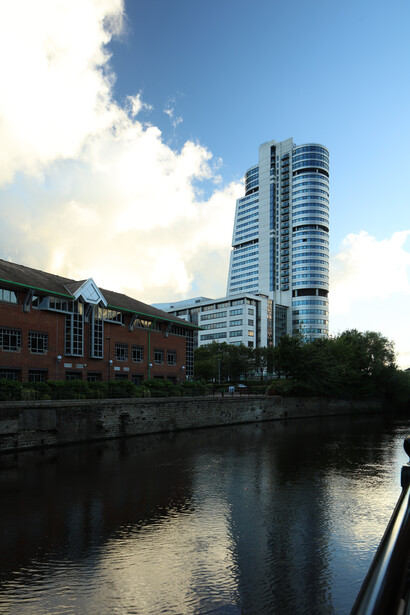
Looking at the example above, you can see how the exposure in the sky is noticeably darker towards the top of the image. The calibration image on the right demonstrates to what extent, more effectively. As discussed above this is due to the tilt-shift lens being shifted too far. The rest of the process needs to be completed in Capture One, as currently it seems no other raw processor offers this feature. Fortunately, the process is very straightforward and can be applied to multiple images with very little effort.
Once all of the images have been opened up in Capture One, simply right click on the calibration image and select "Create LCC." Ensure all the boxes have been ticked and click OK. Capture One will then automatically correct any issues with exposure, dust, and imperfections. After this select all of the images you wish to affect, then right click and select "Apply LCC."
That is essentially the whole process and this method can be used to correct exposure issues when using polarizing filters too. Polarizing filters are used by landscape photographers on occasions to create a darkened sky with that punch to it. There are also many other occasions where having that change in exposure may not be appropriate or wanted. For example, cutting the glare and reflections in trees, greenery, and water without a change in exposure can be really useful. Product and car photographers may also use CPL filters and in these circumstances, odd spots of exposure changes may not be wanted. This method can really help to correct all of those issues.
The Results
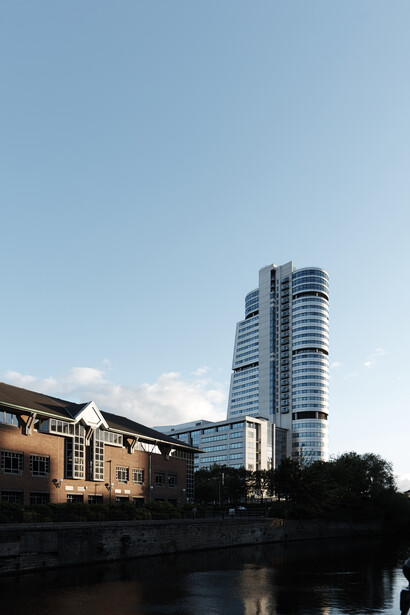
The example above is demonstrating the results for shifting too far with a tilt shifts lens. You'll be able to see how not only has this method corrected the exposure, but it has also corrected the color in the sky. The correct color of the sky based on the white balance and in camera settings used can be seen around mid frame in the before image.
In the example below, you'll be able to see the difference this method has on the exposure when using polarizing filters. As you can see in the before image the exposure was not even and certain areas were unnaturally darker. The color and punch you get in the sky from using a polarizing filter remains without that drastic change in the exposure. Most of these kinds filters will change the exposure by around 2 stops on average. This is very noticeable, especially when shooting in controlled lighting scenarios.

Final Thoughts
Performing a lens cast calibration is nothing new if you use medium-format technical cameras or something similar. Rodenstock lenses are fantastic, however, for those systems an LCC is used to prevent the massive shifts in color they are prone to getting. Using this method on full-frame systems isn't a very common thing, but it gives a distinctly cleaner and a more even exposure throughout the frame. Those vignettes that are baked into the image from the lenses and filters are mostly uneven, and due to that, can be less useful in a creative setting. The method as demonstrated is simple and the time added to your workflow is minimal. This effectively allows you to use your tilt-shift lenses in a way that expands their capabilities and you can get every last millimeter out of them without any penalties. This may even be something you can use for most kinds of photography when shooting on a tripod. Even if you're using other types of lenses and not tilt shifts, performing an LCC will help create the cleanest and most even exposures for your images, removing any dust and scratches too.
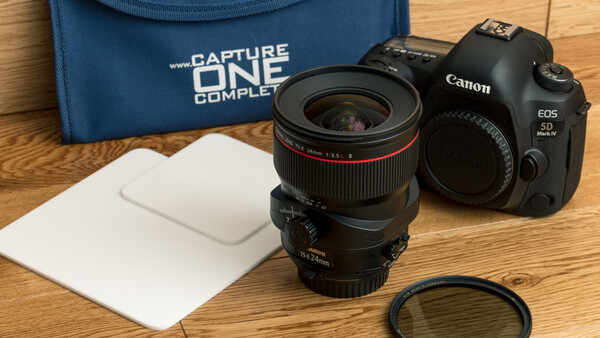
You can purchase one from B&H for $60.


Join the Fstoppers community for free
-
Post comments and join in the discussions
-
Browse the site ad-free
-
Share your work and get featured in the community
-
Compete in the photo contests for fun and prizes
15 Comments
Definitely would like to try this out. Anyone know of a cheaper option than a 100x100x3 mm white acrylic card for $60?
https://www.digitalback.com/product/pocket-lcc/
Glad to know you want to try this :). Thank you for leaving the comment.
Very informative article. Thanks for sharing. I learn new things every time I come to FS. I am afraid to ask what tripod and quick release system is that in the photo? I think the plate is from RRS.
Looks like a Manfrotto geared head with a clamp conversion to Arca Swiss standard by Hejnar Photo. The actual clamp also seems to be one by Hejnar Photo. Hejnar Photo is a small US based company - probably a single guy with some CNC machninery - that makes some quite interesting products around the Arca Swiss standard mounting system.
Thank you Thomas :)
Thanks
Usman, great article.
Thomas, Hejnar makes great quality clamps & the Manfrotto conversion is fantastic, worth every penny. I also have it on a 405 as well as other Hejnar clamps & plates on other heads. His products are of the highest quality & are made to work so smoothly & easily even with gloves on. They are a bit expensive especially since I live in Australia, but are definitely worth it.
James, thank you for the comment and I'm very happy to know FS is so useful to you :). Thomas is correct, I'm using a Manfrotto 405 geared head with a Hejnar Photo Conversion clamp.
Thanks.
Prefer the before unless thats just your editing "style" over the RAW. Blues look more natural.
Having a preference is perfectly fine, the image is unedited aside from the LCC. The color you're seeing in the 'after image' is a more accurate representation of what was there and I think when editing if you're starting out with something accurate it's easier to work with. The point of the method was to get a more even and cleaner exposure with accurate colors.
Thank you for the comment, Kyle, I appreciate you taking the time.
Believe an edited photo would help determine if this is necessary. As of what was shown. I don't see any real benefit than nit picky, which is fine.
"more even and cleaner exposure with accurate colors" Seems like it also created more editing work because the color in the"after" is way off to start. Compared to what the "before" is showing. "After" looks like there is an IG filter that you now have to edit out or around.
Never senen this before but it doesn't seem like its worth the extra work for me. Thanks Usman.
The colour you're seeing is based on the white balance and the scene, you may shoot it differently and choose a different white balance but that's all it is. if you're shooting a scene and the colours aren't consistent or balanced then wouldn't that make things more difficult in post?
Also if the exposures are uneven in areas where they should be even, wouldn't that be more tricky to fix. This method helps to correct that.
Tilt shift lenses are great but push them too far and you get issues so this method fixes it. The colours you're seeing are not created by this method it merely removes issues that were present revealing the colours based on my settings.
Also if I had edited the image, it would distract from he point of the method I'm demonstrating. It takes a few seconds longer but there are multiple reasons why many medium format shooters use this method too.
Thank you again for your thoughts Kyle, I appreciate the discussion.
Kyle, The LCC not only evens out the exposure for Tilt Shift & other lenses that don't have a supporting lens profile it can also save you time if your Sensor has picked up some dust since the last clean as C1 will remove these as part of the process if you have taken a photo 1st with diffuser card.