The masking upgrade in Lightroom Classic 15.5 lets you feather and reshape AI masks after you create them, which turns rough selections into precise, believable edits. That single change addresses one of the oldest complaints about automatic masks: they grab too much, too little, or leave a telltale glow around your subject.
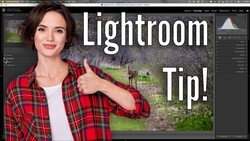
Terry Vander Heiden walks through the new Lightroom Classic version 15.5 and shows exactly how the updated masking controls behave in the develop module. When you run a subject or sky mask, you now get a feather slider and an edge slider that weren't there before. The feather softens the boundary, adding a gentle transition where the old mask cut hard. The edge control contracts the mask inward or pushes it outward, so you can pull a sky selection tight against a horizon or expand it to catch stray pixels. Vander Heiden demonstrates this on a bird, a landscape, and a squirrel, dialing the edge in and out until the selection sits where it should.
The order of operations decides whether these controls stay available. Vander Heiden makes a point of it: create your mask, finish all your feather and edge adjustments first, and only then add or subtract with a brush. The moment you introduce a brush, linear gradient, or radial gradient into the mask, the edge and feather sliders disappear. Those tools already carry a soft edge of their own, so Lightroom removes the option. The same limitation applies to color range masks, which give you a refine slider but not the edge movement you get from the AI selections. Keep the AI masks (subject, sky, background, landscape, objects) as your base if you want the new reshaping controls.
Buried in the same walkthrough is a culling shortcut that has lived in Lightroom for years. In the library module, auto advance moves you to the next image automatically every time you flag or reject a photo. Leaving it on all the time gets annoying, so Vander Heiden ties it to the caps lock key. Flip caps lock on and picks advance for you; flip it off and you're back to normal navigation. It's a small trick, and it speeds up a first pass through a shoot considerably.
The wider story here is control returning to a workflow that automation had quietly taken over. AI masks arrived a couple of years ago and were genuinely impressive, but they were also final in a way older tools weren't. You accepted what the algorithm selected or you painted over its mistakes by hand. Adjustable feather and edge sliders put you back in the loop without abandoning the speed of automatic detection. The principle carries beyond Lightroom: treat any AI selection as a starting point rather than a finished result. Photoshop's select subject, the masking in Capture One, and phone editing apps all lean on the same detection models, and all of them benefit from a manual pass to tighten the edge. Getting a mask 90 percent of the way there in one click and spending twenty seconds on the last 10 percent beats either extreme. The edge control is where realism lives, especially on fur, hair, and soft skies where a hard boundary reads as fake immediately.
Vander Heiden is honest about what he actually uses. He finds the edge slider far more valuable than the feather slider and says the crop tool change, which lets you darken the area outside your crop anywhere from off to fully black, put him to sleep.
The video runs through each mask type and shows the glow problem disappearing as the edge slider moves, which is worth seeing in motion rather than reading about. Watch the full breakdown above to see the exact slider positions Vander Heiden uses and the one workflow mistake that wipes out your edge controls entirely.





Join the Fstoppers community for free
-
Post comments and join in the discussions
-
Browse the site ad-free
-
Share your work and get featured in the community
-
Compete in the photo contests for fun and prizes
1 Comment
Oh wow! All these years (20 or so) of using LR and I never figured out the caps lock auto advance! That has frustrated me no end! I really dislike that feature and (while multi-tasking during edits) find it suddenly starts advancing on me! This has driven me nuts for years! Mystery solved!