Three Lightroom Classic editing tricks can quietly transform a photo from flat to finished. These are the kind of layered, mask-based techniques that separate a polished edit from one that just looks "processed."
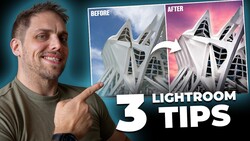
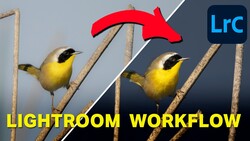
Coming to you from Gareth Evans of Park Cameras, this practical video walks through three specific editing techniques inside Lightroom Classic that work across portrait, product, wildlife, and landscape work. The first tip covers how to build a convincing mist or atmospheric haze using linear gradients layered on top of each other. The key move is pulling the dehaze slider into negative territory and lifting the black point in the curves panel, which are two adjustments that most edits never touch in combination. Stack a second gradient on top and the effect starts to feel genuinely dimensional rather than like a single filter slapped on.
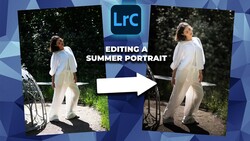
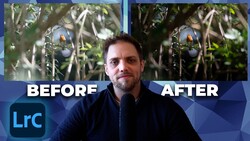
The second technique tackles subject isolation using background-specific masking. The approach is to create a linear gradient from the bottom of the frame, then right-click and intersect that mask with the "select background" option so the adjustment only hits the area behind the subject. A second gradient comes in from the top, lightening the upper background while the lower gradient darkens. The result is a subtle contrast shift that pushes your subject forward without any heavy-handed selection work. The video demonstrates this on three different images, showing how the same technique reads differently depending on the scene.
The third tip involves the "Visualize Spots" checkbox in Lightroom Classic's healing panel, which most people have never clicked. It converts the image into a high-contrast overlay that makes dust, smudges, and skin blemishes immediately visible, including ones that survived your initial cleanup pass. The video shows this on a finished product photo of the Sony a7R VI where a smudge had been missed entirely. Dialing the sensitivity slider up reveals even more problem areas. It's the kind of thing that only matters when a shot gets printed large or posted somewhere people will zoom in, which is exactly when you can't fix it anymore.
What makes these three techniques worth adding to a regular workflow is that they're all non-destructive and adjustable after the fact. Each mask has an amount slider that lets you dial the intensity back without starting over. You can layer effects up gradually, then pull any single mask back independently. That flexibility means you can push an edit further than you normally would, knowing it's easy to walk back.
Check out the video above for the full rundown from the Evans, including the exact slider values and step-by-step mask setups for each technique.


Join the Fstoppers community for free
-
Post comments and join in the discussions
-
Browse the site ad-free
-
Share your work and get featured in the community
-
Compete in the photo contests for fun and prizes
No comments yet