Summer light is some of the most challenging light to work with for portraits. It's bright, contrasty, and full of harsh shadows that flatten your subject instead of flatter them.
Coming to you from Gareth Evans of Park Cameras, this detailed video walks through a complete Lightroom Classic portrait edit from start to finish, using a summer image shot on a 24-70mm f/2.8 lens at f/2.8. Because the shot doesn't have an especially shallow depth of field, one of the first moves is using Lightroom's lens blur tool to push that look further, landing around a blur amount of 40. The edit then moves into masking, where a series of radial and linear gradients are used to redirect where the viewer's eye lands in the frame. The goal is to pull brightness away from the bottom of the image and push it toward the subject's face, which is where the light appears to be coming from in the scene anyway.
The masking work goes deeper than simple vignetting. Using Lightroom's people masking tools, the edit isolates facial skin, hair, lips, and clothing as separate masks and applies targeted adjustments to each. Facial skin gets a slight brightness boost with texture and clarity pulled back for a natural softening effect. The hair mask gets a clarity increase to bring out detail, and the lips get a small exposure and contrast lift with a touch of saturation added. These aren't dramatic moves, but stacked together they give the subject more presence without looking retouched.
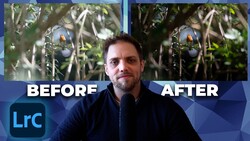
The color work is worth paying attention to. Rather than pushing saturation to amplify that summery feel, the edit actually pulls green and yellow saturation back using the color mixer. Shifting the green hue toward yellow first, then reducing it, quietly separates the subject from the background without drawing attention to itself. It's a counterintuitive call that works because it makes the subject's skin tones read more cleanly against the foliage. The edit also adds a touch of warmth overall, which keeps the image feeling like summer even as some of the color intensity is reduced. The before-and-after comparison at the end shows just how much the light has been redirected across the frame with what are, individually, fairly modest adjustments.
Check out the video above for the full breakdown from Evans, including how the vignette masks are refined in the final pass and the specific slider values used across each mask.


Join the Fstoppers community for free
-
Post comments and join in the discussions
-
Browse the site ad-free
-
Share your work and get featured in the community
-
Compete in the photo contests for fun and prizes
No comments yet