Lightroom Classic gives you more than one way to compare edits, but most people only tap the backslash key and move on. If you want cleaner decisions and fewer second guesses, you need tighter control over what “before” actually shows.
Coming to you from Anthony Morganti, this practical video walks through a simple change inside Lightroom Classic that shifts how you judge your work. Morganti starts with a raw file, crops it, converts it to black and white, and sets white and black points using the Option or Alt key while dragging the Whites and Blacks sliders. You see how he avoids blown highlights while allowing some crushed shadows for depth. He adds clarity and texture, adjusts the black and white mix to darken the sky, tweaks greens and yellows, then finishes with a vignette. It is a straightforward edit, but the key moment comes when he taps the backslash key and realizes the “before” view is not showing what he needs.
Instead of comparing the final image to the original raw file, Morganti shows how to redefine the before state using the History panel. He scrolls to the point where the image was converted to black and white, right-clicks that step, and chooses “Copy History Step Settings to Before.” Now the backslash key compares the final edit to a neutral black and white starting point, not the flat color raw. That small shift changes how you evaluate contrast, tone, and mood. You stop reacting to color differences and start judging the actual adjustments. This approach keeps you from chasing edits that only look good because the starting point was weak.
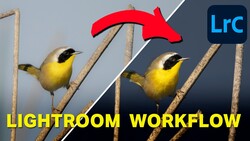
He then moves to a color image of a deer and takes the idea further. The file begins unedited. He straightens it using the crop tool, pulls down highlights, opens shadows, and sets white and black points again with the Option or Alt key trick. A bit of clarity, texture, and vibrance give it punch. At that stage, many people would stop. Instead, he marks that step in the History panel as the new before point. Only then does he experiment.
The experiment uses masking. He selects the background, then intersects it with a radial gradient so the adjustment lands only behind the deer. By lowering dehaze and raising brightness in that controlled area, he builds a softer, misty look. He adjusts the gradient shape while holding the Option or Alt key to move one handle independently. The result feels lighter and more atmospheric, very different from the punchy first version. With the before state set properly, tapping backslash now compares two finished ideas rather than a finished edit and a raw file.
Morganti also outlines two other methods without going as deep: Snapshots and Virtual Copies. A snapshot saves a version inside the same file so you can click between looks. A virtual copy, created with Command + ' on Mac or Control + ' on PC, gives you a separate version to edit freely. Each method serves a different workflow. One keeps everything in a single timeline. The other lets you branch off completely.
What you take from this is control. You decide what you are comparing and when. That alone can change how confident you feel about an edit. Check out the video above for the full rundown from Morganti.


Join the Fstoppers community for free
-
Post comments and join in the discussions
-
Browse the site ad-free
-
Share your work and get featured in the community
-
Compete in the photo contests for fun and prizes
No comments yet