Editing wildlife images in can make the difference between a decent frame and one that holds attention. Small changes to background, detail, and sharpness shape how the subject stands out.
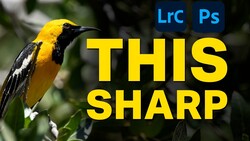
Coming to you from Terry Vander Heiden, this practical video walks through a full wildlife edit inside Lightroom Classic using a common yellowthroat as the subject. Vander Heiden starts with the raw file and checks the capture details: ISO 800, 840mm, f/5.6, and 1/4,000 second. That shutter speed matters when working at long focal lengths with small birds that never sit still. He creates a virtual copy, then checks sharpness before touching anything else. You see the decision-making in real time, not just slider moves. The order he follows keeps the edit controlled instead of reactive.
The first major move is masking. Instead of using a basic subject mask, Vander Heiden switches to the object mask tool to isolate the bird more precisely. Lightroom’s AI does most of the heavy lifting, but it is not perfect. He duplicates and inverts the mask to target the background, darkening it and cooling it slightly to push attention toward the bird. Then comes the cleanup. Stray vines and bright distractions get subtracted from the mask using both brush and object selections. Watching this process shows how layered masking can replace what used to require a trip to Photoshop.
Cropping comes next, and it changes the feel of the frame. A tighter composition removes excess sky and trims edge distractions. He then uses the Remove tool to clean up out-of-focus shapes in the background. When the AI-based removal pushes too far, he switches to the clone tool for more control. That shift alone is worth noting. Automation helps, but manual fixes still matter when edges get tricky.
Once the background settles down, attention turns back to the bird. Vander Heiden lifts shadows slightly and pulls back highlights in the brighter yellow feathers to recover detail from the raw file. He then builds subtle brush masks on the iris, stacking small highlight adjustments to bring life into the eye without making it look artificial. The changes are not dramatic on their own. Together, they give the subject presence.
Sharpening and noise reduction close out the technical work. He sharpens at 100% view, increasing amount into the 90s, then adjusting radius, detail, and masking while holding the Option or Alt key to see exactly what is affected. Only the bird gets sharpened, not the sky. After that, he runs Denoise at around 72 to smooth out noise that became visible after earlier adjustments. The sequence is deliberate: sharpen first, then apply noise reduction to control what the algorithm softens.
There is more in the video, including a simple linear gradient to tone down a bright edge and thoughts on when to move into Photoshop for finer refinements, especially for prints. Check out the video above for the full rundown from Vander Heiden.


Join the Fstoppers community for free
-
Post comments and join in the discussions
-
Browse the site ad-free
-
Share your work and get featured in the community
-
Compete in the photo contests for fun and prizes
No comments yet