
Long exposures and high ISOs can bring out hot pixels. Worse than just regular high ISO noise, hot pixels are those little brightly colored dots that stick out like a sore thumb. Their random nature has made them tough to deal with effectively, until now. Want to know the easiest way to get rid of them?
For most exposures, I find that Adobe Camera Raw handles regular high ISO noise well. A few tweaks to the color and luminance sliders will typically make it acceptable at most sizes and ISOs. If it’s particularly bad, a dedicated plugin like Nik Dfine can do a good job. Both of these approaches fall short when dealing with hot pixels however.
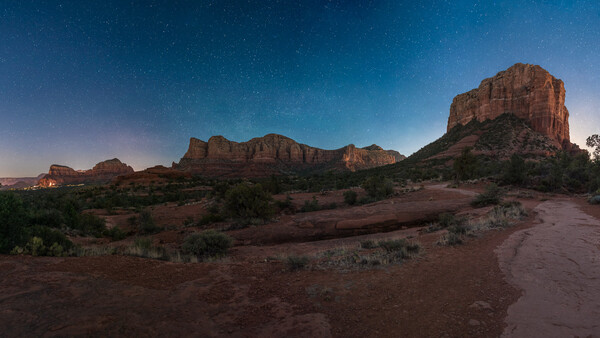
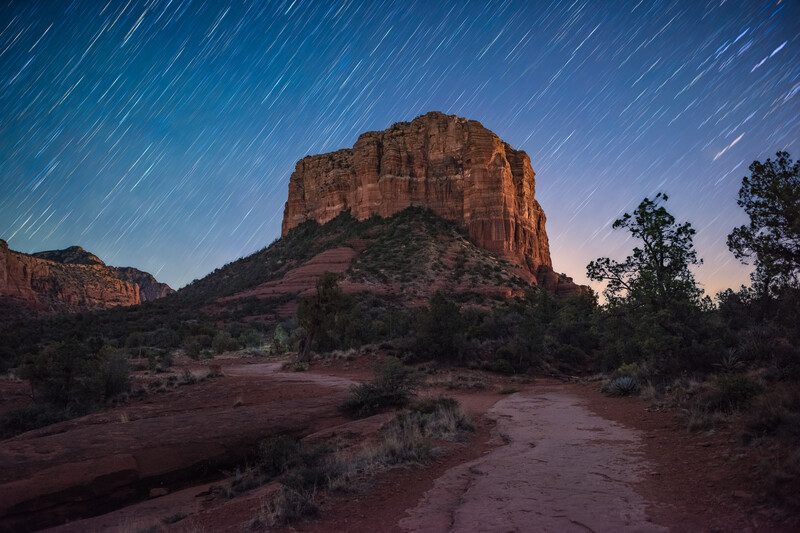
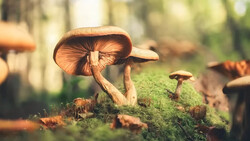
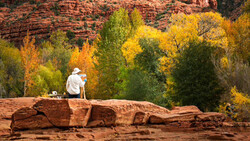
Not only are hot pixels more prominent to my eye, I find that I’d have to take a far more aggressive approach with the sliders than is necessary to address the “regular” noise. Compounding the issue, hot pixels can arise even at lower ISOs, if your exposure is particularly long or your sensor is particularly warm — that’s a scenario I frequently deal with in the desert.
Those of you who’ve done astrophotography before might be saying “there already is an easy way to get rid of them, just use long exposure noise reduction in camera!” Long exposure NR is indeed very effective. Typically enabled via your camera’s menu, long exposure NR takes two exposures. One will be your regular exposure, with the shutter open, capturing your scene. The other will be an exposure of the same length, but with the shutter closed. This exposure is then used to find and remove the hot pixels, serving as a dark frame for the camera to reference.
Long exposure NR is effective, but comes with a notable downside. The second dark frame effectively doubles your exposure times, halving the number of shots you can get in a session. This is particularly problematic when shooting panoramas, quickly changing phenomena like meteor showers or eclipses, or just trying to capture light trails. I also find that it messes with my “flow”, getting inside that loop of compose, shoot, and adjust. If you’ve got a singular shot in mind, and a lot of time to get it, don’t be afraid to use long exposure NR. If however, you want 90% of the results in 0% of the time in the field, consider this method.
Photoshop to the Rescue
There’s a number of noise reduction strategies you can employ. I’ve already touched on ACR’s tools, plugins, and I’ve previously covered how stacking can help reduce noise. This new-to-me technique involves using the dust and scratches filter, along with some simple masking to help retain sharpness.
To get started, I like to do my basic edits, crop, and finalize the regular sharpening and noise reduction. If I’m working on a panorama, star trail image, or something else where I have multiple shots, I’d suggest applying this filter step right at the end of the process for your individual files, but that might just be my preference.

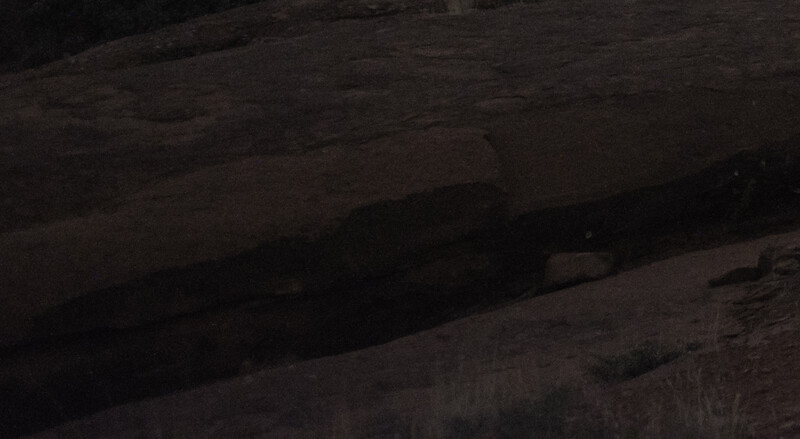
Once I’ve got my individual image finalized, I’d recommend checking for any problem areas. Hot pixels can appear extra prominent against dark areas, especially in the foreground, as well as in large patches of low detail. Some post-processing steps, like white level adjustments or contrast modifications, can also bring them out.
I like to identify two areas: one where there are a large number of hot pixels and another where there are fine or important details. With the filter open, you can still zoom between areas, as well as quickly toggle it on or off, so feel free to check the whole image.
Once you’re ready to apply the filter, I’d suggest making two layers, stamping all the visible layers into one, then duplicating it — this can be easily done via Control/Command+Alt+Shift+E, then Control/Command+J. The lower layer can serve as a good reference, as well as enable easy masking of the filtered layer if you need to further refine it.
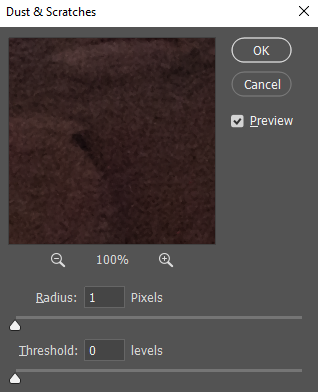
With all the layers setup, navigate to the top layer and activate the dust and scratches filter via Filters>Noise>Dust & Scratches. The filter’s menu is quite simple. The radius controls how wide of an area Photoshop searches for different pixels — for our application, stick to a value of 1 or 2, as higher values unnecessarily blur details. To bring back even more detail, try raising the threshold slider. One helpful property of hot pixels is their significant difference from nearby pixels in terms of color and luminance. This makes them really stick out to the eye, but also makes it much easier for Photoshop to blur them without impacting not-hot pixels.
At a radius of 1 and a threshold of zero, you should see an immediate difference. While zoomed in, try toggling the preview on and off and take note of the changes. For my camera, with a 45mp sensor, this does a great job already, but does leave a few multi-pixel groups untouched.
There are a few ways to further improve these results. The first is by increasing the radius to help address these bigger groups. At 2 pixels, almost all of them are significantly reduced, especially at a reasonable viewing distance. At this level, however, I’m also getting some easily noticeable loss of detail in complex areas.
From here, bring the threshold slider up to a value of 50, and again, toggle the preview on and off. Start by paying attention to the areas of fine detail: has that removed the blur effect from them? I’d rather error on the side of leaving an occasional hot pixel than having blur across my entire image, so you can continue to bring up the threshold if necessary to pull detail back in. If you instead find that you’ve now reintroduced too many hot pixels, or just want to be more aggressive with it, you can drop the threshold lower, to something like 35. This can help knock out any errant pixels, but has to be balanced against that detail loss.
From here, you can play around with masking to better refine the results. If you’re using this for an astrophotography image, I’d strongly suggest masking out the sky from the dust and scratches layer. This process is great for reducing hot pixels, but will also eat stars like crazy. For bonus points, try Photoshop’s new select sky feature for a quick and easy mask!
What I love about this technique is how it delivers great results quickly. Once you’re comfortable with your camera’s noise characteristics, you can apply this filter in seconds, saving minutes or hours of time in the field.

Join the Fstoppers community for free
-
Post comments and join in the discussions
-
Browse the site ad-free
-
Share your work and get featured in the community
-
Compete in the photo contests for fun and prizes
7 Comments
Darktable, which I recommend to give it a try, especially the newest release as it works more and more in the RGB colour space than in Lab, has a dedicated function for removing dead (hot) pixels.
Interesting. I'll have to check that out.
Thank you! As an "amateur enthusiast", I am just starting to dip my toes into post processing, and since I probably won't be doing a lot of it (certainly less than a professional), I don't think I want/need to spend the money for PS/LR. I've downloaded GIMP as well as darktable and have just started to try and figure them out.
Do you have any recommendations for someone like me, who is basically starting at square one, when it comes to post processing? I mean the absolute very basic stuff, and I can work up from there. There are a multitude of YouTube channels, etc. Is there one that would be best for someone just starting out with post processing and zero experience?
Thanks!
Yes, I do. Keep it simple. I'd start with filmic RGB (a new module) instead of base curve, but both is o.k.. base curve mimics the look of the manufacturers in camera processing, filmic rgb turns out to deliver more the impression you got at the moment your were taking the photo (that is at least my impression).
There are some great tutorials. And although you won't understand much of it (many do not) you may start with:
https://pixls.us/articles/darktable-3-rgb-or-lab-which-modules-help/
Don't be afraid if you do not get it, just keep reading (fast, if you want). You'll get a good idea what is RAW processing about.
And of course there are plenty of online tutorials and if you look for them, you'll find a good one.
My best advice I can give is: start slowly, go for just a few modules. The better you care for your exposure, your framing, etc., the lesser you'll need fixing in post processing.
I for my part never really used lightroom and started directly with Darktable (or RawTherapee, but use DT as of today). But I am a Linuxer since the early 90s.
Thanks! I appreciate it! I actually thought about taking a PS/LR course at a local camera shop to learn the basics of what I'm doing (color,, hue, sharpness, curves, etc.) and then trying to transfer that knowledge over to darktable (and later GIMP), because like I said, I need to start with the very beginners basics. I shoot both RAW and jpeg, so I have lots of pics to practice with! Thanks again!
Lightroom/ACR is not the best option to reduse NR.
Better is to turn off sharpening and NR , and let Topaz Denoise ( it works as a plugin for Lightroom) do the rest.
Even better is Deep PRIME in DxO PL. It's simple in it's own league. Nothing is even close to it .....
Lots of threads about Deep PRIME in Dpreview forum.
I'll have to give that a try. I don't find the noise at high ISO's to be enough of a problem to get different software just for it, but it sounds interesting.