
Luminosity masks are well known amongst landscape and nightscape photographers but often underrated by many other creatives. They are an incredibly powerful tool and can help you apply adjustments only to certain areas of an image according to their luminosity. In past articles I wrote, I’ve shown different ways to create these masks. However, with time, I’ve come to the conclusion that there is one way that seems to always be the most effective and yield the most natural-looking results.
Luminosity masks are a way to target a single luminosity zone in your image. They aren’t limited to the global zones – shadows, highlights, and mid-tones – but instead, they can be customized to match exactly what you need. One way to create a luminosity mask is to use Photoshop Apply Image tool on a mask, another method is to create a black and white version of the picture and then tweak the mask with adjustment layers before copying and pasting the result in the said mask, or you could just as well use selection and channels. Many different ways exist as you can see! The three solutions listed here all have their places in a retoucher’s workflow, and some people will like one better than another. My only issue with these is that they are kind of destructive, or at least not dynamic. The layer with the mask isn’t destructive unless you make it so, but the mask won’t adjust if you tweak anything in the layers below. That’s just how masks in Photoshop work.
So, if that’s the case, how can we create a dynamic mask using Adobe photo editing software? The solution is called blend if and can be found in the blending options of any Photoshop layer. The feature’s name couldn’t be more descriptive: it lets you chose how you want to blend your layer. You can make a comparison on the layers below the one you are adjusting or on the value of your current layer using the matching sliders.
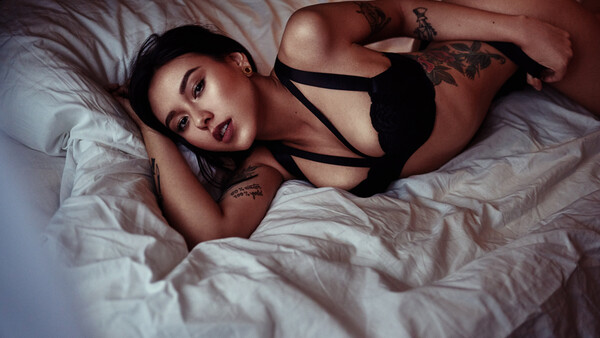
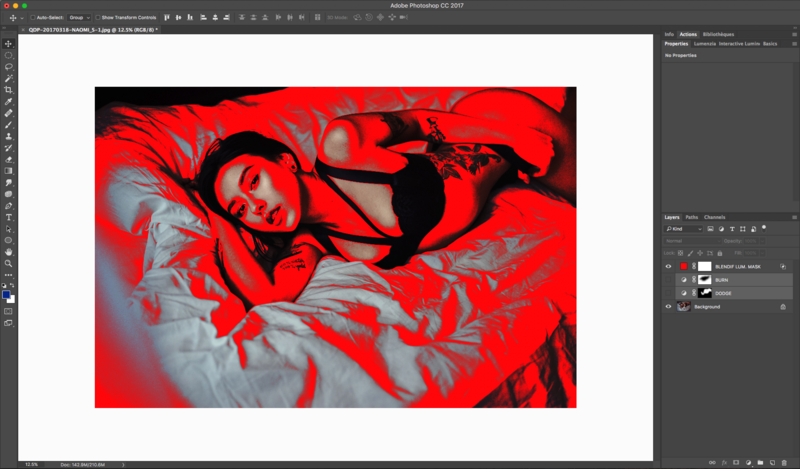
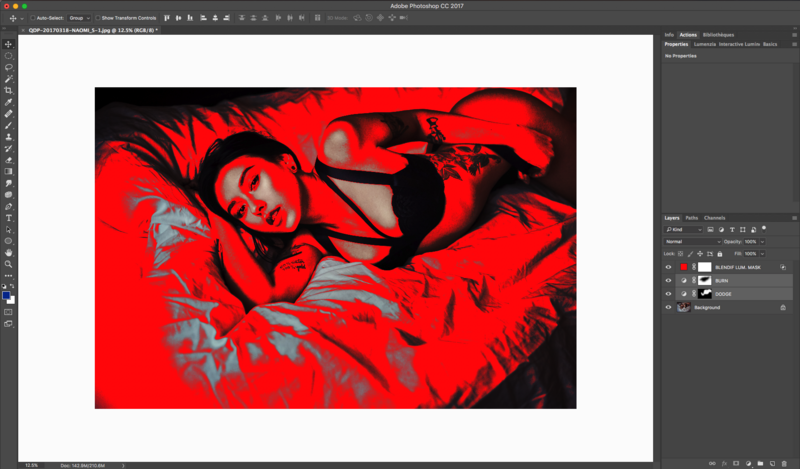
Let’s create a red color fill layer and give these sliders a try. First, so that you see there is no trick to the layer, here is my sample image before and after adding the color fill layer:
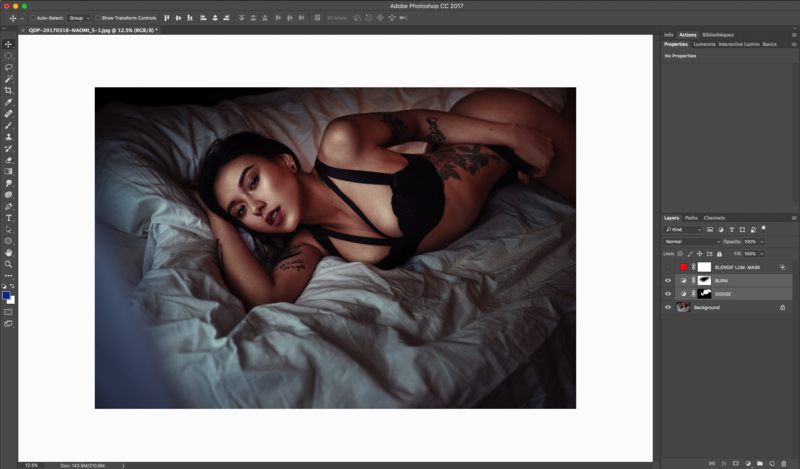
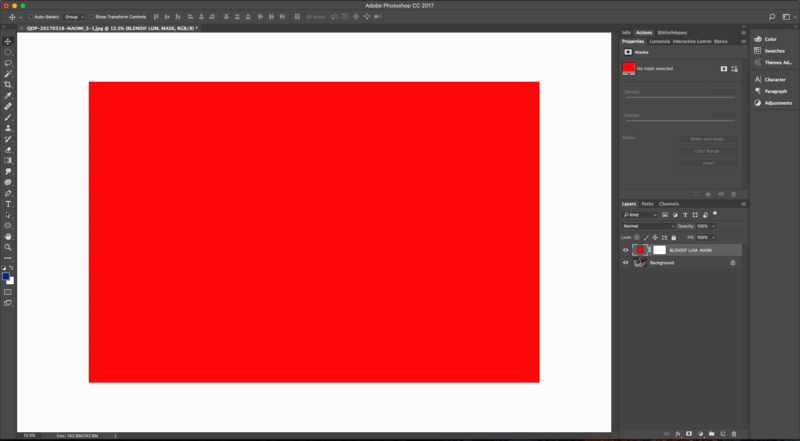
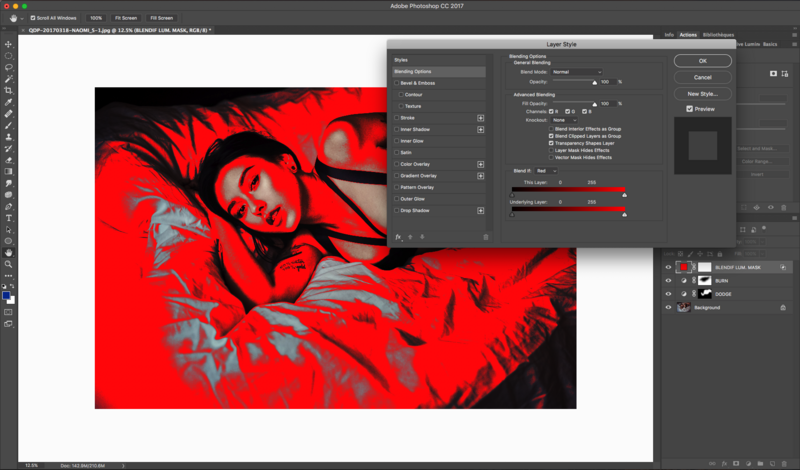
Now let’s bring the blending options window. Two ways are available to us, either double click on the layer or right-click on the layer and select blending options. With the window open, let’s try to move the highlight cursor for the underlying layer option.
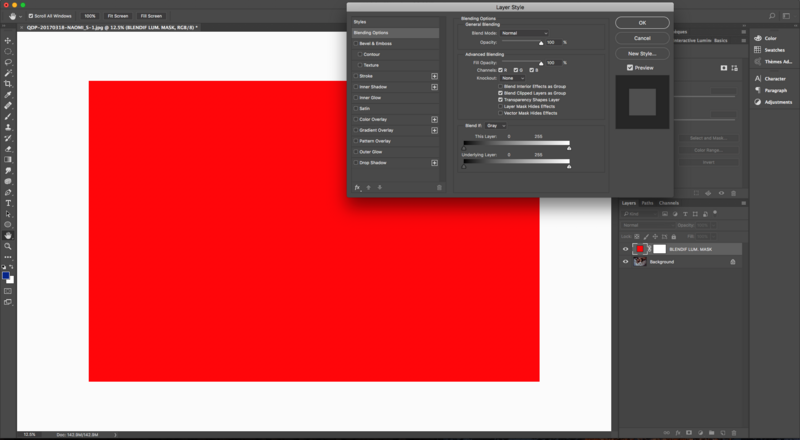
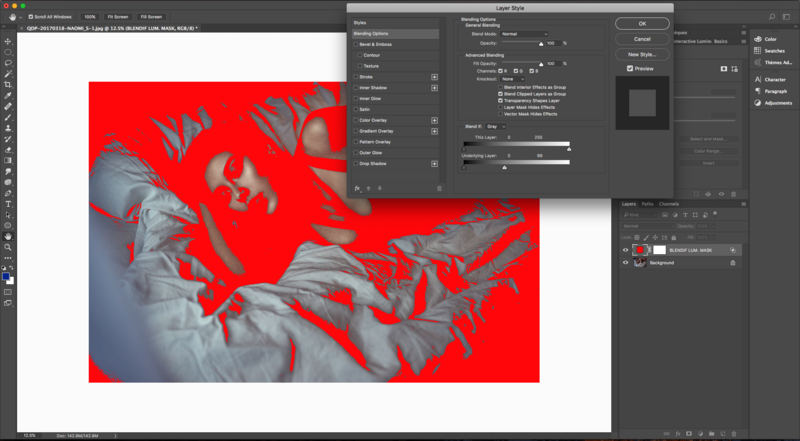
As you can see, it applies our adjustment layer only in areas that are no brighter than the value we chose. We could do the same with the dark slider to remove the adjustment from the blacks and keep it only in the mid-tones.
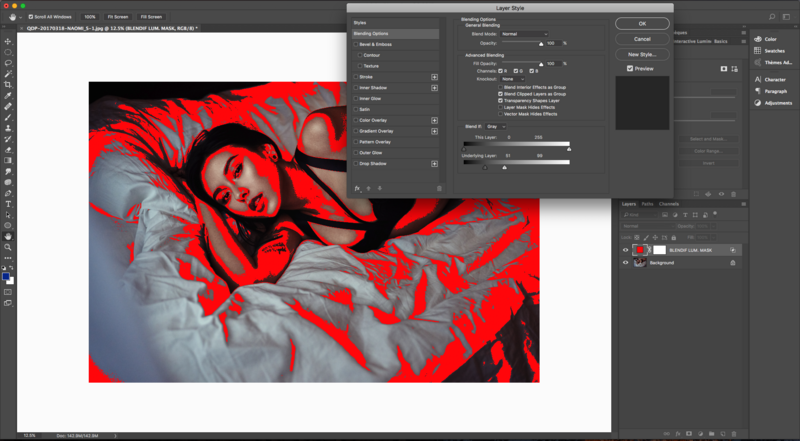
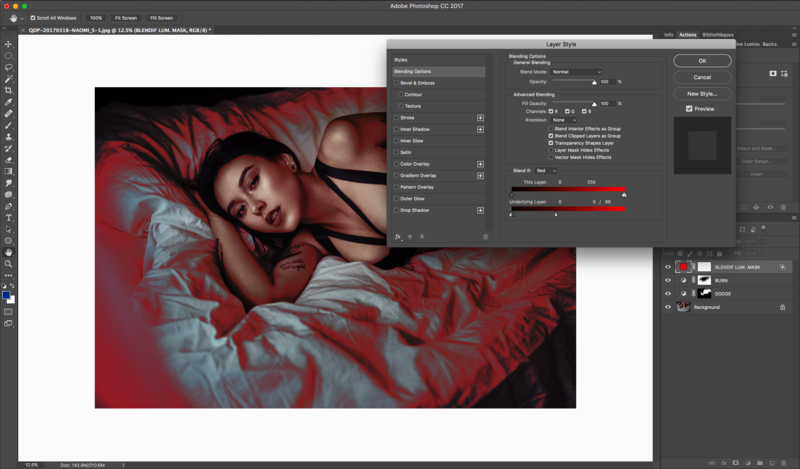
The only issue we currently have is that the transition between where the layer is visible or not is extremely harsh. So you may be wondering why I said it was the most natural way to create a luminosity mask… well, because we have four sliders and not just the two we used! By pressing Alt on our keyboard and dragging the same sliders as before, they will split up and allow us to set a transition zone.
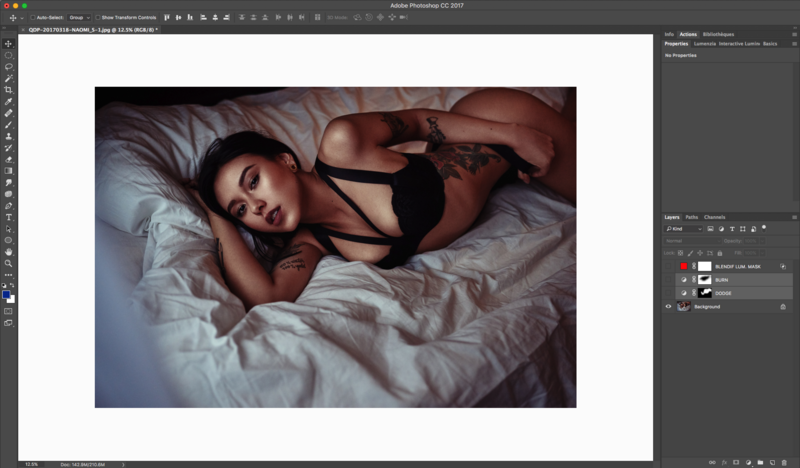
Obviously, our selection is large, but we can tweak it to our liking! The huge benefit of creating a luminosity mask this way is that if I were to modify any layer that was created between this adjustment layer and the background, the mask would automatically change. For example, let’s imagine that I want to add a stronger vignette to my image and brighten up her body. So I’d only add a dodge and a burn layer to my image and make it visible where needed, just like so:
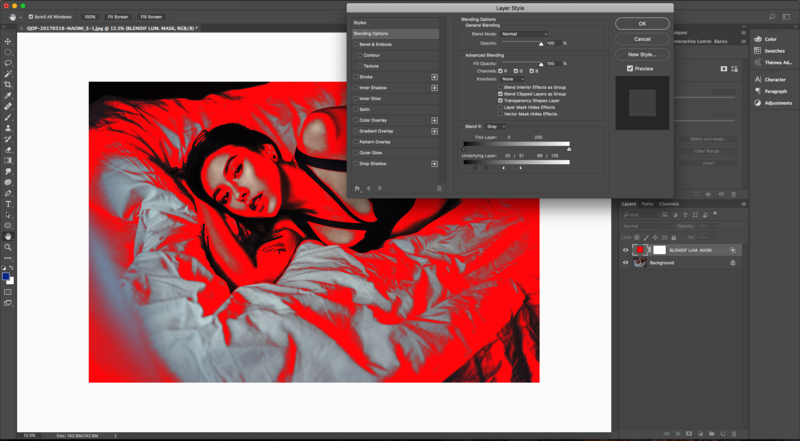
Now let’s have a look at how this affected our red color fill layer and its mask:
It has changed, but I didn’t modify anything on the said adjustment layer! While it many not sound like a big deal to many, it actually is extremely powerful! You can now start your retouching by doing any color correction and then come back to texture and luminosity adjustments, later on, essentially giving you a better idea of what the final image is going to look like before doing the tedious cleanup work.
Also important to be noted, the other blend if slider called "This layer" will let you do the same thing we’ve seen above, however, instead of comparing the values of the layers below to the ones entered with the sliders, it will compare the values of the current layer to the sliders. Even better yet, if you looked close enough before, you may have noticed a drop-down menu next to blend if. This is where the mask becomes even more powerful! You can choose to make it visible only where it’s saturated or not with a particular color. But an example will speak more than words.
In our image above, let’s say I don’t want to add any more red to my skin tone because they are red enough for me. So all I have to do is switch blend if to the red channel, and remove the layer from the part that is red on the layers below just like so:
In future articles, I’ll show you different ways to take advantage of these luminosity and color masks in your portrait, fashion, and beauty retouching. As you’ll see, we can use it for a lot more than just color! It can be incredibly powerful to correct hair texture, to use frequency separation and keep a more natural aspect, to avoid dodging and burning certain areas, and much more! Since I discovered luminosity masks a few years ago, my love for them has exponentially grown. They are extremely powerful and can prove to be such a time saver!
Are luminosity and color masks something you use on a regular basis? If yes, what do you use them for the most? Be sure to share your thoughts either in the comments below or if you need help using them, create a new discussion in the Fstoppers Groups and other members will help you out!

9 Comments
I've got another article demonstrating the same technique but using Lumenzia for a much faster and easier process. It should be online within the next few days. I just wanted to give the opportunity for those who don't want to invest in plugins to know about this :) Also, some people have to edit on multiple workstations and can't install plugins, so knowing how to do it manually is always a good idea. But other than that, totally agree with you! Luminosity masks plugins are a lot more practical.
I thought I saw another article here for a luminosity mask action using channels. It was a fairly useful action set and very handy for creating masks for toning. If I find it, I'll link it.
This ?
https://petapixel.com/2017/02/20/advanced-tutorial-color-grade-photos-u…
Yes!!! This one! Thank you! I was trying to find this, I had the action downloaded, just didnt know which forum site it was on :)
Quentin's articles are a MUST READ!!!!
Actually, a couple of months ago one guy posted a video on Youtube about reducing noise in night sky and Milky way photos using the luminosity masks creating them using the channels. I commented under the video saying that it is possible to select an area for noise removal using Blend if option and instantly was told to shut my face and do my own tutorial and do a commentary on it.... Now I am convinced that guy should definitely read more and stick his arrogant head out of his a-hole. Blend if FTW :)
Thank you Quentin!
Thank you! And true, Blend if FTW :) It's probably one of, if not the most underrated feature of Photoshop layers.