
Snowy region shooters rejoice, there exists a way to completely get rid of all blue snow in your photographs! I know what you’re thinking: just adjust the white balance in any ol' image processor. Unfortunately, you will find that using this method is only winning half the battle for many images. In a few easy steps, you’ll learn how to make any winter photo much more pleasing to the eye.
What’s wrong with adjusting the color temperature to achieve proper white balance? In the case of achieving white snow in your nature and landscape photos, you are faced with the dilemma of choosing either the snow in the daylight or in the shadows to make neutral. Choosing one option won’t fix the wonky color cast of the other. Also keep in mind that because the white balance setting on your camera doesn't affect the RAW file's image data, you'll need to color correct the image in post anyways.
As with most things done in Photoshop, there are a hundred ways to a solution for any one problem. The technique used in this article is what I find to be the quickest method, while still being non-destructive and achieving solid results with little to no localized tinkering.
STEP #1: Curves Color Adjustment
To start off, have your snowy image loaded into Photoshop. The first step we will take is going to fix the overall color cast in the image. To fix the prominent color cast, add a Curves adjustment layer to your document. Then in the Properties window, double-click the white eyedropper. A Color Picker window will open and your cursor will now be an eyedropper. While holding Command ⌘ for Mac or Control for PC, single-click on a point in the image where the snow is supposed to have a neutral white — that means don't choose an area of snow that is supposed to have a warm glow from the sun, or is reflecting color from a nearby object. Let go and do not move your mouse after you’ve clicked. Now, looking at the Color Picker window, we want the RGB values to all be set at the same number. See what number is highest between these three R, G, and B values and go with that number. To adjust these values without touching your mouse, simply use the Tab key and keep pressing it until the value box you need to change is highlighted. Once all three RGB values are identical, press Return (or Enter) on your keyboard. A dialog box will pop up asking, “Save the new target colors as defaults?” Just press Return (or Enter) again to submit “No.” Now, being careful not to move your mouse in any direction as you do this, single-click your left mouse button. You will see that the area of snow you chose is now completely neutral in color, and the entire image has adjusted its color balance.
Now that you’ve fixed the white balance, and perhaps learned a new way to do so, it’s time to fix the strong blue shadows still lingering in your image.
STEP #2: Hue/Saturation Color Adjustment
Up next is taming the blue shadows that remain, and it’s also just as simple. For this step, add a Hue/Saturation adjustment layer to the Photoshop document. In the Properties panel, change the dropdown box from "Master" to "Blues". Still looking at the Properties window, select the Eyedropper tool. With your cursor now displaying an eyedropper, left-click a point of blue snow in the shade. All this is doing is refining what specific hue color of “blue” the adjustment layer is targeting. Now, all that’s left to do is drag the Saturation slider to the left to taste. Why not set the value to -100 and call it a day? Well you could if that’s what you find most pleasing, but generally having a very slight blue tint in the shade does help convey the coldness that I’m sure was present at the time of the snap. For me, I try my best to find the balance between realism and taking into account the 2-D medium limitations of a photograph.
In the event you have other blue objects in the image, such as a blue coat or blue sky, the second step above with the Hue/Saturation adjustment layer may require some localized finesse. While the Hue/Saturation layer is selected, just add a layer mask and brush over the blue objects to bring them back to normal.
Neutrality Check
One thing I would like to mention as well (without going too far off-topic) is the issue of monitor calibration. A lot of times, wintery landscapes with lots of white snow in the photo are easily susceptible to looking wrong on uncalibrated displays. You can always check if your snow is truly neutral despite what your display shows by using the Eyedropper tool and the info palette in Photoshop. Pick a point in your image where the snow should be neutral, and the info palette should show the RGB values as the same number (or a just couple digits off from each other for sanity's sake).
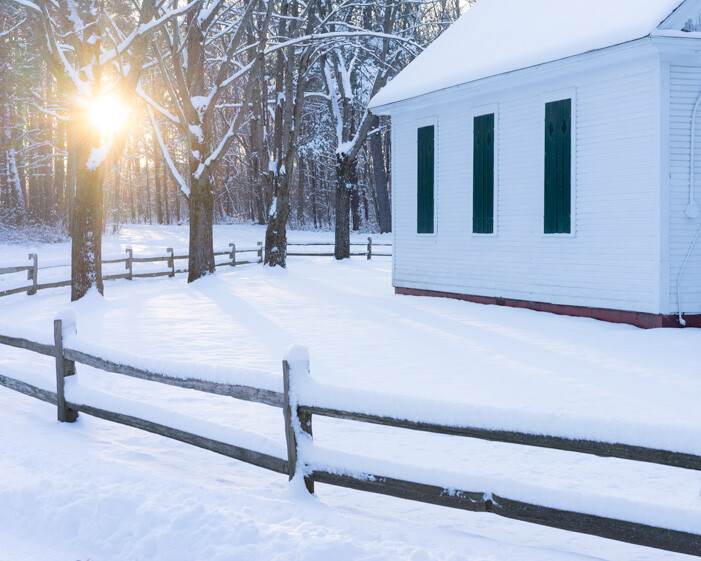
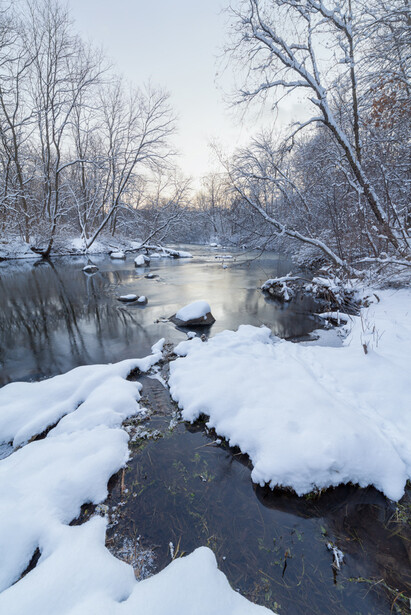
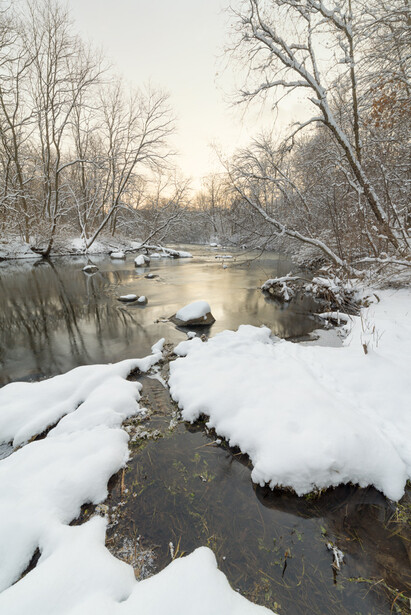
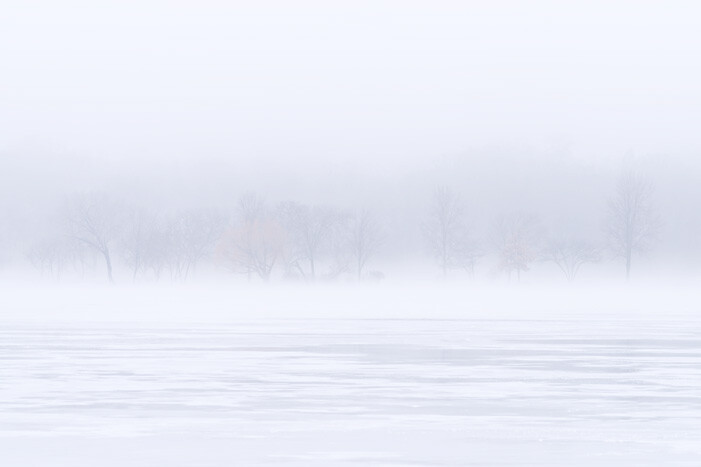
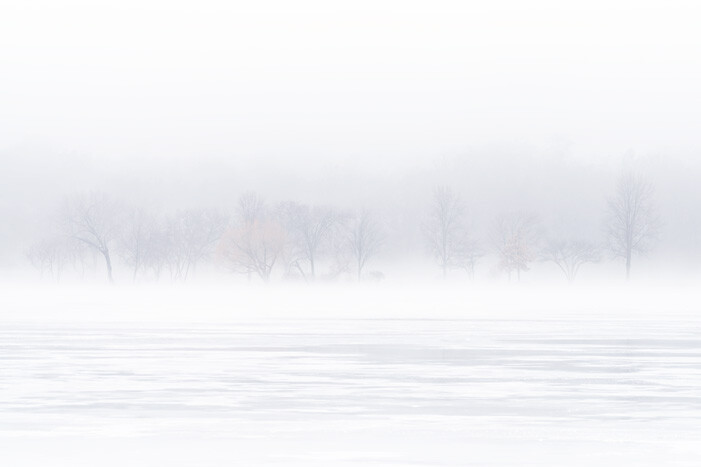
Take a look at some before-and-after examples using this technique below.

This is all there is to it. It’s almost crazy how many words it takes to explain the technique, because after you try it a couple times you will see that this really only takes less than a minute to do everything. Taking these two quick steps will neatly replace your usual white balancing and temperature control, and since these two layers are non-destructive and adjustable you can always reconfigure them later on to keep up with your artistic vision much like you would with a temperature slider.


Join the Fstoppers community for free
-
Post comments and join in the discussions
-
Browse the site ad-free
-
Share your work and get featured in the community
-
Compete in the photo contests for fun and prizes
15 Comments
I don't want to step on anybody's toes because I'm a newbie to DSLR photography and this white balance thang (thing intentionally misspelled). But I had two separate opportunities in South Carolina to take photographs in the snow.
I approached it as a person using daylight balanced film; I changed the white balance from auto to daylight. As I have shot snow with film, I set the exposure compensation to -2/3 or 1 stop. Yes, the shadows had a blue cast to them, but in open sun, the snow was white. I didn't tweak the blue shadow cast in Lightroom.
You can do it that way and that is a simple way of doing it if you were in shaded areas. but with shots that include the sky and sun, it would look unnatural to have it warmer than it already is.
Removing the blue cast will make the results look more natural and draws less attention to itself.
This is awesome! Very useful.
In Lightroom you decrease Blue saturation, and increase Blue luminance. Does exactly same as PS as described in this article. You remove purple, and magenta casts the same way.
One potential problem that can pop up when you do adjustments like this is that you can lose subtle detail, as is happening in the snow highlights in your examples. However there is a simple quick fix that will recover most, if not all, your detail. Simply change the adjustment layer transform from NORMAL to COLOR on both your curves and hue/sat adjustment layers. This will then only affect the chroma, but not affect the luminosity values. You should now see some, or all, of the subtle detail in the snow return. ;-)
Helpful tip!
Or, you know... white balance
I actually think that a slight blue tone to the snow fits the mood of the pictures.
Yup, totally acceptable. Feel free to play with that opacity slider for the curves adjustment and not nudging the saturation off so far in the Hue/Saturation adjustment. Without different tastes in artistic vision, the world would be a much more boring place.
I agree, especially for those old enough to remember the effect in film, both still and moving. I love that unaltered digital camera photos produce the same blue cast.
I might just have to try this with Ice Hockey.
I love that cool blue color, which you also get with film. In fact, the blue cast you typically see in low light/sun setting outdoor scenes is something I strive to capture. I think it's beautiful in photos and in films.
I was just struggling to color balance a wedding dress I shot this week and I remembered this post about blues shadows in snow.. It totally fucking works perfect!! Thanks dude.
Haha that's awesome. Glad it's getting some expanded use.
Do you know why after I tried your tutorial now my auto contrast doesn't work properly?