
Time-lapse photography has quickly become one of the most popular forms of creative expression in the past year. A ton of expensive gear and advanced methods exist to produce cinema quality videos like the opening sequence in "House of Cards," but this shouldn’t deter you from getting out and trying it on your own.
The simple truth is that all you need is a basic DSLR, a tripod, a cheap intervalometer, and Adobe’s Lightroom. Video at its core is simply a series of photographs taken very closely together and combined to appear as one long sequence. By understanding the speed of objects passing through your scene and the length of time-lapse needed, a simple calculation is all that’s left.
Locate a Dynamic Scene
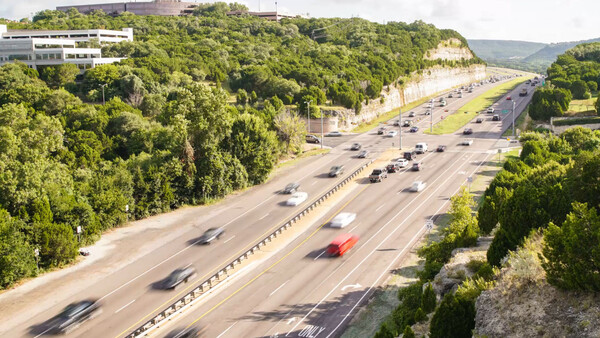
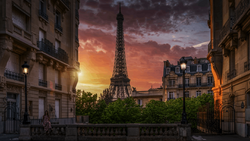
You will first need to find a composition that lends itself to a time-lapse. This can be anything from moving cars, people, or even clouds. The speed of the subjects within your frame will dictate how long you will need to wait for the time-lapse to complete. For example, to capture slow moving clouds you would need to stay put for much longer than you would need for moving cars, as they will not pass as quickly through your frame. Consider this in your decision as you may find yourself getting bored or simply not having enough time. Once you’ve got it, set your camera on a tripod and compose the shot.
Determine Your Exposure
To keep things simple when starting out shoot at times of the day when the variability of light is not changing much. This can be mid morning, mid afternoon, or even night. Creating a time-lapse that spans from afternoon to dark can create complications that are beyond the scope of a beginners level.
Next, determine your exposure. The exposure should remain static throughout your shoot and set using manual mode. Again, consider the speed of the subjects in your frame and how you want them to appear in your time-lapse. If capturing the movement of people, do you want them to appear sharp, or slightly blurred? Slowing down your shutter can create an ethereal look that is interesting if used correctly. Think about the shutter speed first then set aperture and ISO last.
Finally, turn off your cameras high ISO noise reduction and image preview functions if possible. Both of these settings create a lag after each shot is taken which slows down your camera and interferes with short, back to back intervals. Shoot in raw, lock your focus manually, and set a white balance that is appropriate for the scene instead of using auto.
Determine Your Interval
The interval is simply the time between each shot taken. In a scene with quickly changing movement, you will want to choose an interval that is shorter. For example, crowds of people crossing an intersection. The subjects in your scene will be moving quickly so taking your first shot and then another ten seconds later will appear choppy as all of their movement in between those ten seconds will not have been captured. Conversely, clouds moving slowly across the sky don’t need to be shot every 1/2 second as they will likely not have moved much since the previous shot. Here are some scene examples and intervals to consider as suggestions. Note, these are not hard fast rules. Only practice will help you become better at analyzing a scene and setting an interval.
- Moving people or cars = 1/8-1/2 second intervals
- Moving clouds or waves = 1-5 second intervals
- Star trails = 10+ second intervals
Calculate Your Video Length
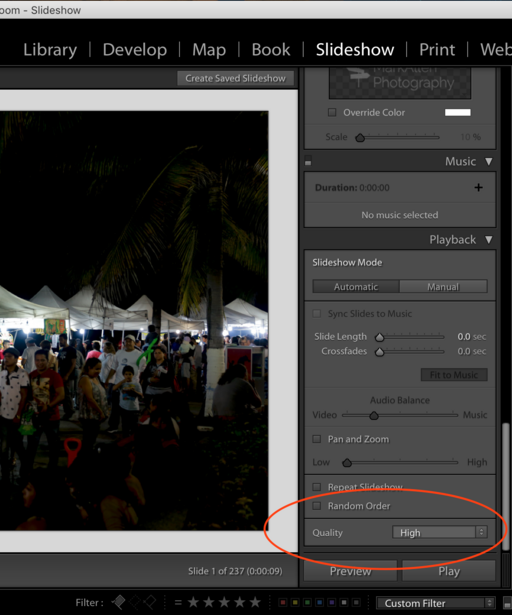
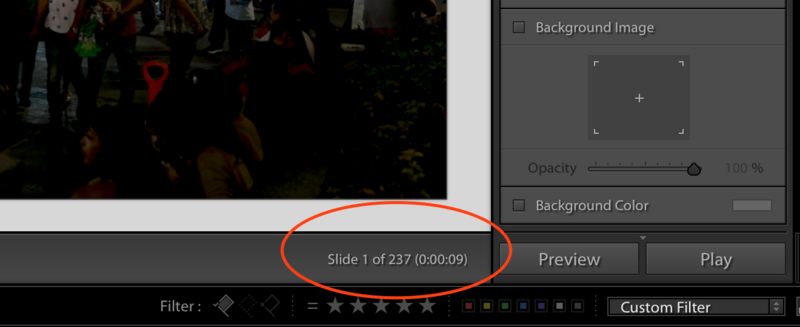
The math is simple. Say you need a 10 second time-lapse. Video in the US is typically viewed at 24 frames per second for cinema, or 30 frames per second for broadcast. This means 24 or 30 photographs appear consecutively within a one second span. Therefore, to make a 10 second video you will need to shoot 24fps multiplied by 10 seconds, which equates to 240 images total, or 300 using 30fps. It is always wise to shoot a few more than what is required just for good measure. Set your intervalometer accordingly.
Create the Time-Lapse in Lightroom
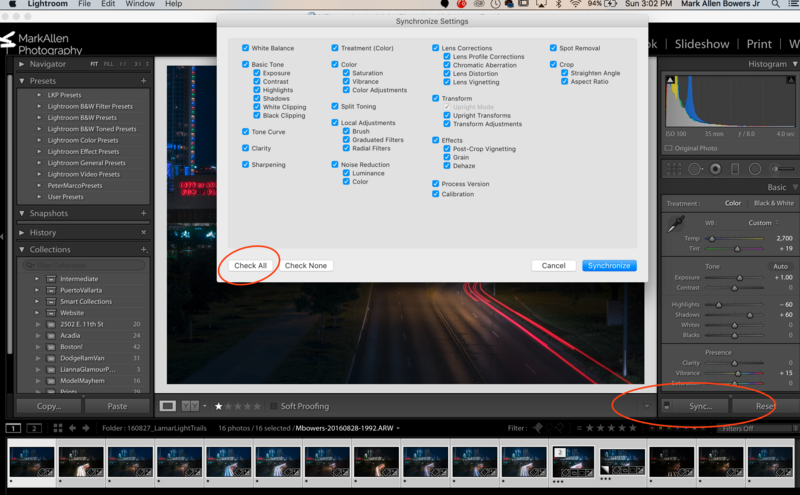
Now that your images are shot, import them into Lightroom and perform any necessary adjustments to exposure, contrast, or color. It is best to edit the first image in your sequence then apply those adjustments to the others by Shift + clicking the last image and using the Sync button in the develop module. If the adjustments are not applied the same to every photo, it will be apparent when played back.
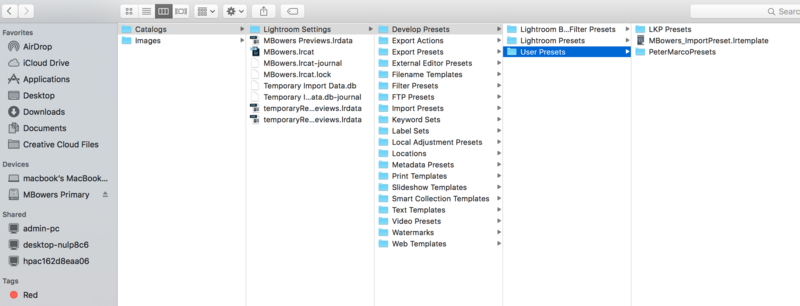
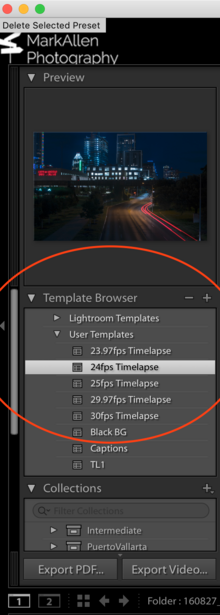
Proceed to the Slideshow tab. You will need to download and install a free preset that stitches together your sequence at 24fps or 30fps. Download the file and look for the folder titled slideshow presets. Copy this folder then proceed to the folder that contains your Lightroom catalog. From there go to Lightroom Settings, Develop Presets, and finally User Presets where you can drag and drop the downloaded folder. Restart Lightroom and the presets will appear under your Template Browser tab to the left.

Enjoy!
Once Lightroom finishes sit back and enjoy your work! Make note of what worked and what didn’t and keep practicing. It will no doubt be addicting. I’ve included some basic examples of work I’ve completed to give you inspiration. And as always, feedback is appreciated!


Join the Fstoppers community for free
-
Post comments and join in the discussions
-
Browse the site ad-free
-
Share your work and get featured in the community
-
Compete in the photo contests for fun and prizes
22 Comments
The preset URL is 404 - not found.
Yikes! Sorry about that Mike, I'll reload it here and let you know. Thanks ft notifying me, apologies
Mike-the link has been updated. Thanks for letting me know, it expired today for some reason?!
Same comment as Mike
Neal-thx for the heads up as well. I can't believe the website expired that link?! I found a new one and it has now been updated in my article. Please share if you find it useful!
Another amazing Time Lapse tool for lightroom is the LRTimelapse plugin by Gunther Wegner - https://lrtimelapse.com/
It's a tad more complicated....well...at first at least....but will allow for some incredible and wickedly smooth results!
David-this looks pretty sweet. I'v heard of it but never really investigated. Is it a stand alone program or a plugin for Lightroom?? Does it help with day to night transitions?
Great Intro Mark. Clear and well illustrated. LRTimelapse is great but it's a bit more complicated. It's not really a plug in but it requires LR to work. The whole point of LRT is to fix the flicker and allows to do holy grail sequence such as day to night and night to day transition. Basically you start LRT, select a number of keyframe image, edit them in LR and LRT will create corrective XMP files to ramp the exposure and any other settings in LR (WB, Shadows). It does a great job. Then you can export a video directly from LRT or export normally with LR.
It sounds like a great option for correcting flicker. How much is it?? I chose to suggest that beginners forgo day to night transitions because of this very problem. Any idea how much it costs? Alot of my articles are geares towards beginners simply because I like to help others who feel lost starting out do some basic cool things which in turn motivates them to do more. That's my hope anyway. Thanks for the kind words, please share if you find it useful!
There is a free trial version with a 400 images limitation which is already good. Then a $99 license and a $249 Pro with more options. I do a lot of time-lapse myself so it's really worth the investment.
I agree, it's definitely not for beginners because the shooting phase is also completely different for holy grail as it requires careful settings and some manual intervention during the sequence.
I've used it intensely for my timelapse and hyperlapse https://vimeo.com/172828815
Just watched your timelapse of Miami. Awesome! well done!
Thanks
I've used LRTL back when it was free beta - It was awesome :) I suppose now it's way better - haven't done any timelapses since ;/ I think Adobe could add a feature like "Match exposures" but for defined area - IMO it would work way better than current one...
Interesting article and I had forgotten that Lightroom has its own "video" export, so thank you for that tip!
With that said, I usually export my finished image sequences as full resolution stills instead of video if I want to be able to add some more motion to them.
I also use After Effects and Premiere to edit and/or stabilize the footage or hyperlapses, so I need a bit of leeway in terms of the post-work.
I agree, I also use AE and Pr but this article is aimed at beginners or occasional timelapsers. As you said it's good to have the opportunity to do everything in one software.
Another big tip that I'm not sure if LR can do but we do in premiere is to export the time lapse as 4K. This allows you to then stabilize the footage if you have any slight movement caused by ground movement, tripod vibrations or if you forgot to turn VR off, and you can also Keyframe slight movements into your video which makes it even more dynamic. Of course you would need a video editor to do stabilization and digital zoom effects but if you are shooting 20-36 mp stills, you can imagine how much flexibility you have with the final time lapses. Sometimes you can even get 2 "unique" timelapses out of one sequence just by playing with the composition and key frames.
Great point Patrick! For a little extra each month on my Adobe membership I was able to add Premiere Pro which opens a whole new level of possibilities when it comes to editing time lapse. Using the key frame functionality allows you to create some awesome movements on the "cheap".
I made a tool that can easily remove flickers from day to night and sunset sequence. Here is link to the tool and some demos! http://timelapsedeflicker.com/
Here is link to video that shot day to night sequence with shutter priority mode: https://www.youtube.com/watch?v=knzY3AYP47M
Jinsheng, this tool looks amazing. Is there anyway I can try a trial version first?
oh. so it is possible to push below the standard 1 second in the slideshow tab. But how? What does the preset change?
The featured video (on Vimeo) is showing "Sorry this video doesn't exist"