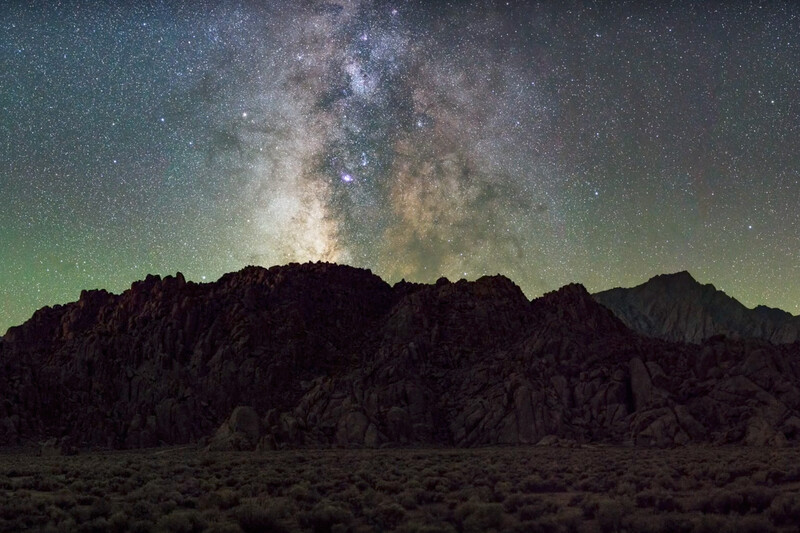
When shooting the Milky Way and nightscapes, there are several ways to get cleaner images with less perceivable noise and other techniques to increase dynamic range. Ian Norman from Lonely Speck has been putting out tutorials for shooting at night for a few years now, and his newest video goes into addressing ISO noise by mixing two different techniques to create a better resolving and cleaner final composition.
First off, the video does address using two previously discussed techniques from his tutorial series so if this is the first time you’ve heard about these techniques, take a look at “Milky Way Exposure Stacking With Manual Alignment (Noise Reduction) in Adobe Photoshop,” “Medium Format Astrophotography With Panorama Stitching,” and “Noise-Free Astrophotography With Starry Landscape Stacker.” Now that you’re caught up on stacking images to lower high ISO noise creating panoramic images to increase the resolution and reduce noise by trading some detail in the image you may have thought that you could add both techniques together and you would be absolutely correct. This is exactly what Norman explains and goes through in this new tutorial. Definitely watch the video embedded above, especially if you are not familiar with the combination of techniques together, and get inspired by some beautiful imagery from Norman.
Most of my imagery is panoramas and stacked images for nightscapes, so I’ll add some info to what Norman has gone over. These are things that may be issues for those beginning with this tutorial series and may have not done any panoramic imagery before.
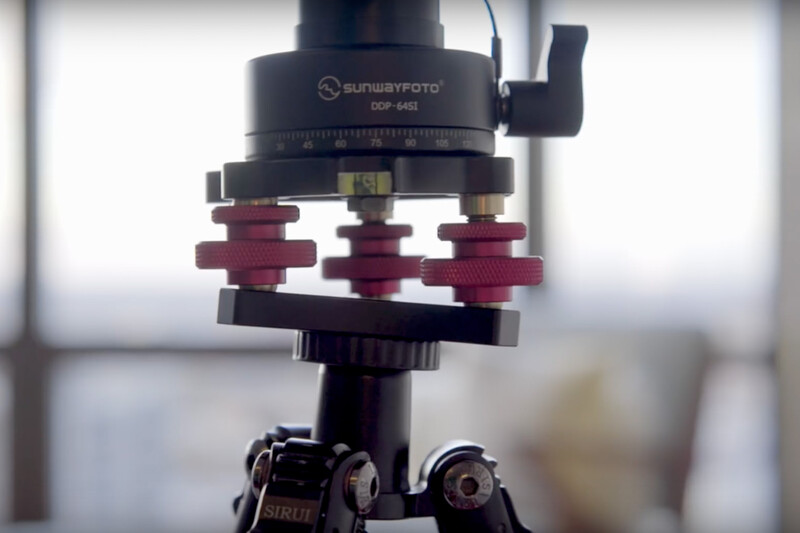
First, choose a nodal slide of 200mm, not 120mm. Removing parallax, which is the reason for the nodal slide, means having the rotation of axis at the nodal point which is near the front lens element. Be aware this point will be different for different focal lengths on a zoom lens. You need room on the nodal slide to move your camera to this point and for those of us using a DSLR, we need the extra space to adjust the camera because our camera and lenses tend to be larger. You can find the nodal point by placing two light stands approximately 10 feet apart with one directly in front and close to your camera. Place the second stand slightly off center from the first stand. You'll be able to tell if the space widens or becomes thinner easier this way. If there is no difference in spacing when sweeping your camera left to right, then you have found the no parallax or nodal point.
Our planet is spinning at 15 degrees per hour, and if you’ve ever taken some time under the stars you’ll notice they are moving pretty quickly so taking images quickly is a necessity. I have had issues with images in a stack taken together a total of more than 15 minutes from the first image to the last where Starry Landscape Stacker would not stack. Depending on the focal length, stacking software will have be able to align the images if there isn't too much time in between each image and from the first to last image in the stack. You can do these manually in Photoshop, as Norman explained, or you can use software to automate this process. Norman discusses a MacOS platform software, but if you are a Windows user you have your own software that’s free to use called Sequator. Sequator will allow you to do automate the median stacking and alignment of images just like Starry Landscape Stacker but for those using a Windows machine.
The reason we stack imagery is to reduce the noise in the image we are creating, but not many people know the rule behind stacking. It’s a simple square rule which reduces the noise by about one stop each time it's used. It does have a starting point of two images though so to explain: if you have an image at 3,200 ISO and stack it with one more image it will look like a comparable 1,600 ISO image for noise. If we square this we will have four images and will now be at a comparable 800 ISO image for noise. If we square one last time we will have 16 images and will have a 400 ISO image for noise. Doing more than 16 images isn’t worth while because if we square we need 256 images and will take longer than our about 15 minute time for stacking software anyhow. So If stacking imagery, going beyond 16 images makes little sense.
The tutorial doesn't discuss dynamic range but some people believe stacking can add dynamic range. This is incorrect; we cannot gain dynamic range in stacking so understanding how ISO impacts dynamic range and understanding how highlights, midtones, and shadows show in an image will help greatly. Before you end your photography session, make sure to take a dark frame which can be used as a noise reduction frame for long exposure pixel noise. Simply take one photo at the end of the session with the lens cap on. This will allow the stacking software to remove hot pixels in the images as median stacking will only remove luminance noise.
If you are looking at getting better night sky imagery, using stacking or creating panoramas will do very well for you and it’s easy to stack imagery. You don’t need a ton of new kit to be able to do simple panoramas and additionally stack them. Using either technique or both will be determined by your creativity, the size of the area you are shooting, or how much work you want to do in post.
If you are already stacking or creating panoramic night sky images, let’s see what you're creating. Let us know why you prefer one technique over another, or if you are using another technique like a star tracker why you prefer each one.


1 Comment
Thank you so much for adding information to an already great tutorial. Much appreciated.