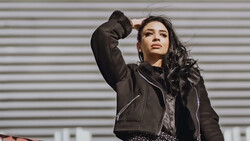
Photoshop is a powerful program full of hundreds of functions, many of which seem to behave very similarly, but definitely have distinct purposes that make them more or less appropriate than related tools depending on the situation. This video examines one of the most common cases, vibrance vs. saturation, and how you should use each in your editing.
Coming to you from Jesus Ramirez of the Photoshop Training Channel, this tutorial will show you the differences between and nuances of vibrance and saturation adjustments in Photoshop. Fundamentally, both work to increase and decrease the intensity of colors in an image, but whereas saturation simply increases the intensity of all colors simultaneously, vibrance increases the intensity of muted colors more so than already saturated colors while also working to protect skin tones and prevent posterization (which occurs when colors are so maxed out that transitions are destroyed, creating the blocky, banded look). You can think of vibrance as a sort of smart saturation on the global level. Of course, if you want to get even more precise with your color control, you'll want to dive into HSL and selective color adjustments and start masking things out, but for quick global adjustments, it's good to know the difference.


Join the Fstoppers community for free
-
Post comments and join in the discussions
-
Browse the site ad-free
-
Share your work and get featured in the community
-
Compete in the photo contests for fun and prizes
4 Comments
Excellent summary. I really appreciate the video; the recurrence of saturation and vibrance in different layers always confused me. It's particularly important to me to understand how best to protect skin tones when retouching portraits since I'm color blind. It was really the main reason I went with Canon, since they tend to nail the color science for skin tones right out of the camera. But occasionally I still need to do a bit of adjustment in post if my white balance is off.
I end up nudging my white balance a little most of the time (normally a little warmer), but I agree, the Canon skin tones are always great as soon as the WB is dialed in.
Vibrance in Lightroom is excellent for when images need just a little "pop" without looking cartoonish.
That's a great way to put it!